There’s a rule of thumb when it comes to FDM printing that overhangs are really only possible to an angle of around 45 degrees or so. If you try to squirt out plastic with nothing supporting it, it just goes everywhere. However, a new slicer hopes to enable printing up to 90-degree overhangs with some creative techniques.
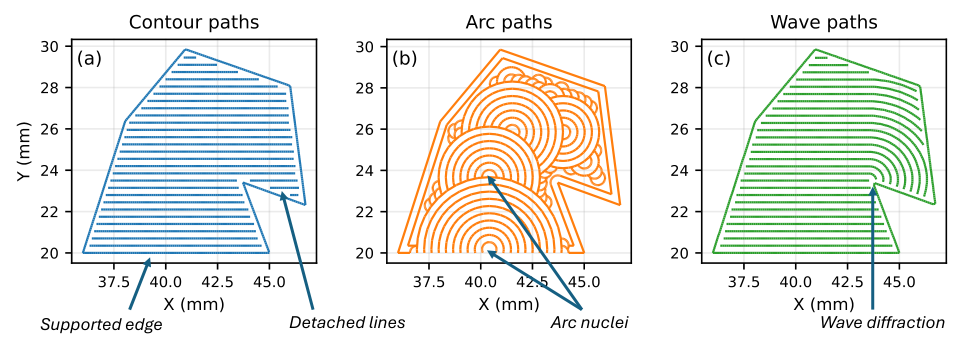
The software that enables this is called WaveOverhangs, and currently exists as a fork of OrcaSlicer. The idea is straightforward enough — using unique toolpathing to create rings of deposited material that fasten to those laid down before them in the same layer. Thus as the printer lays down a layer into bare space, the deposited plastic is, ideally, able to fix on to the supported edge. As the next ring is laid down, it grabs on to the cooled ring laid down before it, and so on. The idea is inspired by wave propagation, hence the name. You can see a demonstration of the software in the video below by [Cocoanix 3D Printing].
It’s still a very new technique. The slicer has a whole bunch of knobs to turn and two different algorithms. Get the settings just right and you can print horizontal overhangs successfully. There aren’t exactly presets yet, this is something to explore with trial and error. If you test it out, don’t forget to upload your results to the Community Gallery so the developers can see what works and what doesn’t.
We’ve explored how smart slicers can do amazing things before, too, particularly when it comes to things like bridging.
Continue reading “New Slicer Enables Horizontal Overhangs Without Support”