3D Printed Tyres Let You Drive On Water

[Jesus] apparently walked on water, without any tools at all. But when you’ve got a 3D printer handy, it makes sense to use it. [Simon] decided to use his to 3D print some tyres for his R/C car – with awesome results.

[Simon] started this project with a goal of driving on water. Initial experiments were promising – the first design of paddle tyres gave great traction in the sand and were capable of climbing some impressive slopes. However, once aimed at the water, the car quickly sank below the surface.

Returning to the drawing board armed with the advice of commenters, [Simon] made some changes. The paddle tyres were reprinted with larger paddles, and a more powerful R/C car selected as the test bed. On the second attempt, the car deftly skipped along the surface and was remarkably controllable as well! [Simon] has provided the files so you can make your own at home.

It’s a great example of a practical use for a 3D printer. Parts can readily be made for all manner of RC purposes, such as making your own servo adapters.

This 3D Cable Printer Remixes The Delta

When last we ran into [Daren Schwenke] he was showing off his 6-color delta printer that changes colors seamless mid-print. Right now he’s working on a printer that uses tensioned cables to precisely move a toolhead while maintaining enough solidity that [Daren] can tap on the toolhead without it budging at all.

It’s much more simple a rig than a gantry-style 3D printer, with a chassis shaped like a geodesic polyhedron consisting of fiberglass trusses (those driveway markers) secured by 3D-printed lugs, all controlled by a Beaglebone Green and four steppers. A key element of the build is the central steel rod, a 4′ repurposed garden stake which serves to stabilize the whole toolhead. In terms of  build diameter it can scale from around 200 mm to 600 mm. [Daren] aims to using Machinekit’s tripod kinematics for control and he also learned a bunch from RepRap’s Flying SkyDelta project.

For more 3D-printing goodness, be sure to check out [Daren]’s aforementioned 6-color delta.

Continue reading “This 3D Cable Printer Remixes The Delta”

This 3D Printer Enclosure Takes Ventilation Seriously

A lot of work has gone into hacking common items (like IKEA Lack tables) into useful and effective 3D printer enclosures, but [Stefan.Lu] has taken a harder look at the whole business. He decided to start with some specific goals that were unmet by current solutions. In particular, he wanted to allow for proper ventilation and exhaust. Not only do some filaments smell bad, but there is ongoing research around UFP (ultra-fine particles) emitted from the 3D printing process. Just in case UFPs turn out to be this generation’s asbestos or something equally terrible, [Stefan.Lu] felt that a bit more work and expense up front would be worth it to meet his goals of a ventilation-friendly enclosure.

In addition to ventilation and exhaust, [Stefan.Lu] wanted to locate the printer at a comfortable working height, and preferred not to build things entirely from scratch. He did it for well under $200 by using a common storage rack shelf as the foundation and acrylic panels for the sides, and a few thoughtful uses of basic hardware. The angled metal supports made for easy attachment points and customization, and a combination of solid shelf plus anchoring to the wall put an end to vibrations. The side panels are secured by magnets, and [Stefan.Lu] points out that if you don’t have access to a laser cutter, cast acrylic withstands drilling and cutting better than extruded acrylic.

The final touch was a fire alarm, which is an excellent precaution. 3D printers are heating elements with multiple moving parts and they often work unattended. It makes sense to have a fire alarm around, or at least not enclose the device in highly flammable material in the first place.

Refurbishing An Old P3Steel

In the aftermath of the London Unconference, after the usual beer drinking networking at the pub, I meet Javier Varela, one of our many readers that were present. It turns out my fellow Iberic friend is involved in some interesting hardware projects, one of them being the OVM20 Lite board. I was looking for an excuse to mess around with my old Prusa and this was the perfect one. The P3Steel 3D printer was just getting dusty on my basement and it printed just fine in the past. Until one day…

Based on Arduino Mega 2560 with the RAMPS 1.4, it was a pretty standard and cheap option to get some years ago (and still is). My additional modifications or upgrades from the standard options was a LCD screen and the DRV8825 stepper drivers.

What happened was that one fine day the prints started to skew. No matter how hard I tried, it skewed. I checked the driver’s potentiometer, I went back to the motor specifications, I swapped drivers around, and I even flashed another firmware. If the print was big enough, it will get messed up. Sometimes even small prints failed. When you are debugging something like this for hours, there comes a point in time that you start to suspect everything. Was it overheating the drivers? If so, why did this never happened before? Maybe the power supply is fluctuating and coming to the end of its life? Some messed up capacitor in the board? Was it RAMPS’ fault or Arduino? A motor starting to fail? A mechanical issue? I had a fine-tuned Marlin firmware that I manually tweaked and slightly changed, which I had no backup off after the flashing. In retrospect, I actually checked for a lot of things that couldn’t really be related to the problem back then but I also learned quite a lot.

Continue reading “Refurbishing An Old P3Steel”

3D Printing On The Subway; Or Anywhere Else!

3D-Printed wearable electronics are on the rise, however our own [Naomi Wu] flipped it around and made a wearable 3D printer which not only is portable but also manufactures on the move!

The project starts with a baby carrier that was locally purchased, and the extra fat was trimmed off leaving behind only the primary harness and square frame. This square frame is left intact to provide stability to the mounted printer as well as some level of comfort to the wearer. [Naomi] then drills a number of new holes in the delta printer in question, of which fortunately the top is made of plastic. Using swivel screws and long screws, the upper part connects with the harness. The receptacle clamp for the upper part is 3D-printed as well, and provides a modular rigid fixture for the machine.

The lower part also uses a 3D-printed triangular base that has a slot for the carrier frame which attaches with the bottom part of the delta using screws. The project is powered via two 3 Ah batteries that are kept in place behind the printer using custom clamps made with PLA. The whole project works on the move, as demonstrated by [Naomi] in the video below.

From dissecting the baby carrier to puncturing holes in a harness using a screwdriver heated by a blow torch, this project has a lot of DIY in it. For those looking for a more productive motorised wearable, check out Adding Haptic Feedback For The Disabled. Continue reading “3D Printing On The Subway; Or Anywhere Else!”

Automatic part remover for 3D printer

Automatically 3D Print Infinite Number Of Parts

We’ve seen 3D printers coming out with infinite build volumes, including some attempts at patenting that may or may not stall their development. One way around the controversy is to do it in a completely different way. [Aad van der Geest]’s solution may not give you the ability to print an infinitely long part, but it will allow you to print an infinite number of the same, or different, parts, at least until your spool runs out.

[Aad]’s solution is to have a blade automatically remove each part from the print bed before going on to the next. For that he put together a rail system that sits on the bed of his Ultimaker 2, but out of the way on the periphery. A servo at one end pulls a blade along the rails, sweeping over the bed and moving any parts on the bed to one end where they fall away. This is all done by a combination of special G-code and a circuit built around a PIC12F629.

One of many things that we think is pretty clever, as well as fun to watch, is that after the part is finished, the extruder moves to the top corner of the printer and presses a micro switch to tell the PIC12F629 to start the part removal process. You can see this in the first video below. The G-code takes over again after a configurable pause.

But [Aad]’s put in more features than just that. As the second video below shows, after the parts have been scraped from the build plate, a pin on the extruder is used to lift and drop the blade a few times to remove small parts that tend to stay on the blade. Also, the extruder is purged between prints by being moved over a small ridge a few times. This of course is also in that special G-code.

How do you produce the special G-code, since obviously it also has to include the parts to print? For that [Aad]’s written a Windows program called gcmerge. It reads a configuration file, which you edit, that contains: a list of files containing the G-code for your parts, how many to print, whether or not you want the extruder to be purged between prints, various extruder temperatures, cooling times, and so on. You can find all this, as well as source for the gcmerge program, packaged up on a hackaday.io page. Incidentally, you can find the PIC12F629 code there too.

Continue reading “Automatically 3D Print Infinite Number Of Parts”

XYZ Printing Unveils Inkjet-Based Filament Printer

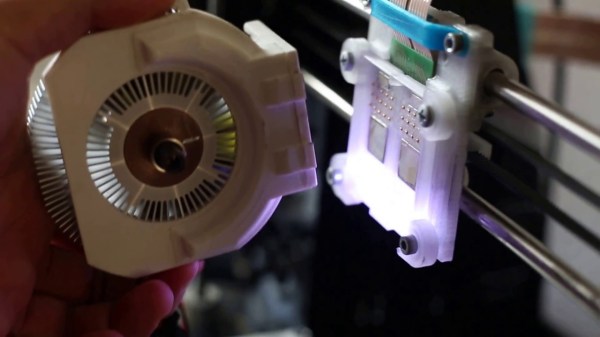
XYZ Printing, makers of the popular da Vinci line of 3D printers, have just released one of the holy grails of desktop 3D printing. The da Vinci Color is a full-color, filament based printer. How does this work? A special filament (Color PLA, although this filament is white in color) is extruded through a nozzle like any other 3D printer. Color is then added layer by layer by a system of inkjets in the head of the printer. Yes, it’s a full-color 3D printer, and yes, people have been suggesting this type of setup for years. This is the first time it’s been made real.

The specs for this printer are about what you would expect from any other filament-based printer in 2017. The build volume is 200 x 200 x 150mmm, the print bed has auto-leveling (although strangely doesn’t have a heated bed), and the user interface is a 5-inch color LCD. The da Vinci Color is available for preorder right now for $2,999.

You can check out a few pics of samples printed on the da Vinci Color below:

Continue reading “XYZ Printing Unveils Inkjet-Based Filament Printer”