Your run-of-the-mill desktop 3D printer is based on a technology known as Fused Deposition Modeling (FDM), where the machine squirts out layers of hot plastic that stick to each other. But that’s not the only way to print a Benchy. One of the more exotic alternative techniques uses a photosensitive resin that gets hardened layer by layer. The results are impressive, but historically the printers have been very expensive.
But it looks like that’s finally about to change. The [3D Printing Nerd] recently did a review of the Longer3D Orange 10 which costs about $230, less than many FDM printers. It isn’t alone, either. Monoprice has a $200 resin printer, assuming you can find it in stock.
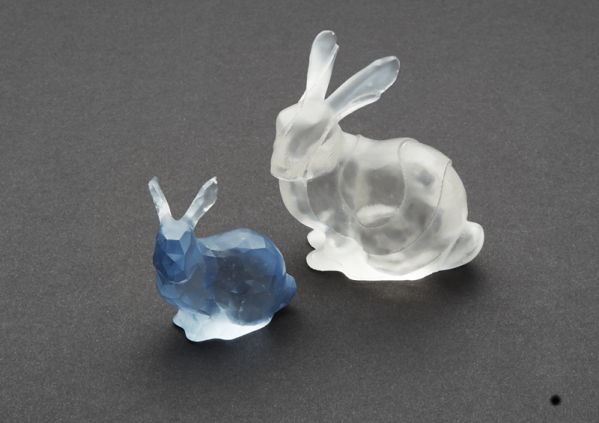
The resin isn’t cheap and it’s harder to handle than filament. Why is it harder to handle? For one is smells, but more importantly, you aren’t supposed to get it on your skin. The trade off is that the resulting printed parts look fantastic, with fine detail that isn’t readily possible with traditional 3D printing techniques.
Some resin printers use a laser to cure resin at particular coordinates. This printer uses an LCD to produce an image that creates each layer. Because the LCD exposes all the resin at one time, each layer takes a fixed amount of time no matter how big or detailed the layer is. Unfortunately, using these displays means the build area isn’t very large: the manufacturer says it’s 98 by 55 millimeters with a height of up to 140mm. The claimed resolution, though, is 10 microns on the Z-axis and 115 microns on the LCD surface.
Getting the prints out of the printer requires you to remove the uncured resin. In the video, they used a playing card and two alcohol baths. After you remove the uncured resin, you’ll want to do a final curing step. More expensive printers have dedicated curing stations but on this budget printer, you have to cure the parts separately. How? By leaving them out in the sun. Presumably, you could use any suitable UV light source.
There are a few other similar-priced options out there. Sparkmaker, Wanhao (resold by Monoprice). If you’re willing to spend more, Prusa has even thrown their orange hat into the ring. If you were wondering if you could use the LCD in your phone to do this, the answer is sort of.
Continue reading “Resin Printers Are Now Cheaper, Still Kind Of A Hassle” →