True Transparent Parts From A Desktop 3D Printer

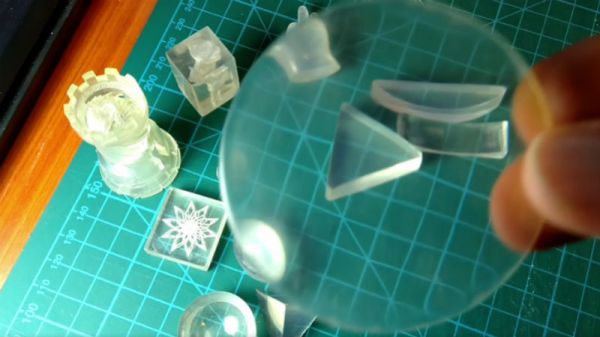
We’re no strangers to seeing translucent 3D printed parts: if you print in a clear filament with thin enough walls you can sorta see through the resulting parts. It’s not perfect, but if you’re trying to make a lamp shade or decorative object, it’s good enough. You certainly couldn’t print anything practical like viewing windows or lenses, leaving “clear” 3D printing as more of a novelty than a practical process.
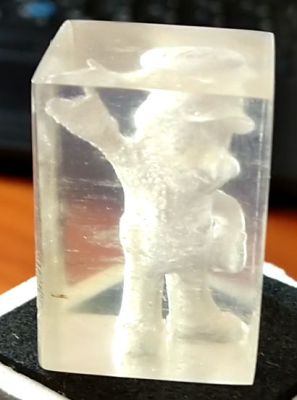
But after months of refining his process, [Tomer Glick] has finally put together his guide for creating transparent prints on a standard desktop FDM machine. It doesn’t even require any special filament, he says it will work on PLA, ABS, or PETG, though for the purposes of this demonstration he’s using the new Prusament ABS. The process requires some specific print settings and some post processing, but the results he’s achieved are well worth jumping though a few hoops.

According to [Tomer] the secret is in the print settings. Essentially, you want the printer to push the layers together far closer than normal, in combination with using a high hotend temperature and 100% infill. The end result (hopefully) is the plastic being laid down by the printer is completely fused with the preceding one, making a print that is more of a literal solid object than we’re used to seeing with FDM printing. In fact, you could argue these settings generate internal structures that are nearly the polar opposite of what you’d see on a normal print.

The downside with these unusual print settings is that the outside of the print is exceptionally rough and ugly (as you might expect when forcing as much plastic together as possible). To expose the clear internals, you’ll need to knock the outsides down with some fairly intense sanding. [Tomer] says he starts with 600 and works his way up to 4000, and even mentions that when you get up to the real high grits you might as well use a piece of cardboard to sand the print because that’s about how rough the sandpaper would be anyway.

[Tomer] goes on to demonstrate a printed laser lens, and even shows how you can recreate the effect of laser-engraved acrylic by intentionally putting voids inside the print in whatever shape you like. It’s a really awesome effect and honestly something we would never have believed came off a standard desktop 3D printer.

In the past we’ve seen specialized filament deliver some fairly translucent parts, but those results still weren’t as good as what [Tomer] is getting with standard filament. We’re very interested in seeing more of this process, and are excited to see what kind of applications hackers can come up with.

Continue reading “True Transparent Parts From A Desktop 3D Printer”

Better Mechanical Keyboards Through 3D Printing

You’re not cool unless you have a mechanical keyboard. No, you won’t be able to tell if your coworkers don’t like it, because you won’t be able to hear their complaining over the sound of your clack-clack-clacking. You can even go all-in with switch modifications, o-rings, and new springs, or you could use your 3D printer to modify the touch of your wonderful Cherry MX switches. That’s what a few researchers did, and the results are promising.

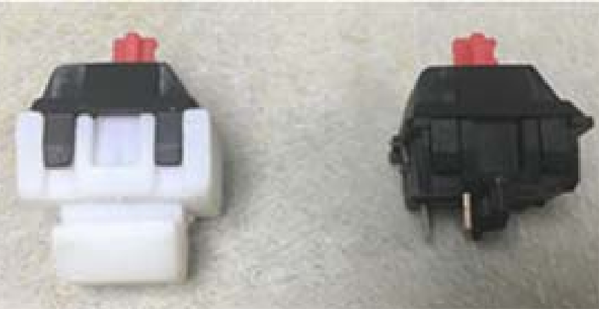
The ‘problem’ this research is attempting to solve is bottoming out on Cherry MX keyswitches. If you’re bottoming out, you’re doing it wrong, but nevertheless, you can get a publication out of solving repetitive strain injury. This was done by modeling the bottom housing of a Cherry MX switch by printing most of it in nylon on a Stratasys Objet 350 polyjet printer, with a tiny bit of of the housing printed with a polymer with a hardness of Shore 40. No, Shore A, Shore B, or Shore 00 was not specified, but hey, it’s just a conference paper.

The experimental test for this keyswitch was dropping a 150 gram weight from 125 mm onto the keyswitch, with a force sensitive resistor underneath the switch, connected to an Arduino. Data was logged, filtered, and fitted in Excel to create a plot of the force on dampened, rigid, and commercial switch housings. Results from ANOVA were p > 0.05 (p=0.12).

Despite the lack of significant results, there is something here. The Objet is one of the few printers that can do multimaterial printing with the resolution needed to replicate an injection molded part. There is a trend to the data, and printing squishy parts into a keyswitch should improve typing feel. There will be more work on this, but in the meantime we’re hopeful some other experimenters will pick up this train of research.

Etch-a-Sketch 3D Printed With Cell Phone

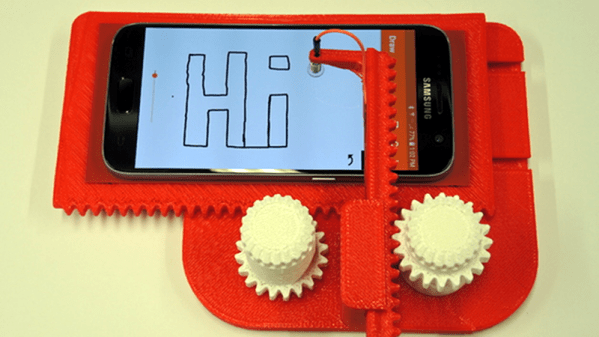
Most of us have fond memories of the Etch-a-Sketch from childhood. [Potent Printables] wanted to update the designs so he 3D printed an XY carriage for a stylus that works with a cell phone drawing program. You can see the video below and the 3D model details on Thingiverse.

The design is fun all by itself, but it also gave us a few ideas. For one thing, if you motorized it you could make some pretty clever drawing toys. But there could be a more practical use, too.

Continue reading “Etch-a-Sketch 3D Printed With Cell Phone”

3D Printed Brushed Motor Is Easy To Visualize

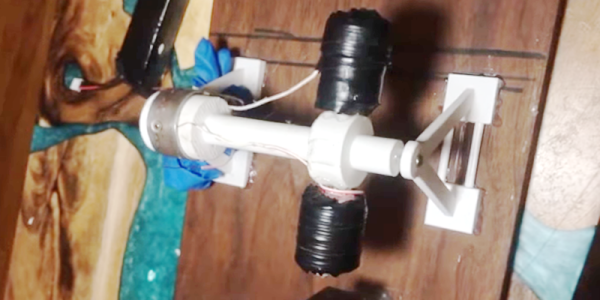
A motor — or a generator — requires some normal magnets and some electromagnets. The usual arrangement is to have a brushed commutator that both powers the electromagnets and switches their polarity as the motor spins. Permanent magnets don’t rotate and attract or repel the electromagnets as they swing by. That can be a little hard to visualize, but if you 3D Print [Miller’s Planet’s] working model — or just watch the video below — you can see how it all works.

We imagine the hardest part of this is winding the large electromagnets. Getting the axle — a nail — centered is hard too, but from the video, it looks like it isn’t that critical. There was a problem with the link to the 3D model files, but it looks like this one works.

Continue reading “3D Printed Brushed Motor Is Easy To Visualize”

Germinate Seeds With The Help Of 3D Printing

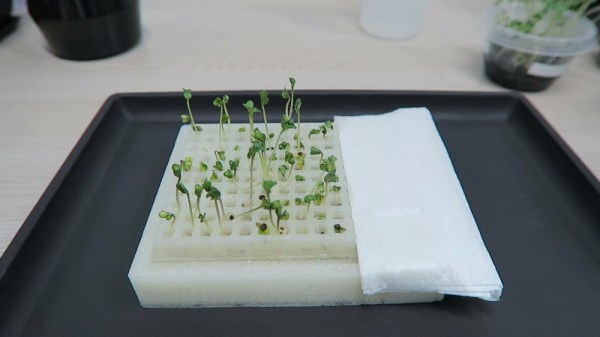
Microgreens, also known as vegetable confetti, are all the rage in fancy restaurants around the globe. Raised from a variety of different vegetable seeds, they’re harvested just past the sprout period, but before they would qualify as baby greens – usually 10-14 days after planting. There’s a variety of ways to grow microgreens, and [Mr Ben] has developed a 3D printed rig to help.

The rig consists of two parts – a seed tray and a water tray underneath. The seed tray consists of a grid to house the broccoli seeds to be grown, with small holes in each grid pocket to allow drainage. They’re sized just under the minimum seed size to avoid the seeds falling through, and also provide a path for root growth. Beneath the seed tray, the water tray provides the required hydration for plant growth, and helps train the roots downward.

[Mr Ben] notes there are some possible improvements to the design. He suggests PETG would be the ideal filament to use for the prints, as it is foodsafe unlike PLA and ABS. Additionally, precautions could be taken to better seal the water tray to avoid it becoming a breeding ground for insects.

Overall, it’s a tidy project that makes growing these otherwise delicate and expensive greens much neater and tidier. There’s also plenty of scope out there to automate plant care, too. Video after the break.

Continue reading “Germinate Seeds With The Help Of 3D Printing”

3D Printed V8 Engine Uses Solenoids

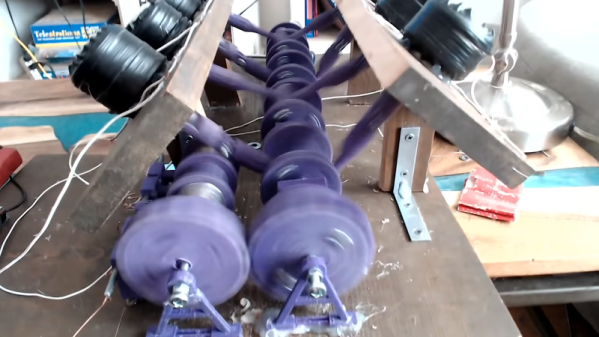
Normally when you think of a V8 engine you think of pistons driven by exploding fuel, pushing a crankshaft. [Miller’s Planet’s] version doesn’t use pistons, instead it uses solenoids along with a 3D printed crankshaft. The finished product would make a great science project or classroom demonstration of how a crankshaft converts a reciprocal linear motion into a rotary motion.

There are a lot of 3D printed parts and the links are in the post. A lot of the video (see below) is filmed in the wordless-workshop style with just a few text overlays to explain what is happening. But towards the middle, you’ll hear an explanation of how a solenoid produces force. The real payoff though is at the end, when you get to watch the contraption in motion.

Continue reading “3D Printed V8 Engine Uses Solenoids”

3D Printering: Blender Tips For Printable Objects

3D models drawn in Blender work great in a computer animated virtual world but don’t always when brought into a slicer for 3D printing. Slicers require something which makes sense in the real world. And the real world is far less forgiving, as I’ve found out with my own projects which use 3D printed parts.

Our [Brian Benchoff] already talked about making parts in Blender with his two-part series (here and here) so consider this the next step. These are the techniques I’ve come up with for preparing parts for 3D printing before handing them off to a slicer program. Note that the same may apply to other mesh-type modeling programs too, but as Blender is the only one I’ve used, please share your experiences with other programs in the comments below.

I’ll be using the latest version of Blender at this time, version 2.79b. My printer is the Crealty CR-10 and my slicer is Cura 3.1.0. Some of these steps may vary depending on your slicer or if you’re using a printing service. For example, Shapeways has instructions for people creating STLs from Blender for uploading to them.

Continue reading “3D Printering: Blender Tips For Printable Objects”