Making Asteroids Miniature

Asteroids

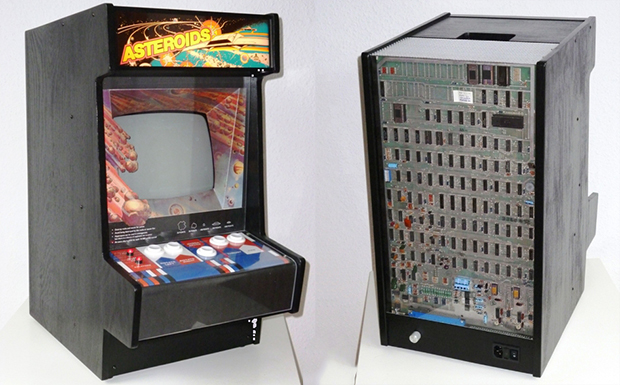
Mini arcade cabinet builds are fairly common, but we’ve never seen anything like [Jurgen]’s mini vector Asteroids cabinet that takes an original Asteroids circuit board and a true vector monitor and shrinks it down to table top size.

Unlike the raster monitors of a later generation’s arcade games, the original Asteroids cabinet used a vector monitor just like one would find in an oscilloscope. [Jurgen] found the perfect CRT in, of all places, a broken Vectrex console. The video circuitry in the Vectrex was rather primitive and the beam deflection was far too slow for the video signals generated by the Asteroids PCB. To get around this, [Jurgen] added a custom XY driver board. While the Asteroids game – and other vector Atari games – were designed for a screen with 1 MHz of bandwidth, [Jurgen] found that 300 kHz was ‘good enough’ to display proper Asteroids graphics.

While the cabinet isn’t a miniaturized version of any proper cabinet, [Jurgen] did manage to build a rather nice looking case for his luggable version of Asteroids. The exposed PCB on the back is a great touch, and an awesome project for any ancient video game aficionado.

75 Controllers, One Gaming System

Multi Video Games System

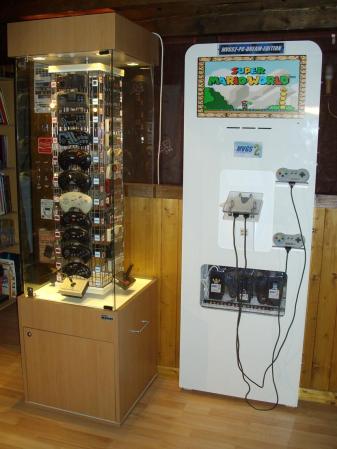
This gaming cabinet lets two players select games from a wide array of consoles and play them using the original controllers. [Patrice] built it around his Multi Video Games System 2, which converts each of the 75 controllers to a common format. Players pick controllers from the display case, plug in an  HD-15 connector, and choose the game they want to play. The cabinet contains a PC that runs a variety of emulators, and uses HyperSpin as a menu system.

Using adapters, the converted controllers can also be used on other game systems, tablets, or smartphones. [Patrice] claims that they’ll work across 110 different game systems. A full list of the controllers and systems is shown here.

This cabinet is definitely one of the most comprehensive video game installations we’ve seen, and the display case of controllers looks fantastic. Check out a video of the system and some controller porn after the break.

Continue reading “75 Controllers, One Gaming System”

An Arcade Controller For The Original PlayStation

I love it when you hit those switches

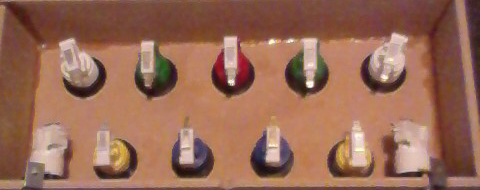
[Kevin] just finished a project for someone who lives in his apartment complex. This resident loves the game Pop ‘n Music – a Guitar Hero sort of game for the original Playstation and PS2 that uses nine colored buttons instead of five buttons along a fingerboard. His original idea was to wire up a few arcade buttons to a Playstation controller but this plan fell through, forcing [Kevin] to figure out the PSX bus all by his lonesome.

The initial code began with simply bit-banging the PSX controller interface with an AVR. This had a few problems, namely speed, forcing [Kevin] to move onto assembly programming to squeeze every last bit of performance out of a microcontroller.

The assembly route failed as well, dropping some transactions  Looking at the problem again, [Kevin] realized the PSX controller bus looked a little like an SPI bus. There were a few changes required – reversing the order of the bits, and using the MISO line to drive a transistor – but this method worked almost perfectly on the first try.

Now, [Kevin]’s building mate has a custom Playstation controller for his favorite game. Of course all the code is up on github for all your PSX controller emulation needs, but be sure to check out this completely unrelated Pop ‘N Music video from someone who desperately needs a piano.

Making Vector Arcade Games With An FPGA

3d

While we’re sure most Hackaday readers were raised by arcade games featuring sprites, pixels, and other shiny brightly colored squares, this was not always so. Many classic arcade games – Lunar Lander, Gravitar, and Asteroids in particular – used vector displays. Instead of drawing individual pixels, these games functioned more like an oscilloscope, drawing lines. When [Todd] and [Andrew] got their hands on a monitor from an old Asteroids cabinet, they knew what they had to do: build their own vector arcade game.

The guys made their own DAC and Amplifier board that plugs right in to a Nexys2 FPGA dev board. This was after they tested out some 3D drawing code with a gnarly handmade R2R DAC they used to draw and rotate a cube on an oscilloscope screen.

Not only did the guys build a vector video card, they also connected the FPGA’s VGA out to a monochrome monitor for an in-game HUD. Awesome work that blows away anything available in the golden days of vector arcade games. It’s a beautiful piece of engineering that certainly deserves its own cabinet.

Video of the game available below.

Continue reading “Making Vector Arcade Games With An FPGA”

The Tiniest Arcade Cabinets You’ve Ever Seen

After perusing Amazon one day, [Dave] found a very interesting piece of kit: a small, 1.5″ digital picture frame. They’re not very complex, just an LCD, a few buttons to cycle the picture, and a battery to keep everything portable. He decided the best use of this tech would be a tiny arcade cabinet, featuring screen shots of the best games a darkly neon lit arcade of the late 80s had to offer.

After sourcing a few of these digital picture frames on eBay, [Dave] set to work disassembling the frames and designing a custom enclosure. He wanted a few specific features: controls in the right place, replaceable sides, and the glowing red eyes of a coin acceptor slot. [Dave] whipped a model up in OpenSCAD and sent the parts over to his printer.

The controls for the digital picture frame were connected to a quartet of tact switches on the control panel, and a red LED provides the glow from the coin acceptor. With a USB plug and the frame’s memory loaded up with screen shots, [Dave] has a fabulous desk toy.

All the relevant files are up on Thingiverse if you’d like to build your own.

NES Zapper Modified To Work With An Old Nintendo VS. Cabinet

nes-zapper-nintendo-vs

The company which [Eric Wright] works for recently bought a Nintendo VS. It had Ice Climber installed as one of the titles but they asked the vendor if it was possible to swap it out for the Duck Hunt ROM. They had the ROM but not a light gun that would work with the system. [Eric] suggested they buy it with Duck Hunt and hack an NES Zapper to work with the VS cabinet.

Let’s take a step back for a moment. The Nintendo VS was a coin-operated gaming cabinet you would find in an Arcade. Luckily there’s quite a bit of information about the original hardware on the web. Some research helped him discover that electronically the only difference between the arcade and home versions of the Zapper is that the sensor capture is inverted. This was fixed by replacing a transistor in the gun with a jumper wire. The next challenge was figuring out how to wire the gun up to the second controller port. And finally he patched the ROM to work with the incorrect PPU as the right chip was not easily sourced.

Continue reading “NES Zapper Modified To Work With An Old Nintendo VS. Cabinet”

One Game Controller Connects To Many Consoles

multi-controller-for-several-gaming-consoles2

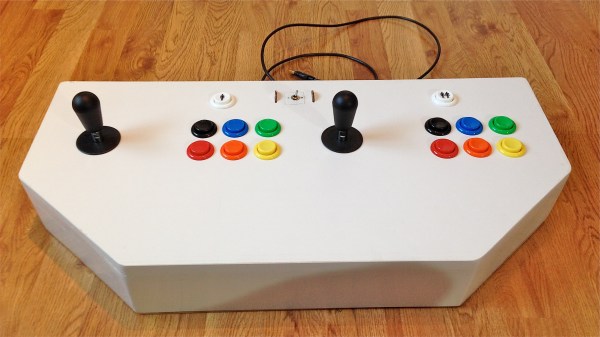
[Dave Nunez] wanted arcade quality controls when gaming at home. The problem was he couldn’t decide on just one console to target with his build, so he targeted them all. What you see above is a single controller that connects to many different gaming rigs.

He took a simple-is-best approach, keeping the main goal of high-quality inputs at the forefront. To start, he built the face plate out of thick MDF to ensure it wouldn’t flex or bounce as he mashed the buttons. To keep the electronics as simple as possible he soldered connections to actual controller PCBs (well, reproductions of controllers), breaking each out to a separate DB9 connector on the back of the case. These connectors interface with one of the three adapter cables seen to the right. This lets the controller work with NES, SNES, and an Atari 2600 system.

To pull the enclosure together [Dave] designed the rounded corner pieces and cut them out with a CNC mill. These connect with flat MDF to make up the sides. To give it that professional look he filled the joints with Bondo and sanded them smooth before painting.