Half-tone CNC With Man-powered Z Axis

We think this is an intriguing take on half-tone art. It’s a CNC machine that uses an Arduino and two stepper motors to draw on a paper-covered drum. But you’re not just going to set it and forget it. To simplify the device, the Z-axis is not mechanized, but requires the dexterous opposing digit of a person to actuate.

The first prototype used a frame cut from plywood, but the developers moved to some attractive laser-cut Lexan for the final version. The rotating drum was inspired by observing the off-set printing process. It greatly simplifies the build when compared to a flat CNC bed. But including a Z-axis solution that could account for differently sized dots really opens a can of worms. Because of this, the choice was made not to automate that task, but to leave it up to the user. A clickable Sharpie does the marking. When the pen is in place, you click the plunger to hold the felt tip against the paper until a dot of the appropriate size has leeched onto the paper.

It’s not a bad solution to the problem. Especially if you don’t have the high-end milling equipment necessary to do this on a piece of plywood.

[Thanks Dron]

Spaduino Heats Up A Used Hot-tub

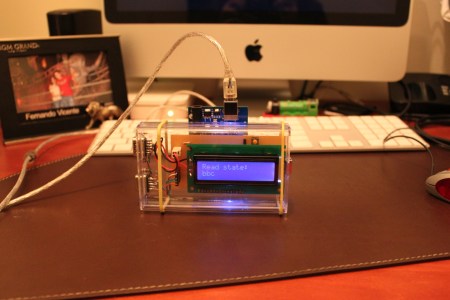
[Ryan] and the roomies decided that a hot tub was just what they needed to spice up the place. They hit Craig’s List and found one for the right price. After acquisition and setup they were pleased to find that the jets and pump worked great. But you’re not going to want to stick as much as your big toe into this ice-cold cryogenics experiment. Some poking around in the control system exposed the dead relays which are responsible for switching the heater. Instead of swapping the parts, [Ryan] began building a control system that will replace the twenty-year-old original.

The heating element still works, but it’s rated at 5.5 kW and here’s no way to automatically switch it on and off. [Ryan] found a 60 Amp solid state relay which can handle the load, and plays nicely with his Arduino. Initial tests got the tub up and running again. Obviously you want the tub to maintain temperature and so a thermistor was added to take readings from the heater core. There’s also a potentiometer to adjust the temperature, and an LCD screen to show the current settings. But [Ryan] hopes to add more features over time, like incorporating jet control, and adding wireless communications via an Xbee module.

ColorNode: A Drop-in GE Color Effects LED Controller

colornode-ge-color-effects-controller

[Paul] was looking to spice up his holiday decorations this year, so he picked up some GE Color Effects lights and started hacking away.

We’ve already seen how hacker-friendly these LED bulbs are, which is why [Paul] decided to give them a try. His ultimate goal was to synchronize several sets of lights from one location, which would unfortunately require that he run wires from his control board to each of the strings.

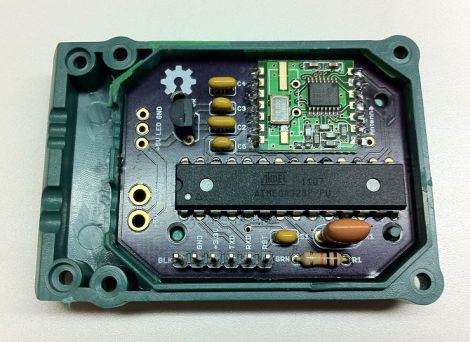
He then decided to go a different route, and build his own control board that would work as a drop-in replacement for GE’s controller circuitry. He wanted to retain the wireless control aspect of the lights, so he picked up some RFM12B wireless modules which happen to be well-supported by the folks at JeeLabs.

He modified their JeeNode board design to fit it in the Color Effects electronics enclosure, paring it back to the minimum components necessary to control his lights.

The hardware side of the ColorNode is complete, but the software is a work in progress. [Paul] says that once he gets things wrapped up, he will make the code available on his site.

RGB Upgrade For Ikea Single Color Fiber Optic Lamp

Five bucks will buy you a STRÅLA lamp from Ikea. It’s a battery operated hanging lamp that pipes the light out through multiple branches of fiber optic bundles. But you’ll only get white out of this, which is pretty boring. [Boris] decided to swap out the stock LED for an RGB unit and drive it with an Arduino.

The lamp nucleus is just a couple of pieces of plastic which can be popped apart to reveal the shard of PCB hosting one LED. The body of that diode is flat on the top, and [Boris] filed down his replacement to match the form factor. There are only two conductors in the wire that runs between that PCB and the battery pack, so he replaced them with four conductors (R,G,B, and GND). His prototype uses the Arduino’s PWM capabilities to control the colors, but [Boris] recommends transitioning to a simple chip like a PIC 12F675 or one of the smaller ATtiny microcontrollers after you’ve got the bugs worked out.

See how this turned out in the clip after the break.

Continue reading “RGB Upgrade For Ikea Single Color Fiber Optic Lamp”

Beginner Concepts: We’re Gonna Let You Finish, But First This Tutorial On Arduino Interrupts

OK, year-old pop culture references aside [Kyle] dropped us a line to show us his tutorial on using interrupts with your Arduino. Given the single core nature of your average Arduino’s AVR you pretty much have two choices for monitoring occasional un-timed inputs: Either check an input at an interval (which risks missing the signal entirely) or set up an interrupt to pause the chip’s normal operation. Obviously working with interrupts saves you tons of clock cycles since you are not polling a pin over and over. [Kyle] plans on a follow up tutorial to cover timer based interrupts, which can come in handy when generating frequencies and stuff.

Looking for more Arduino Basics? How about Basic on an Arduino. Check out our other beginner concepts posts as well if you need to work on your fundamentals.

Arduino-based MIDI Synth

[Charles Gershom] has been tinkering around with his keyboard and Arduino in order to build his own version of a MIDI controlled synthesizer. It looks like he’s gutted the enclosure of some commercially available MIDI hardware to use for the project. This works nicely since it gives him both the MIDI and audio jacks that he needs. The box also provides a nice control surface where a set of four LEDs indicates the synth mode currently in use. There are also four potentiometers mounted on the panel, but they’re not yet up and running.

Check out the video after the break to see what this can do so far. [Charles] shows the device synthesizing sounds coming in from the keyboard. It is also used to playback the audio from Super Mario Bros. which is fed in by a music notation program on a computer. Only one voice is playing when this happens which makes us think this can only handle one channel at a time right now (but we could be wrong).

Continue reading “Arduino-based MIDI Synth”

A Simple Method For Expanding Arduino IO Capacity

Although there are other ways to do this, [Rod] has decided to write up his method of using two Arduinos and the I2C protocol to expand an Arduino’s IO capacity. As seen in the picture above, you’ll sacrifice 2 analog pins, but if you happen to need IO and have an extra Arduino lying around, this could really help. [Rod] also notes that this method could be used with many Arduino’s in parallel if the situation called for it. The code for this simple hack is included as well, so be sure to check out his site if you want to try this idea.

Some other solutions for extra IO would be to buy an Arduino Mega with 54 digital IO pins or the Muxshield which gives you 48 IO (and is stackable for other shields). An advantage of using the two Arduinos, is that if they are needed to be split in the future for different projects, this could be done. It’s good to have options for your IO needs as every hack is different.

Check out the video after the break to see everything being hooked up.

Continue reading “A Simple Method For Expanding Arduino IO Capacity”