“Counting Box” Also Saves Calculators From Small Children

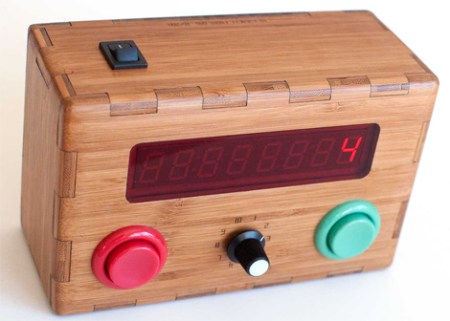
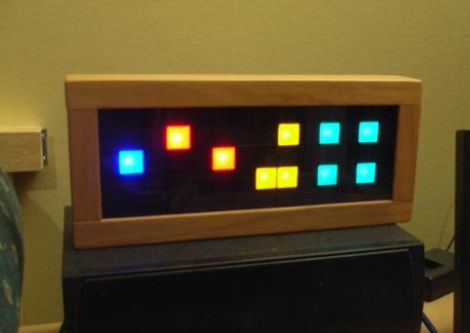
[Nathan]’s son really loves numbers and counting, and one of his favorite things to do is add 1 to a calculator over and over again. Being the awesome dad that he is, [Nathan] built his son a counting box that has a 10-digit rotary switch and two arcade buttons to add and subtract.

One goal of the project was to have the counting box retain memory of the display while being powered off. The easiest way to do this is to write the display data to the ATmega’s EEPROM. This EEPROM is only rated for 100,000 write cycles (although in practice it’s much higher), so [Nathan] included a 24LC256 in a little spasm of over-engineering. All the electronics are laid out on perf board, and the case is constructed from bamboo that was laser cut by Ponoko. The quality of the case itself is fairly remarkable – we’re really impressed with the finish and the magnetic battery access door.

From experience, we know that playing with an HP-15C eventually leads to a broken calculator and having our Nintendo taken away. We’re really happy for [Nathan]’s son, and wish we had our own counting box at his age.

Keeping Tabs On Your Tabby With A Camera And GPS

cat_eye_pictures_and_gps

[Janis] has an outdoor cat that likes to roam all over the neighborhood. He was curious to see what he was up to all day, so he decided to build a small cat cam to document the feline’s comings and goings. After the cat returned one evening with a snail riding along on his back, [Janis] thought it would be pretty interesting to see where the cat was going as well.

He calls his creation “CatEye”, and it consists of a small JPEG color camera and GPS sensor, both of which are managed by what looks to be an ATMega328. The camera snaps pictures as the cat roams around, while the GPS sensor records its location throughout its travels. All of the data is stored on an SD card, making it easy to transfer the pics and .KML files back to his computer. A few clicks later, he can see everywhere his cat has been, using Google Earth.

It seems like a pretty interesting project, and we would love to see some schematics and code so that we can strap one of these on [Caleb] our cat to see where he’s been all day.

Workshop Lights So Bright, They Will Give You Sunburn

workshop_led_lighting_control

There are few things more frustrating than trying to tinker at your workbench with suboptimal lighting. [Jeremy] was toiling away in his workshop one afternoon when he decided that he finally had enough, and set out to overhaul his lighting setup.

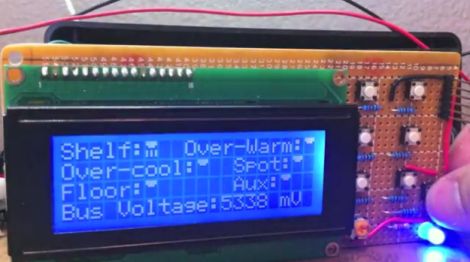
His workshop is incredibly bright now, sporting a handful of under the shelf CCFL tubes to complement the mixture of cool and warm LEDs that are mounted on the ceiling. One thing we really liked about his setup is that he added a handful of LEDs to the bottom of his workbench, aimed at the floor – perfect for those times when a tiny screw or SMD component goes missing.

Everything is controlled by an ATMega 328 that he shoved into a project box, allowing him to tweak the lighting to suit his needs using a few simple buttons and a small LCD panel.

[Jeremy] says that the entire thing is “overkill” and that it is decidedly the messiest wiring job he has ever done. For something that was put together hastily in an afternoon, we think it’s just fine. The only thing we’re left wanting is some schematics and source code.

As far as the overkill comment goes, say it with me: There. Can. Never. Be. Too. Many. LEDs!

Stick around to watch [Jeremy] give a demonstration of how the system operates.

[via Adafruit blog]

Continue reading “Workshop Lights So Bright, They Will Give You Sunburn”

Clocks Built From Old Aircraft Surplus Parts

aircraft_indicator_clocks

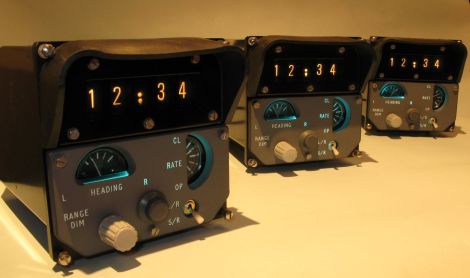
A few years ago, Tube Clock forum member[Sine1040] bought a set of four brand new aircraft indicator units that were built some time in the early 70’s. He had no idea what the units were actually used for, but he did know that he could repurpose them into some pretty slick looking clocks.

He disassembled all four boxes and between them, scrounged enough parts to build three clocks. After gutting the clocks and rearranging the digits, he built a timekeeping circuit using an ATMega8 which is clocked by a DS32 oscillator.

While the time is displayed using the large projection-style digit displays, the seconds are ticked off in the left-most analog meter. Minutes are also represented in the clock’s right-most analog window, swinging the needle from top to bottom as each one passes.

[Sine1040] paid special attention to keeping the boxes looking as stock as possible, with the only external modification being a power plug installed in place of an old grounding screw. The clock is definitely a different take on keeping time, and we think it looks great.

Continue reading to see a quick demo video of the clock in action.

[Thanks Brian]

Continue reading “Clocks Built From Old Aircraft Surplus Parts”

Getting More Information From Your Battery Charger

echo_6_battery_charger_serial_hacking

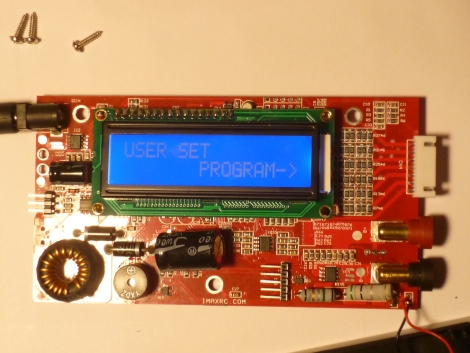
[Dane] bought a reasonably cheap ($17) Hobbyking Echo-6 battery charger and wanted to see what sort of information he could pull from the unit. Since the charger is designed for a variety of battery chemistries and sports an LCD screen, he figured that it contained a fairly decent microcontroller which he could tap into for some useful data.

He disassembled the unit and started looking around for any useful items. He discovered that it used an ATMega32 microcontroller and had quite a few unpopulated areas on the PCB, which led [Dane] to believe that the Echo-6 shared its main board with a more robust charger. He tapped into the ATMega’s UART and began seeing data immediately. Once he figured out what was coming over the serial line, he piped the data into LogView, resulting in some nice graphs showing off the charge/discharge processes in detail.

Tapping into the Echo-6 seems easy enough for any skill level, and we assume that just about anyone would benefit from getting kind of information out of their battery charger.

DIY Clock Replica Is Better Than The Real Thing

diy_tix_clock

After seeing the TIX clock for the first time, [Gweedo Steevens] really wanted one, but wasn’t interested in paying the seemingly high asking price over at ThinkGeek. He figured it wouldn’t be too incredibly hard to build his own, so he decided to give it a shot.

The clock relies on 27 LEDs to display the time, which were multiplexed to make the most of his ATMega16 microcontroller’s available IO pins. Once he was happy with how things functioned on breadboard, he migrated the LEDs to a piece of perf board, and etched his own PCB for the controller circuit.

He used an office overhead lighting grate to separate the LEDs, providing nice uniform light segments. He put a piece of clear perspex on the front to cover the LEDs, but later switched it out for a much darker piece, for better daylight viewing.

The finished product is fantastic, and in our opinion looks even better than the retail version – awesome job!

[via HackedGadgets]

GPS Lap Timer From Secondhand Parts

gps_racing_lap_timer

Hackaday forum member [nes] was training for an endurance race, and rather than having someone verbally call out his lap times, he wanted something he could keep in-vehicle to help keep track of his performance. With the race budget running dry, he and his teammates needed something cheap, if not free, to get the job done.

He scored a “broken” GPS receiver on eBay for a measly £4 and found that the receiver worked, but corrupted software prevented the unit from mapping routes. Since he didn’t require routing functions to keep track of his lap times, he splayed the GPS receiver open and started hunting around for a serial bit stream. He found what he was looking for after a bit of probing and hooked it up to his computer to see if the data contained NMEA sentences.

He cut the receiver down to the necessary parts and then started work on the lap timer itself. The timer uses an ATMega32 to run the show, displaying relevant time and location information on an LCD panel he scavenged from the trash bin.

He admits that the wiring is a bit questionable, but says that after about seven hours of rough use, everything is still intact and working great.