It’s possible that it was [Matt Meerian]’s awesome pun that won us over, not his ultrasonic bicycle dog defense system, but that would be silly. [Matt] wanted an elegant solution to a common problem when riding a bicycle, dogs. While, obscenities, ammonia, water, pepper spray, and others were suggested, they all had cons that just didn’t appeal to [Matt]. He liked the idea of using C02 powered high pressure sound waves to chase the dogs away with, but decided to choose a more electronic approach. He used a Atmel ATmega644 as the MCU, four 25kHz transmitters, and two 40kHz transmitters. When the rider sees a dog he simply flips a switch and it activates the transducers (along with, cleverly, a human audible horn so he doesn’t have to look down to know it’s working). So far [Matt] has not had a dog chase him in order to test it’s efficacy, but his cat clearly seems unaffected by the device as you can see after the break. Continue reading “Defense Against The Dog Arts”
Atmel115 Articles
Dell Streak Screen Repair Yields A Few Welcome Surprises

[Rupert’s] friend cracked the screen on his beloved Dell Streak 5 phone and handed it off to see if [Rupert] could repair it. He says that the glass replacement was a relatively straightforward affair – a process he documented in thorough detail worthy of iFixit.
He did come across a few interesting tidbits along the way, including an Atmel Mega168P hanging out on the broken screen’s digitizer board, which now resides in his parts bin. The most intriguing thing [Rupert] discovered however was that the phone’s on-board memory chip wasn’t soldered in as he would have expected. Instead, he found a standard microSD slot with a 2GB card in tow. He didn’t happen to have a larger card on hand, but after researching a bit he did find out that swapping the card is a relatively simple process.
If you happen to have one of these phones sitting around, or come across a damaged unit at any point, it definitely seems worth it to resurrect it and change the factory card out for something along the lines of a 32GB model. We certainly wouldn’t complain if we had a rooted 32GB Streak kicking around!
Half Keyboard, Half Guitar, Totally Radical, The Tabstrummer!
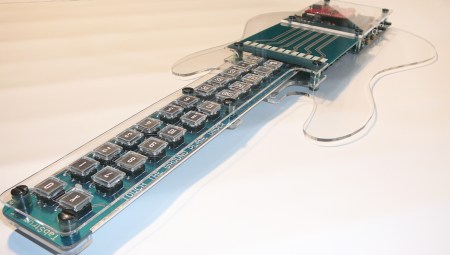
While tablature-based music probably annoys “properly” trained musicians to no end, it has given many musicians and musical-hobbyists their first introduction to the world of guitar. The [Tabstrummer] takes this to a whole new level, allowing chords to be programmed into this instrument and played back. Once pre-programmed chord is set, the “conductor-strings” are strummed to allow the chord to play.
This device is based around an Atmel microcontroller and features a MIDI output as well as an audio-out jack. Besides the interesting electrical hardware, the housing seems to be quite well-built featuring what appears to be an acrylic or polycarbonate body. Although not quite the same thing, possibly some influence was gained from the [Keytar]. It’s heyday may be past, but not forgotten.
Check out the video below for a Christmas-themed jam played on the [Tabstrummer] or check out their video page for several more songs. This “hack” is being considered as a commercial product, so the inventors would love to hear your feedback! Continue reading “Half Keyboard, Half Guitar, Totally Radical, The Tabstrummer!”
A Study In AVR Power Saving Techniques

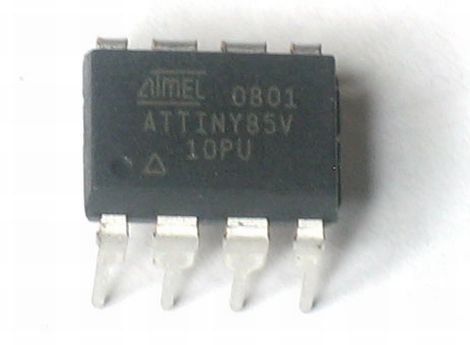
[Scott] found the iCufflinks from Adafruit Industries pretty interesting, but he thought that the stated run time of 24 hours was a bit short. He figured he could improve the product’s power consumption at least a little bit, to improve the overall battery life.
From their schematics, he placed an order for parts and built two identical iCufflink mock-ups side by side – one running their code and one running his. He took baseline current draw measurements, then got busy slimming down the cufflinks’ software. It had been 20 years since he touched assembly, and he has never written it for an AVR, but judging by his work he’s not rusty in the least.
He slowed the ATtiny’s clock down and tweaked a few other settings for a savings of 53μA, but the real improvements came via a fairly simple fix. The original code called for the processor to institute a counting loop to sleep, which he found to be very wasteful. Instead, he chose to put the processor in an idle state, using the chip’s watchdog timer to wake it when it was time to pulse the LED. The power savings from this change alone was a whopping 261μA!
When he was said and done, the changes save about 315μA of current draw, and should allow the cufflinks to run for up to 38 hours without swapping batteries. In [Scott’s] opinion, a nearly 60% improvement in battery life is pretty good for a day’s work, and we’re inclined to agree.
Regarding Atmel’s Xmega Chips

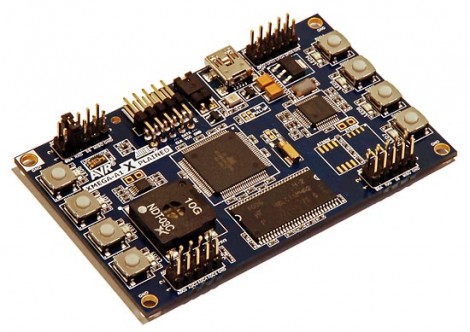
A few years back Atmel announced a new line of chips, the XMega series. We see the name bouncing around here and there, but when [Michael Kleinigger] mentioned that he’s seen very few project using these chips we realized that not only is he right, but we know next to nothing about them. Just give his XMega review post a whirl and you’ll be up to speed in no time.
He compares an XMega128A1 side-by-side with an ATmega1280. For those that abhor reading paragraphs full of words, there’s a table that can give you the quick facts like how the XMega costs less and runs faster. But we know from past discussions (like the one on PWM) that [Mike] knows his stuff so the whole thing’s worth a read. He’ll lead you through the programming tool chain (which hasn’t changed), a bit about the new event system, and then finish with a demo program on the Xplained development board.
$14 Swarm Robot, Kilobot, Is Extremely Cool
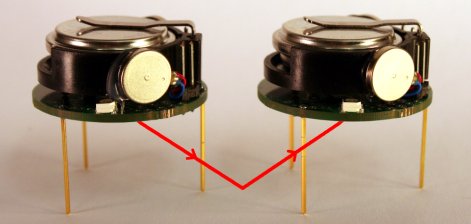
Reader, [Michael Rubenstein], sent in a project he’s been working on. Kilobot, as stated in the paper(pdf), overcomes the big problems with real world swarm robotics simulations; cost, experiment setup time, and maintenance. The robot can be communicated with wirelessly, charged in bulk, and mass programmed in under a minute. Typically, robots used for swarm research cost over a $100, so large scale experiments are left to software simulation. These, however, rarely include the real world physics, sensor error, and other modifying factors that only arise in a physical robot. Impressively enough, the kilobot comes in far under a hundred and still has many of the features of its costlier brothers. It can sense other robots, report its status, and has full differential steer (achieved, surprisingly, through bristle locomotion). There are a few cool videos of the robot in operation on the project site that are definitely worth a look.
Programming An ATtiny Using An Arduino

[Scott] is a big fan of the Arduino platform, and he’s not afraid to admit it. It does all the things he needs, but now and again he would like to use something a bit smaller, without all the bells and whistles the Arduino has to offer. He contemplated using an ATtiny for smaller projects, but after looking into what he would need to program the chip under Linux, he could never find the motivation to give it a go.
That all changed when he discovered the Arduino-Tiny project, which aims to bring a limited Arduino IDE to the ATtiny line of microcontrollers. He found the project to be quite useful, so he put together a brief tutorial that walks through everything you need to get started.
The tutorial is fairly straightforward, and even demonstrates how the Arduino can be used as an ISP for the ATtiny, removing the need to purchase a standalone programmer. Be sure to check it out if you are searching for an easy way to get started with ATtiny chips under Linux.


