Gas Gauge Upgrade Keeps VW Restoration Classy

Getting every detail perfectly right is often the goal in automotive restorations, and some people will go to amazing lengths to make sure the car looks and acts just like it did when it rolled off the dealer’s lot all those decades ago. That ethos can be pushed a little too far, though, especially with practical matters like knowing how much gas is left in the tank. Get that wrong and you’ll be walking.

Unwilling to risk that cruel fate with his restoration of 1978 Volkswagen Bus, [Pegork] came up with a replacement fuel gauge that looks identical to the original meter, but actually works. The gas gauges on ’60s and ’70s VWs were notoriously finicky, and when they bothered to work at all they were often wildly inaccurate. The problem was usually not with the sender unit in the tank, but the gauge in the dash, which used a bimetallic strip heated by a small coil of wire to deflect a needle. [Pegor]’s “SmoothBus” modification replaces the mechanical movement with a micro servo to move the needle. The variable voltage coming back from the fuel sender is scaled through a voltage divider and read by an analog input on an ATtiny85, which does a little algorithmic smoothing to make sure the needle doesn’t jump around too much. A really nice addition is an LED low fuel indicator, a feature that would have saved us many walks to the gas station back in our VW days. Except for the extra light, the restored gauge looks completely stock, and it works far better than the original.

Hats off to [Pregor] for this fantastic restomod. As we’ve noted before, classic VWs are perhaps the most hackable of cars, and we applaud any effort to keep these quirky cars going.

Left: the ATtinyBoy and cartridges inside a custom case. Right: ATTinyBoy under the hood.

2024 Tiny Games Contest: ATtinyBoy Does It With Tiny Cartridges

What is it about tangible media? There’s just something neat about having an individual thing that represents each game, each album, each whatever. Sure, you can have a little console with a thousand games loaded on it, but what’s the fun in that?

A Tetris cartridge made of a broken-out ATtiny85 and header pins.Enter the ATtinyBoy. [Bram]’s entry into the Tiny Games Contest is based on the ATtiny85, and the whole thing is smaller than a credit card. In fact, each little game cartridge contains its own ATtiny85, with the pins broken out into headers.

That is, although the schematic is based on [Billy Cheung]’s gametiny, which uses an ATtiny85 as the brain, ATtinyBoy’s brain is divided among each of the games.

This certainly checks a lot of boxes when it comes to contest rules and requirements, and it’s just awesome besides. We particularly like the custom box that holds ATtinyBoy and all his distributed knowledge. If you want to make one of your own, the schematic, code, and STLs are all available over on IO.

Nice Retro Displays Set This Watch On Edge

A common design language for watches has evolved ever since they first started popping up in the 1500s. Whether worn on the wrist or in a pocket, watches are relatively slim front to back, with the display mounted on the face. That’s understandable given the imperatives of human anatomy. Still, it’s not the only way to arrange things, as this very cool LED matrix watch with an edge-mounted display demonstrates.

True, the unique form factor of this watch wasn’t really the point of the whole project. Rather, [Vitali]’s design was driven by a couple of things. First off were the extremely cool Hewlett Packard HDSP-2000 displays, with four 5×5 5×7 LED matrices shining through the clear cover of a DIP-12 package. Also visible through the cover are the shift registers that drive the matrices, complete with gold bonding wires.

The main attraction for [Vitali], though, was the challenge of working within the limits of the ATtiny85 he chose to run the watch. The MCU’s limited IO made hardware multiplexing necessary, no mean feat given the limited resources and real estate available. He still managed to pack everything in, with the unique edge-mount display coming from the LEDs bridging the space between the two main PCBs. Everything fits into a nice wood veneer case, although we think it looks just fine without it. [Vitali] puts it through its paces in the short video below.

Hats off to [Vitali] for a great-looking project that pushed his limits. We just love these displays, too; of course, it’s not the first time we’ve seen them put to similar use.

Continue reading “Nice Retro Displays Set This Watch On Edge”

Custom Hat Gives Vintage Mitutoyo Calipers A New Lease On Life

Metrology fans are usually at least a little bit in love with Mitutoyo, and rightfully so. The Japanese company has been making precision measuring instruments for the better part of 100 years, and users appreciate their precision almost as much as the silky smooth feel of their tools. If you can afford it, a Mitutoyo caliper is quite an addition to your toolbox.

As good as they are, though, they’re not perfect, which is what led to this clever Mitutoyo digital caliper hack by [turbanedengineer]. The calipers in question, a digital set from the early 1980s, happen to have a unique history with a tangential Hackaday angle — they belonged to [Dhaval], mechanical engineer and avid motorcyclist who happens to be the late elder brother of our own [Anool Mahidharia].

The tool, in need of a little TLC, made its way to [turbanedengineer] who first restored the broken battery contacts. Once powered up again, it became apparent that while the caliper’s native metric measurements were spot on, the internal conversion to inches was considerably off. This led [turbanedengineer] to the data port on the tool, which is intended to send serial data to an external computer for logging measurements. After a little experimentation to nail down the data format, he prototyped a tiny circuit using an ATtiny85 and an OLED display that reads the caliper data, converts metric to inches, and displays both measurements on the screen. The prototype led to a more permanent version, which cleverly sits over the original display and taps into the data port without any free wires. The video below shows the very slick results.

Our hearts go out to [Anool] and his family for their loss, and we tip our hats to [turbanedengineer] for his thoughtful and respectful hack of a storied tool. We know that anthropomorphizing tools makes no rational sense, but we think it’s safe to say that a tool like this has a soul, and it’s probably happy to be back in the game.

Continue reading “Custom Hat Gives Vintage Mitutoyo Calipers A New Lease On Life”

MIDI Controller In A Cubic Inch

MIDI as a standard has opened up a huge world to any musician willing to use a computer to generate or enhance their playing and recording. Since the 80s, it has it has revolutionized the way music is produced and performed, allowing for seamless integration of digital instruments, automation of complex sequences, and unprecedented control over everything from production to editing. It has also resulted in a number of musical instruments that probably wouldn’t be possible without electronic help, like this MIDI instrument which might be the world’s smallest.

Fitting into a cubic inch of space, the tiny instrument’s volume is mostly taken up by the MIDI connector itself which was perhaps an acceptable size by 1980s standards but seems rather bulky today. A two-layer PCB split into three sections sandwiches the connector in place and boasts an ATtiny85 microcontroller and all the associated electronics needed to implement MIDI. Small threaded screws hold the platform together and provide each layer with a common ground. Four small pushbuttons at the top of the device act as the instrument’s keys.

The project’s creator (and Hackaday alum!) [Jeremy Cook] has it set up to play notes from a piano right now, but has also made the source code available so that any musical action can be programmed onto these buttons. Flexibility is perhaps MIDI’s greatest strength and why the standard has lasted for decades now, as it makes it fairly straightforward to build more comprehensive, easy-to-learn musical instruments or even musical instruments out of retro video game systems.

Continue reading “MIDI Controller In A Cubic Inch”

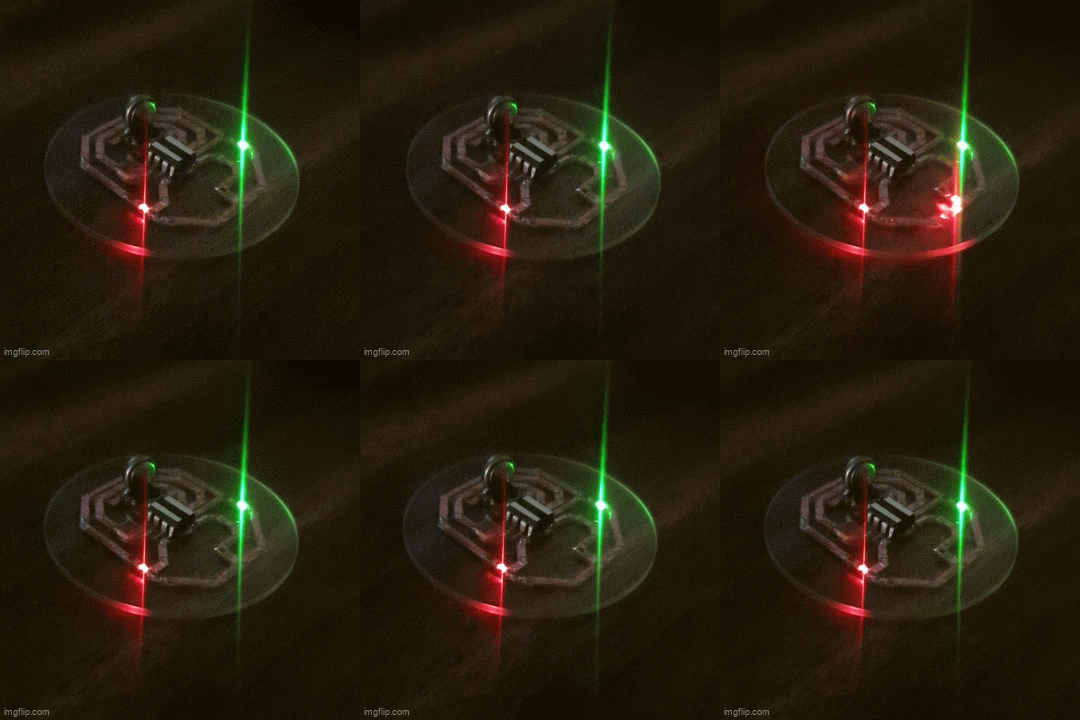
A persistence-of-vision business card which displays information when shaken (not stirred).

2024 Business Card Challenge: Make Them Shake Your Handiwork

Before COVID, people traditionally sealed their initial introduction to each other with a handshake. Nowadays, that activity seems kind of questionable. But you can still give them something to shake if you build this persistence of vision (POV) business card from [chaosneon] to show your credentials in blinkenlights form.

As you might have guessed, the input comes from a tilt switch. The user simply shakes the card back and forth, and the sensor detects the direction and cadence of the shake. Cleverly, the pattern plays forward-ways on the swing, and backwards on the back stroke, which just reinforces the POV effect. Don’t worry about how slow or fast to shake it, because the timing adjusts for your speed.

The first version used individual white LEDs, hand-soldered to an ATtiny2313. Now, in the updated version which you can see in the demo video after the break, [chaosneon] is using an RGB NeoPixel strip, which only needs one data wire to connect to the microcontroller. Thanks to this, [chaosneon] was able to to downsize to an ATtiny85.

Continue reading “2024 Business Card Challenge: Make Them Shake Your Handiwork”

Baffle The Normies With This Binary Thermometer

We think it’s OK to admit that when someone puts a binary display on a project, it’s just a thinly veiled excuse to get more blinkenlights into the world. That and it’s a way to flex a little on the normies; you’ve gone pretty far down the tech rabbit hole to quickly decipher something like this binary-display thermometer, after all.

Don’t get us wrong, we think those are both perfectly valid reasons for going binary. And all things considered, a binary display for a thermometer like [Clovis Fritzen]’s is much simpler to decode than, say, a clock. Plus, it seems a bit that this build was undertaken at least partially as an exercise in Charlieplexing, which [Clovis] uses to drive the six-bit LED display using only three lines of GPIO from the Digispark ATtiny85 board running the show.

The temperature sensor is a DHT11, whose output is read by the microcontroller before being converted to binary and sent to the six-bit display. The 64-degree range is perfect for displaying the full range of temperatures most of us would consider normal, although we’d find 63°C a touch torrid so maybe there’s a little too much resolution on the upper end of the scale. Then again, switching to Fahrenheit would shift it toward the hypothermia end of the scale, which isn’t helpful. And you can just forget about Kelvin.