Developed in the very late 60s and through the 70s, the PDP-11 series of minicomputers was quite possibly the single most important computer ever created. The first widely distributed versions of Unix and C were developed on the PDP-11, and it’s hardware influence can be found in everything from the Motorola 68000 to the MSP430.
When [Dave Cheney] saw the recent 8086 simulator written in 4kB of C code, he realized simulating entire computer systems doesn’t actually require a whole lot of resources outside a big chunk of memory. Armed with an Arduino Mega clone, he set out on one of the coolest projects we’ve seen in a while: simulating a PDP-11 on an AVR.
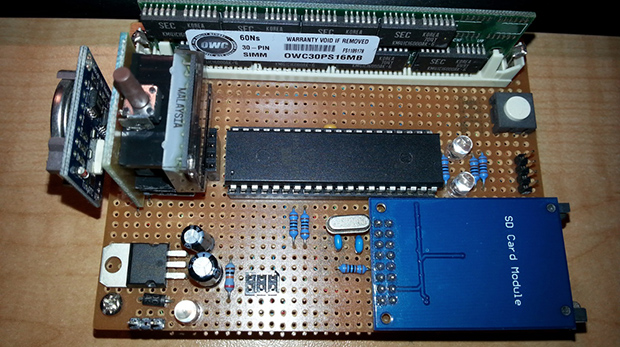
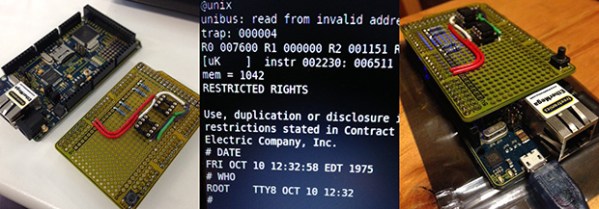
[Dave] used an ATMega2560-powered Arduino Mega clone with an Ethernet module for the hardware of this build. Attached to it is a shield filled up with a pair of RAM chips that expand relatively limited amount of RAM on the ‘Mega.
So far, [Dave] has his simulated system booting Unix V6 off an SD card. For PDP-11 storage, he’s also simulating an RK05 disk drive, a massive 14 inch platter containing 2.5 Megabytes of data. Compared to the original PDP-11/40, [Dave] estimates his machine is about 10 times slower. Still, an original 11/40 system fills multiple server racks, and the most common installations consume several kilowatts of power. The Arduino Mega can fit in a pocket and can be powered over USB.
Future developments for this system include improving the accuracy of the simulator, running more advanced operating systems and the DEC diagnostic programs, and possibly speeding up the simulation. We’d suggest adding some switches and blinkenlights on an additional shield, but that’s just us.
All the code can be found on [Dave]’s git, with a description of his SPI RAM shield coming shortly.

 Hosting a New Year’s Eve party, but don’t want to be stuck behind the bar all night? You could set out a bowl or two of