a comparison of the before and after

Compensating For Your TVs Backlight

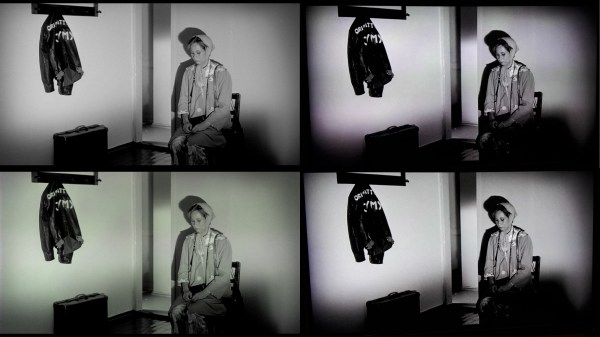
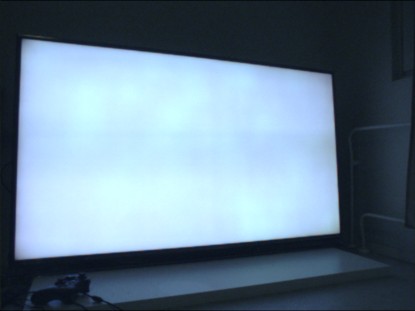
[Pekka Väänänen] has a Panasonic TV with a broken backlight that creates an uneven pink/green color. While it isn’t a huge deal for most films, black-and-white films tend to show the most effect. So, by modeling the distortion as a function, [Pekka] set out to find an inverse function that corrects the distortion before it gets to the TV.

However, the backlight doesn’t emit enough light for some colors, which means the blue and green channels need to be dimmed. As mentioned earlier, the distortion isn’t even, so the distortion needs to be captured and then calculated.

He took a few pictures with his phone, corrected the perspective, and applied a blur. The camera also has some distortion but works as a first approximation, but that isn’t something he covered here. Next, he set up a webcam and pointed it at the TV, trying to find good gain and offset values with a bit of Python.


Now it just becomes a problem of minimizing the per-pixel difference. Ultimately he just went for a random approach rather than an annealing or hill-climbing approach. Now that he had a function to apply, it was just a matter of adding a custom shader to his video player, which includes a live shader editor. He had to hack in support for an external texture, but he is kind enough to include the shader code and the patch in the article.

The result is excellent, and it’s a great use for an old TV. But perhaps, in some cases, it might be worth replacing the backlight entirely.

DIY Keyboard Backlighting Takes Forever, Worth It

LED Keyboard with Custom Lights

Want a back-lit keyboard? Make one yourself. Though you may not want to after seeing this build by [prodigydoo], who devoted 40 hours to upgrade his mechanical keyboard with a smattering of shiny.

No eye rolling just yet, though, because [prodigydoo’s] work is a monument to meticulous craftsmanship and dedication. So what if he accidentally dropped the keyboard’s PCB and cracked it? He patched that up with a few wires in true hacker-problem-solving fashion and no one will ever know.

With the electronics “safely” removed, [prodigydoo] set about desoldering every single key switch, then carefully detaching and disassembling the Cherry MX Blues. He then inserted an LED into each switch’s backplate, reassembled them, mounted the keys back on the board, then added some current-limiting resistors and heat shrink to the circuit. [prodigydoo] cut a few necessary holes for a power switch, state indicator LEDs (Caps Lock, etc.) and some under-the-board lighting, then rounded off the build by hooking up a power supply capable of running all the lights.

No microcontroller? No RGBLEDs? We like it anyway, and it seems [prodigydoo] is glad he kept it simple. Go check out the gallery for gritty details, an explanation of the circuit, and more pictures than your family vacation album.

Current Limiting Diode Use And Tutorial

Current limiting diode 1

Not that this happens often, but what do you do when faced with a repair where you don’t know the power source but you do know you have to drive LED backlighting? When faced with this dilemma [Eric Wasatonic’s] solution was to design for ambiguity. In this interesting hack repair [Eric] needed to restore backlighting for an old car stereo LCD display. First he guaranteed he was working with a DC power source by inserting a small full-wave bridge rectifier. Then knowing he needed 4 mA to power each LED for backlighting he used some 1978 vintage current limiting diodes designed to pass 2mA each regardless of voltage source, within limits of course.

Sure this is a simple hack repair but worthy of being included in anyone’s bag of tricks. Like most hacks there is always knowledge to be gained. [Eric] shares a second video where he uses a curve tracer and some datasheets to understand how these old parts actually tick. These old 1N5305 current limiting diode regulators are simply constructed from a JFET with an internal feedback resistor to its gate which maintains a fixed current output. To demonstrate the simplicity of such a component, [Eric] constructs a current limiting circuit using a JFET and feedback potentiometer then confirms the functionality on a curve tracer. His fabricated simulation circuit worked perfectly.

There was a little money to be made with this repair which is always an added bonus, and the recipient never reported back with any problems so the fix is assumed successful. You can watch the two videos linked after the break, plus it would be interesting to hear your thoughts on what could have been done differently given the same circumstances.

Continue reading “Current Limiting Diode Use And Tutorial”

Aurora Open Source Hardware Mixer


We’ve seen some fairly impressive mixer projects this year, and the Aurora mixer is no exception. It is a dual channel USB-powered mixer with two linear faders, one crossfader, eight backlit buttons and 24 potentiometers, all built around a PIC 18LF4525 microcontroller. That’s all pretty typical for a mixer, but this one is very visually attractive, featuring a clean and stylish form factor and controllable lighting both under the board and in the LEDs backlighting the buttons and knobs.

Whether you want to buy one now or build one yourself, the Aurora team has made both possible. You can contact them for pricing if you are ready to buy. If you prefer to build, this is an open source project with full assembly instructions, schematics, drivers, patches and all other source code and information you should need available here. See more photos of the Aurora mixer here, or see it in action after the break.

Continue reading “Aurora Open Source Hardware Mixer”