Real-time Robotic Arm Control With Blender

robotic_arm

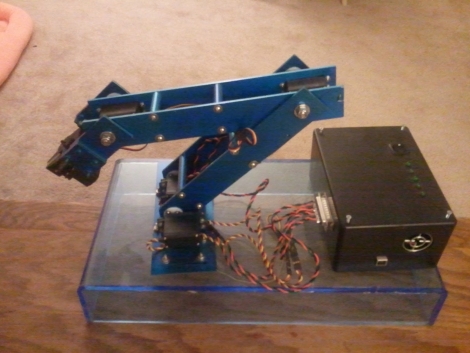
Last year, [Justin Dailey] was coming down the home stretch of his senior year as a Computer Engineering student and needed to build a final design project. He always wanted to construct a robotic arm, and figured that there was no better way to legitimize such a project, than to claim that it was “homework”.

While he originally wanted to control the arm with a joystick, he had been messing with Blender quite a bit leading up to his final project, and thought it would be pretty cool to let Blender do the work. He started out by testing his ability to control a single servo with Blender, then slowly increased the complexity of the project. He prototyped the arm using cardboard, and satisfied with his progress thus far, began constructing the arm out of aluminum.

Once he had all six of his servos attached to the arm’s joints and wired to his Roboduino, he got busy constructing a 3D model in Blender. Using a few Python scripts, the movements inside Blender are translated to serial data in real-time, which is relayed to the Roboduino in order to control the arm.

Check out his site if you get a chance – there’s plenty of code to be had, as well as several videos of the arm in various stages of construction and testing.

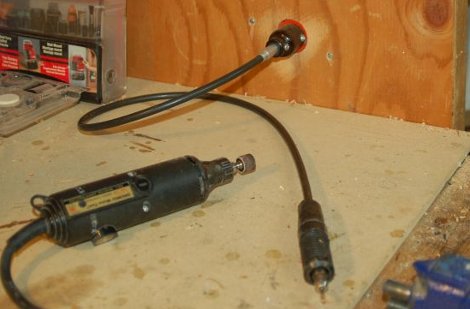
Rotary Wall Plug From Scrap

Rotary tools such as a Dremel are useful to have around for all sorts of tasks in a workshop, including cutting, polishing, and grinding. [Konstantin] sent us in his home made wall mount rotary tool based off of parts from a blender and an old bench top jigsaw. Unlike a Dremel where the motor is in the hand held part of the tool, this setup hides the blender motor (which provides the power) behind a wall panel, and is controlled via the blender’s speed settings buttons. We could see this configuration allowing for more delicate work due to the reduction of weight in hand, as well as the added bonus of a near impossibility of losing this tool. Overall an excellent re-purposing of leftover parts, be sure to check out [Konstantin]’s blog for more build info and photos.

Using Makerbot For Dishwasher Repair

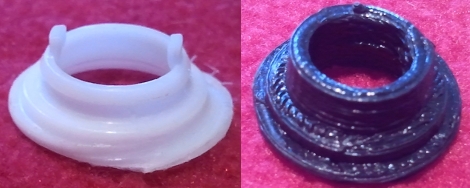
[Daryll Strauss’] dishwasher had some problems that he traced to a worn out part on the upper spinning arm. The hackerspace he belongs to has a Makerbot and he though this would be the perfect opportunity to print his own replacement part. He picked up some inexpensive digital calipers and set to work mapping out the dimensions of the broken piece. He took his hand-drawn cross section and built a replica part in Blender. Once he had it just right he generated the g-code and printed the part. His replacement works very well, and it’s a bit thicker (by design) than the original so hopefully that means it will hold up longer.

Rendering And Blendering In A File Cabinet

The Blender Foundation has just received a new render farm. It came in the form of a four-drawer file cabinet something akin to the popular Ikea clusters. Each draw holds four motherboards, power supplies, and hard drives and the whole cabinet will eventually add up to a 16-node cluster. Join in on the geeky excitement by watching the delivery and unpacking video after the break. We love it when organizations share the details on the hardware they use. Continue reading “Rendering And Blendering In A File Cabinet”

Ditch The LPs And Build Your Own 3D Scanner

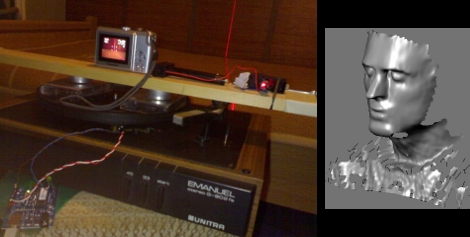
Find yourself an old record player, a laser level, and a digital scanner and you can build a 3D scanner. That’s what [Rob] did. The camera and laser level are mounted on the turntable for steady rotation. The camera captures the vertical laser line traveling around the room by recording 30 fps at a resolution of 640×480. This data is then translated into a Blender 3D file via a Python script and the Python Image Library. You can scan a whole room or just a small object. The face above is the result of this image capture after a bit of processing. [Rob] found this worked best in the dark and when scanning surfaces that are not reflective.

Make sure you also check out the camera-and-projector scanning method.

RoboThespian: Chuck E. Cheese Entertainment Comes Home

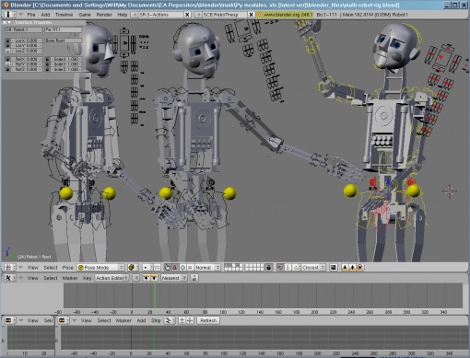
Remember your eighth birthday party when the animatronic band at Chuck E. Cheese sang happy birthday just for you? Now you can enjoy this any day of the year with RoboThespian. The complete animatronic platform has been modeled in Blender 3D. Animating the robot is as easy as producing an animation from its digital model. Lip syncing is generated automatically, with the handles to the right of the model’s head controlling facial expression.

Using Blender as a choreography tools is brilliant.  We’re hoping someone will incorporate this technique in their Halloween shows this year.

[Thanks Rob via BlenderNation]

Gas Powered Blender

gas_mixer1

We aren’t sure what [stubman] needs to blend, but whatever it is, it must require some serious power. [stubman] put together this industrial looking gas powered blender. While gas powered blenders certainly aren’t a new thing, he did add a nice touch with an electric starter. While maybe not as cool looking as some we’ve previously covered, this one would look good in any shop. Why are gas powered blenders so popular? Why not gas powered pencil sharpeners or gas powered can openers? We’ve seen a gas powered vacuum!