Automatic Bluetooth Module Programmer

automatic-bluetooth-programming

Before we dive in don’t be confused by the title. This doesn’t flash firmware to the device. But it does automate the process of setting up the Bluetooth to serial module for use in your projects.

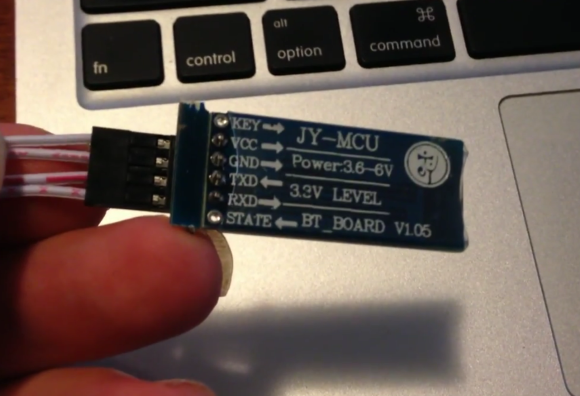
We’re often confused by the lack of a standard way of describing these inexpensive modules. We would look at this can call it an HC-05, but we’re not sure if that’s right or not. [James Daniel] calls it a JY-MCU board. If you have a handle on the differences (or lack of) please let us know in the comments. Either way we know that these boards can be frustrating to work with. They can be found with a wide variety of different firmwares, which can make the configuration process a bit different for each.

[James’] solution connects the device to an Arduino running a sketch that he wrote. Connect the device, launch the terminal monitor in the Arduino IDE, then give it your desired settings. The sketch will poll the Bluetooth module to see what speed it is set to run at. It will then establish which firmware version the board is running, displaying this info in the terminal. It then uses that information to program the board with your desired settings.

In this case [James] is using one of the modules to drive his 3D printer without being tethered to his laptop.

Continue reading “Automatic Bluetooth Module Programmer”

Announcing Adafruit’s Bluefruit

adafruit_2098

You always meet the most interesting people wandering around Maker Faire, but by far the most interesting was Hackaday’s founder, [Phil Torrone] and bubblegum-haired compatriot [Limor] from Adafruit. They were out in full force checking out the sights and gave us the scoop on a new piece of hardware they’re releasing called Bluefruit.

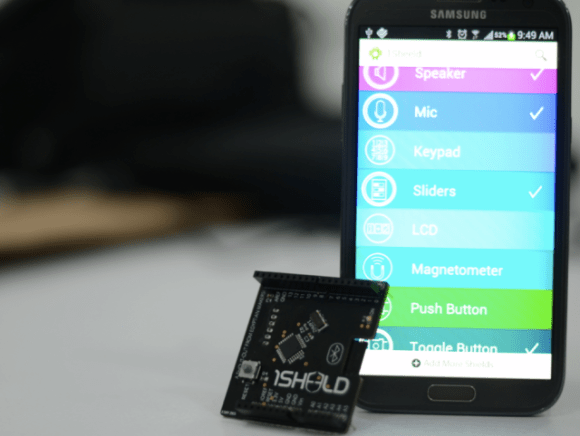
Bluefruit is a very tiny and very cheap Bluetooth module breakout board that allows anyone to take 12 digital inputs and turn them into a Bluetooth HID device. If you’re planning a portable battery-powered arcade controller, just plug in a Bluefruit, set up your keypresses in your software, and rock out.

On board the Blufruit are an FTDI programming connector, 12 input pins, a few power pins, a custom FCC and CE certified CSR Bluetooth module, and that’s about it. If you’re looking for a simple GPIO to Bluetooth adapter without an overwrought Arduino setup, this is the best solution we’ve seen by far. Adafruit is also rocking their own custom firmware for the device, so this will be extremely hacker-friendly.

The price will be $20 and should be available in the Adafruit store in a bit. If you’re looking for an easy way to put a Bluetooth HID controller in your next project, this is the one.

Pictures of the Bluefruit and Adafruit crew below.

Continue reading “Announcing Adafruit’s Bluefruit”

Trash To Treasure Bluetooth Radio And Tube Amp Build

trash-to-treasure-internet-radio

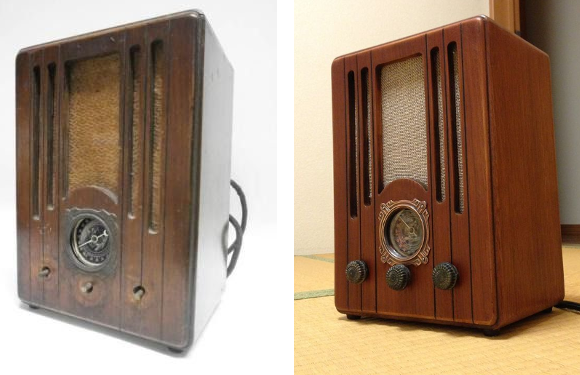
The before image doesn’t look all that bad but we were still impressed with what went into the restoration of this radio. Perhaps restoration isn’t the right word since it didn’t manage to hold on to any of the original internals. This is more resurrection of a retro radio case for use as a Bluetooth radio.

At first look we didn’t notice that the original knobs were missing. The speaker fabric is ripped and the glass on the tuning dial is broken as well. [Yaaaam] happened to have another antique radio with interesting knobs — but he didn’t just transplant them. He made a mold of one knob and cast three replacements for the radio. After refinishing the wood he replaced the fabric and things were really starting to look up.

All of the electronic components were removed and a new tube amp was built on the original metal chassis. It uses a Bluetooth module for input which facilitates using your smart phone as the playback device without involving any wires or other nonsense. Two problems popped up after the project was completed. The first replacement power supply overheated. The second replacement had a different problem, needing some additional shielding to prevent noise from creating unwanted… noise.

This looks so much better than modern injection molded plastic shelf systems. But there are some fun wireless hacks out there for those too.

Sending Data Over Bluetooth Low Energy With A Cheap NRF24L01+ Module

nRF24L01+ modules like the one shown above are a great way to send data wirelessly between your projects. They can be found on many websites for less than $1.50 a piece and many libraries exist for them. After having thoroughly looked at the Bluetooth Low Energy (BLE) specifications, [Dimitry] managed to find a way to broadcast BLE data with an nRF24L01+.

Luckily enough, BLE and nRF24L01+ data packets have the same preambles. However, the latter can’t send more than 32 bytes in a packet and can’t hop between frequencies as fast as the BLE specification wants. [Dimitry] found the solution when he discovered that he could send unsolicited advertisements on three specific channels. In the end, considering the 32 bytes the nRF24L01+ can send, you’ll need to use 3 bytes for the CRC, 2 for the packet header, 6 for the MAC address and 5 for devices attributes. This leaves us with 16 bytes of pure data or 14 bytes to split between data and name if you want your project to have one.

Motobrain: A Bluetooth Controlled PDU

motobrain

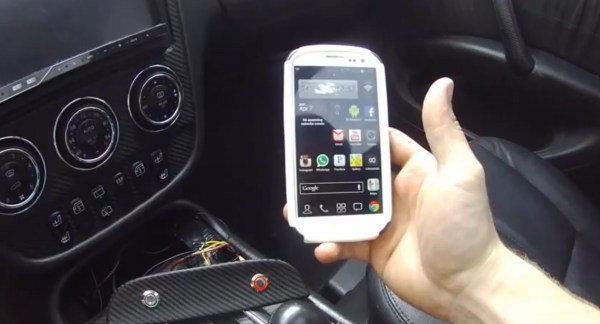
If you’ve ever considered modding your vehicle’s electrical system, [Josh Oster-Morris’s] Motobrain PDU (power distribution unit) might make life easier by providing precision control and protection for auxiliary 12V outputs in your car, bike, boat, etc. Once the Motobrain is paired to a phone over Bluetooth, a companion app displays real-time telemetry and lets you program up to 8 output channels.

Each of these 8 outputs can be directly controlled in the app, but the real power lies in the 4 programmable inputs. Here you can tie systems together and dictate exactly how one should respond to the other, e.g. detecting high-beams and disabling the auxiliary light bar you added. There’s even a “delayed on” option. Programming also has PWM capabilities, so flipping a switch could raise the brightness of some lights over 4 levels of intensity. If those lights are LEDs, the Motobrain can also provide constant current to specification. Each circuit can supposedly handle 15A continuous current and has a programmable circuit breaker, which would make fuses optional.

You can watch an overview video after the break to get a better idea of how it all works, but stop by [Josh’s] project blog to see all the features explained across multiple videos and blog posts as they are developed and tested.

Continue reading “Motobrain: A Bluetooth Controlled PDU”

ArduGuitar, An Arduino Controllable Guitar

The ArduGuitar

Electric guitars have several switches and potentiometers for controlling volume, tone, and which pickups are enabled. Rather than fiddling with these by hand, [Bob] built the ArduGuitar. It uses an Arduino to control the parameters over Bluetooth. This allows for musicians to configure presets, then recall them as needed, providing the exact same sound every time. It’s similar to the Guitarduino, but adds wireless control.

The internals of the ArduGuitar consist of the Arduino Micro, a BlueSMiRF from Sparkfun, and resistive opto-isolators. The resistive opto-isolators allow the Arduino to adjust resistance through an electrically isolated barrier. This prevents the Arduino from interfering with the guitar’s sound.

Some of the first Vactrols were used to create a tremolo effect in guitar amplifiers. These pulsed a incandescent lamp onto a photoresistor. Fortunately, there are now integrated solutions. PerkinElmer makes these, and they have a nice application note [PDF] on audio applications.

The final part of the design is an Android app, which provides remote control over Bluetooth. The source for everything is available on Github, and the detailed build log is available here.

Modifying The HC-05 Bluetooth Module Defaults Using AT Commands

The HC-05, a Bluetooth to serial bridge, can be found for around $5 on the internet and therefore may be the cheapest way to add Bluetooth connectivity to your project.

However, its default settings may need to be changed depending on your application. [Hazim] explains a way to enter the HC-05 AT command mode to benefit from the rich set of features that the device can provide. The process is fairly simple as it only consists of maintaining the key pin of the HC-05 high while powering on. The device then boots in AT command mode with a default 38400bits/s speed and listens for all of the AT command set (PDF). As an example [Hazim] provides a sketch allowing you to write the AT commands directly in your favorite terminal.

With the basics out of your way you may want to further research the hardware, especially if you will be using modules from different sources. They don’t always come with the same firmware.