On the face of it, producing a set of noise cancelling headphones should be a relatively straightforward project. But as [Pete Lewis] found out, things are not always as they seem. The result is a deep dive into microphone specifications, through which most of us could probably learn something.
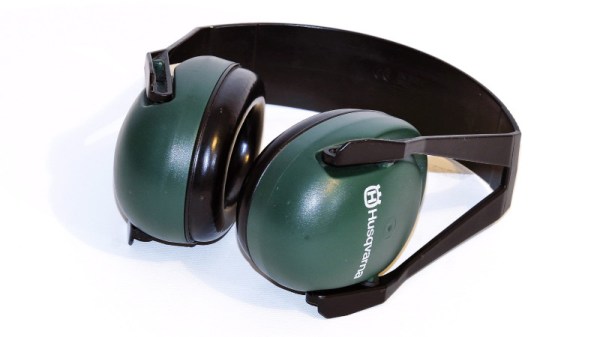
Noise cancelling headphones have a set of microphones which provide anti-phase noise through an amplifier to the ‘phones, thus in theory cancelling out the external noise. Since [Pete] is a musician this pair would have to be capable of operating at high noise levels, so he checked the spec for his microphone and with an acoustic overload point at 124 dB for a 115 environment he was ready to go.
Unfortunately these ‘phones showed distortion, which brings us back to the acoustic overload point. This is the sound level at which the microphone has 10% distortion, which is a very high figure, and certainly meant there was enough distortion to be audible at the lower level. After a search for a higher spec microphone and a move to a digital codec-based solution with an ESP32 he eventually cracks it though, leading to an inexpensive set of noise cancelling headphones for high-noise environments.
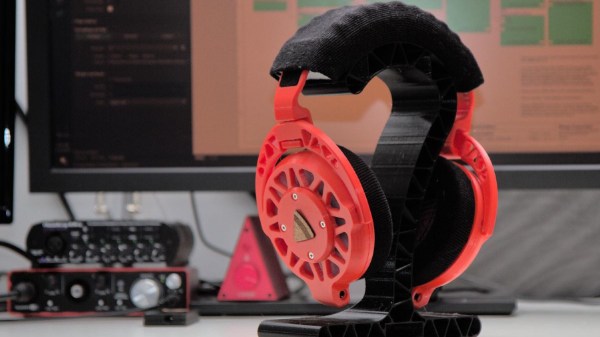
We’ve seen many DIY headphones projects on these fair pages over the years, but not many that are quite as DIY as the Ploopy Headphones. What makes this project interesting is the sheer depth of the construction, with every single part being made from what we might call base materials. Materials such as 3D printer filament, foam and felt, and the usual metallic vitamins.
The electronics are fairly straightforward, with an RP2040 functioning as the USB audio interface and equalizer function. Audio samples are emitted as I2S into a PCM3050 24-bit stereo codec which generates a pair of differential output audio signals. These are then converted from differential to single-ended signals and passed on to the coil drivers. The coil drivers consist of no fewer than eight-paralleled opamps per channel. All of this is powered by the USB-C connection to the host computer. Whilst a kit of parts is available for this, you can make your own if you wish, as the full source (Altium designer needed for tweaks) is available on the Ploopy headphone GitHub.
A pretty ploopy response
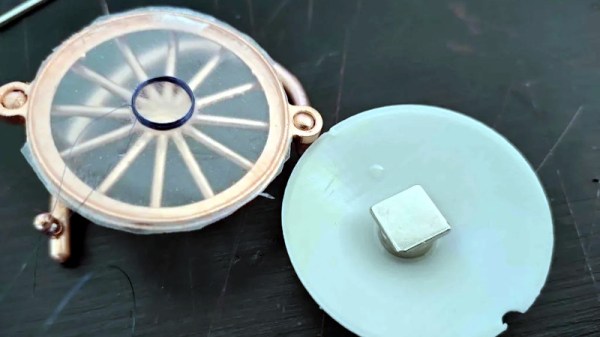
Many DIY headphone builds would likely be using off-the-shelf speaker units, with large parts of the ear cups being taken from spare parts kits for commercial offerings. But not the Ploopy. The drivers are constructed from flex PCB coils with a standard TRRS jack on each side. Magnets for these coils to react against are held in a 3D-printed frame that is attached to the outer cover. The coils are aligned with a special jig and bonded to the ‘driver foam’ with some 3M VHB tape.
The ear cups are constructed with some 3D printed rings, foam pieces, and simple woven material. The resonator plates push into the inner side of the cup, and the assembly simply screws to the driver assembly. The incredibly detailed assembly wiki makes it look easy, but we reckon there are a few tricky steps in there to trip the unwary. The headband again consists of printed spring sections, some woven material, and foam with a few metallic vitamins thrown in. That makes it sounds simple, but it isn’t.
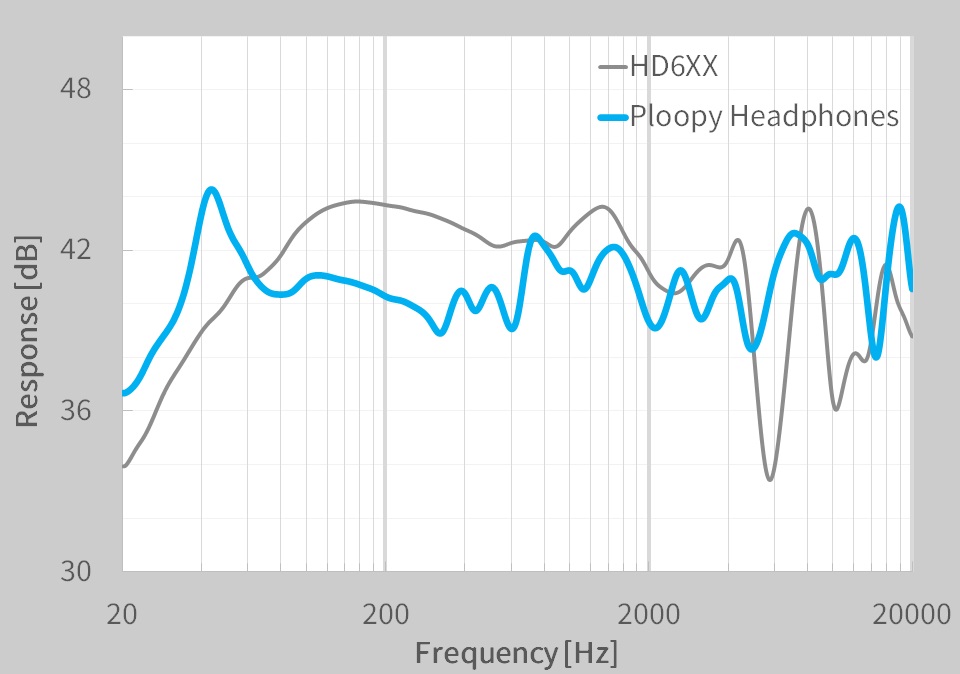
On the whole the build looks fantastic, but what does it sound like? The Ploopy team has tested them against a pair of Sennheiser HDRXX giving a broadly comparable response, but we’re no audio experts, and the proof, as always, is in the wearing. This project seems to be the ultimate in audio tweakability, with the punchy RP2040 capable of running six audio filters at the full 48 KHz, 16-bit audio, though, the PCM3050 is capable of more.
Want to build some headphones, but need a Bluetooth interface? We got you covered. Can 3D printed headphones ever compare to the big names? We’ll see.
The sound produced by any given electric guitar is shaped not just by the instrument itself but by the amplifiers chosen to make that sound audible. Plenty of musicians swear by the warm sound of amplifiers with vacuum tube circuits, but they do have some limitations. [Collin] wanted to build a reactive load for using tube amps without generating a huge quantity of sound, and it resulted in an interesting project that also taught him a lot about inductors.
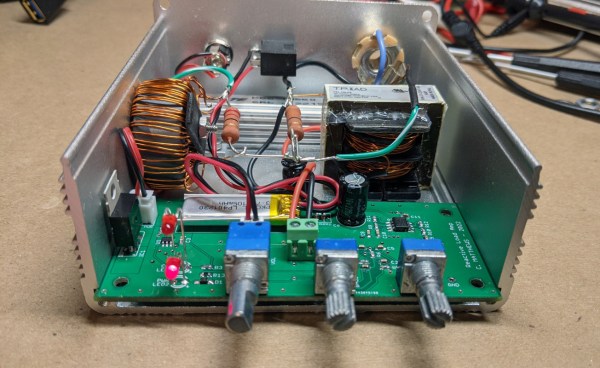
The reactive load is essentially a dummy load for the amplifier that replaces a speaker with something that won’t produce sound. Passive loads typically use resistor banks but since this one is active, it needs a very large inductor to handle the amount of current being produced by the amplifier. [Colin] has also built a headphone output into this load which allows it to output a much smaller quantity of sound to a headset while retaining the sound and feel of the amplifier tubes, and it additionally includes a widely-used tone control circuit as well.
There’s a lot going on in the design of the circuitry for this amplifier load, including a lot of research into low-frequency inductors that can handle a significant amount of current. [Collin] eventually ended up winding his own, but the path he took to it was long and winding. There’s a lot of other circuit theory discussed as well especially with regards to the Baxandall EQ that he built into it as well. And, if you’d like to learn more about tube amplifiers in general, take a look at this piece which notes one of the best stereo amps ever produced.
There are a variety of ways to enjoy your audio, of which headphones are one. Making a set of headphones is a straightforward enough project, but [madaeon] has taken the art to a new level by building the headphone drivers from scratch rather than using an off-the-shelf pair.
The result is a set of moving coil drivers with a construction technique involving using the semi-opaque thin window from an envelope as a diaphragm and as a former for the coil. Cyanoacrylate adhesive holds everything in place. The diaphragm is suspended across the mouth of a cardboard tube with the coil positioned above a magnet, resulting in the minimum moving mass necessary for as good a sound reproduction as possible. Judge for yourself, there’s a video that we’ve placed below the break.
The drivers are placed in a set of 3D-printed on-ear holders, and while they probably won’t match an expensive set of commercial headphones, we’d hazard a guess that they won’t have too bad quality. At the very least, it’s an interesting design to base further experimentation on.
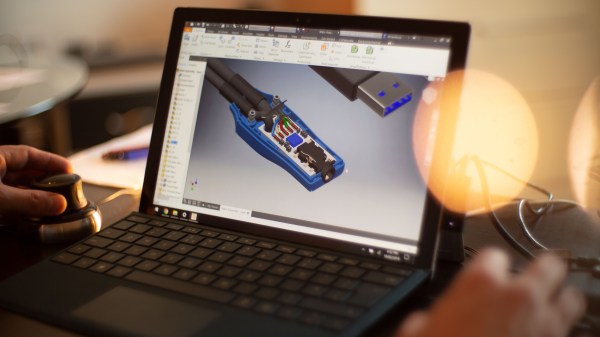
[David] sends in his very nicely designed “Thumpware Media Controller” that lets your mobile phone headphones control the media playback on your PC.
We realize that some PCs have support for the extra pins on cellphone earbuds, but at least some of us have experienced the frustration (however small) of habitually reaching up to touch the media controls on our earbuds only to hear the forlorn click of an inactive-button. This solves that, assuming you’re still holding on to those 3.5mm headphones, at least.
The media controls are intercepted by a PIC16 and a small board splits and interprets the signals into a male 3.5mm and a USB port. What really impressed us is the professional-looking design and enclosure. A lot of care was taken to plan out the wiring, assembly, and strain relief. Overall it’s a pleasure to look at.
All the files are available, so with a bit of soldering, hacking, and careful sanding someone could put together a professional looking dongle for their own set-up.
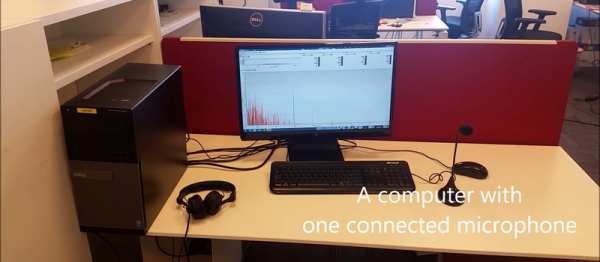
We all know that speakers are microphones and microphones are speakers, right? If not, take a moment to plug your headphones into a microphone jack and yell into them. It’s not exactly hi-fi, but it works.
So it’s not a huge surprise that three security researchers in Israel have managed to turn the combination headphone and microphone input jacks that are present on most laptops into an eavesdropping device. (Paper here as PDF, with an obligatory demo video on YouTube, embedded below.) Speake(a)r is a neat proof-of-concept and a horrid pun. Continue reading “Eavesdropping Via Headphones”→
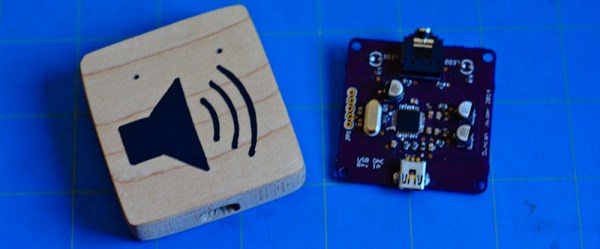
The biggest and best audiophile projects are usually huge tube amps, monstrous speaker cab builds, or something else equally impressive. It doesn’t always have to be that way, though, as [lowderd] demonstrates with a tiny DIY USB DAC build that turns a USB port into a headphone output.
In the Bad Old Days™ putting a DAC on a USB bus would require some rather fancy hardware and a good amount of skill. These days, you can just buy a single chip USB stereo DAC that still has very good specs. [lowderd] used the TI PCM2707 USB DAC, a chip that identifies as a USB Audio Class 1.0 device, so no drivers are needed for it to work in either Windows or OS X.
The circuit fits on a tiny PCB with a USB port on one side, a headphone jack on the other, and the chip and all related components in between. There are some pins on the chip that allow for volume, play/pause. and skip, but these pins were left unconnected for sake of simplicity.
The board was fabbed up at OSH Park, and the second revision of the case laser cut out of bamboo and acrylic by Ponoko. It’s a great looking little box, and something that fits right inside [lowderd]’s headphone case.