Tiny Hardware-based DSLR Intervalometer

diy_dslr_intervalometer

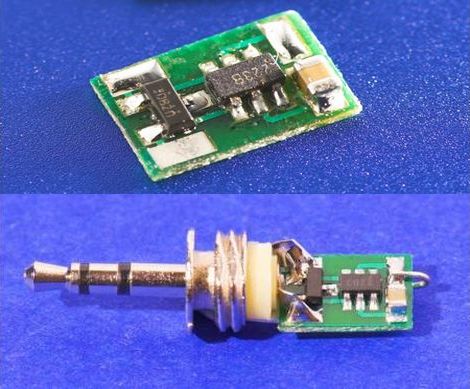
Most DSLR cameras have the ability to take pictures at set intervals, but sometimes the menu system can be clunky, and the options are often less than ideal. [Achim] is a big fan of time lapse photography and has been hard at work creating a hardware-based intervalometer to suit his needs. He has just finished the second revision of the controller which is just about small enough to fit inside the housing of a 2.5mm stereo plug. The timer is not 100% universal, but so far he has confirmed it works on Nikon, Canon, and Pentax cameras.

Based on a PIC10F222, the circuit’s operation is quite simple. Once the dongle is connected to your camera, you simply need to take two pictures anywhere from 0.4 seconds to 18 minutes apart. The intervalometer “watches” to see how long you waited between pictures, and proceeds to take shots at that interval until the battery dies or your memory card fills up.

As you can see in the video on his site, the timer works a treat. If you want to make one of your own, swing by his site to grab schematics and code – it’s all available for free.

*Whoops, it looks like we’ve actually covered this before. Our apologies.

Canon A70 CCD Replacement/repair

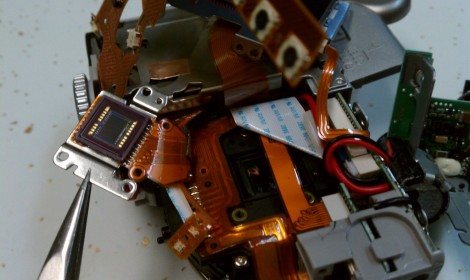
Looking for an underwater camera setup, [Imsolidstate] picked up a Canon A70 and a Canon water-tight housing on eBay for around $45. Unfortunately the camera arrived with a non-functioning CCD. Another trip to the online auction site landed him a replacement CCD which he set about installing.

We have this exact model of camera with a cracked LCD display. Being that we like to hack around on things we’ve pulled it apart in order to replace the screen and believe us, there’s no extra room inside that thing. The video after the break shows the teardown, and you can see what a pain it is to get the unit apart. That process in only eclipsed in difficulty by the reassembly itself.

In the end it wasn’t a problem with the CCD itself, but with the connector on the PCB that received the flat cable. It wasn’t holding the contacts tight, but [Imsolidstate] fixed that with a strategically placed piece of foam.

Continue reading “Canon A70 CCD Replacement/repair”

Laser-powered DSLR Auto Focus Assist Light

laser_af_assist

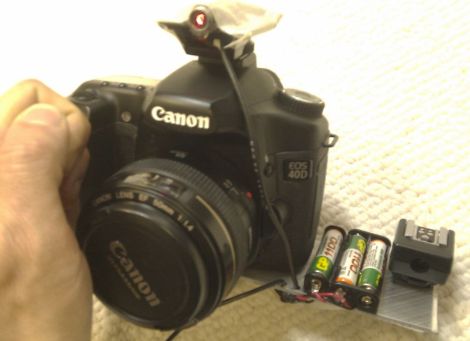
[Adrian] uses his Canon 40D quite often in dark or low-light situations, and found the onboard auto focus assist functionality to be a bit frustrating. In certain focus modes, the auto focus assist light is programmed to turn off once focus has been achieved. He noticed that if his subject moves or the focus point changes before he snaps the picture, the AF light does not come back on to assist in refocusing the image.

To work around this problem, he decided to build a supplemental auto focus assist light that could be triggered at will. He purchased a cheap laser pointer with an adjustable lens, then cut it open to get at the good parts. He mounted it on top of his camera and tweaked the lens to produce an unfocused beam of light that measures about 6” x 12” at five feet.

The laser pointer did the trick – his images are coming out much nicer now that he can easily recompose his shots in low light. While it works great, he’s not completely satisfied with the build, especially with the fact that he has to manually trigger the laser pointer.

Version 2 is in the works however, which employs an old hot shoe to trigger the laser whenever he pushes the shutter release halfway down. According to his blog he is having some timing issues, causing him to capture the laser in most of the pictures he takes. [Adrian] is working hard to correct the problem, and we’re sure he’d appreciate any tips you might have.

Make A Point-and-shoot See Infrared Light

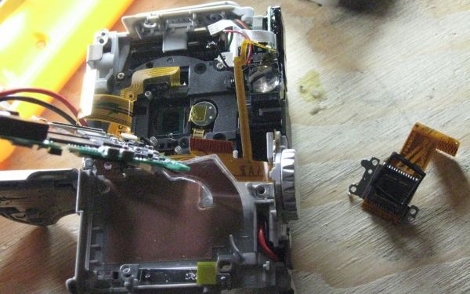
[Daniel Reetz] has caught the Kinect hacking fever. But he needs one important tool for his work; a camera that can see infrared light. This shouldn’t be hard to accomplish, as the sensors in digital cameras are more than capable of this task, but it requires the removal of an infrared filter. In [Daniel’s] case he disassembled a Canon Powershot to get at that filter. There’s a lot packed into those point-and-shoot camera bodies and his teardown images tell that tale. He also ended up with extra parts after putting it back together but that didn’t seem to do any harm.

After the break you can see video that shows the Kinect’s speckled IR grid, which is why he needed IR sensing in the first place. But there’s also some interesting photos at the bottom of his post showing the effect achieved in outdoor photography by removing the filter.

The flash never made it back in the camera. That’d be a perfect place for an IR light source. You’d end up with a night-vision camera that way.

Continue reading “Make A Point-and-shoot See Infrared Light”

Photo Booth In Briefcase Form

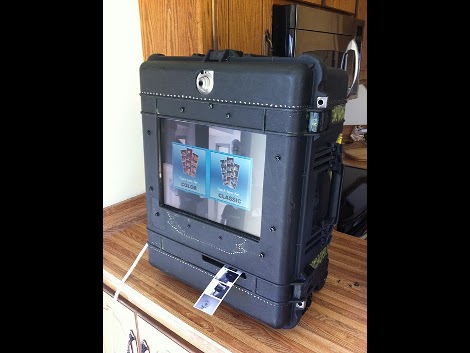
Taking portability one step further [Marty Enerson] built a photo booth in a roll-away case. The Pelican mobile case houses an Elo Touchscreen, a Canon PIXMA iP3000 photo printer, and a Canon Powershot SD100 digital camera. Most of this, including a Lenovo laptop to run it, was purchased second-hand from eBay, with a copy of Photoboof (different from the wedding photo booth from last week) to tie up the software side of the project. He plans to add a folding stand later on to make it into a kiosk.  For some reason that sparks the image of a voting booth in our minds.

From Cinema To Stills, Camera Lens Gets New Life

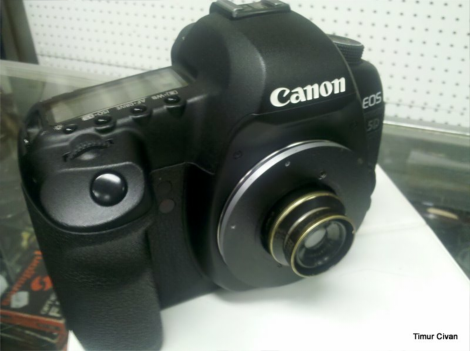
[Timur Civan], with a beautiful merge of past and present, has taken a 102 year old camera lens (a 35mm F5.0 from hand cranked cinema cameras) and attached it to his Canon EOS 5D. While this is not the first time we’ve seen someone custom make a camera lens or attach a lens to a different camera, such as when we brought you plumbing tilt shift or iPhone camera SLR or Pringles can macro photography, the merge of old tech with new warms our empty chest cavities hearts. Catch some additional shots of 1908/2010 New York City after the jump.

Continue reading “From Cinema To Stills, Camera Lens Gets New Life”

Miniscule Intervalometer

Calling this intervalomemter small would be a glaring understatement. It’s tiny enough to fit inside the plastic cover for a 2.5mm jack for use with a Canon DSLR camera. We should point out that the image we put together is a bit misleading. The picture of the jack is version 1 of this circuit and uses an 8-pin SOIC chip. The board in the oval is version 2, with a PIC 10f222 SOT23-6 package making it even smaller than the original version.

This is used for time-lapse photography. When plugged in the chip draws power from the camera. Get this: it learns the timing interval by listening for the first two images. Once you’ve snapped the first two pictures the PIC will continue to take images based on that initial delay. Amazing.

[Thanks AW via DIY Photography]