Are You In Bed?

If you’re building an omniscient home-automation system, it’s ability to make decisions is only as good as the input you give it. [Petewill]’s self-made panopticon now knows when someone is in bed. That way, the [petewill]’s automatic blinds won’t open when he’s sleeping late on weekends.

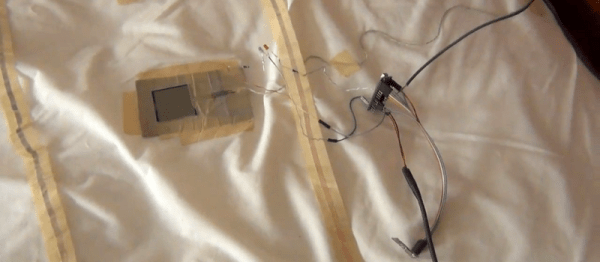
[Petewill] didn’t take the easy way out here. (In our mind, that would be a weight sensor under one of the bed’s feet.) Instead, his system more flexible and built on capacitive sensing. He’d tried force sensors and piezos under the mattress, but none of them were as reliable as capacitance. A network of copper tape under the mattress serves as the antenna.

Continue reading “Are You In Bed?”

StarMAT Greets Visitors With The Imperial March

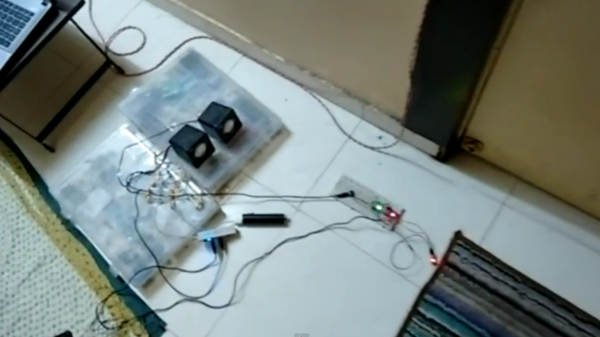
Strong is the Force, with this Padawan. To coincide with the latest installment of the continuing saga from a galaxy far, far away, [Rohit Gupta] built a Star-Wars themed interactive doormat. The doormat detects a footstep using capacitive sensing and plays a random Star Wars audio clip like the opening theme or the Imperial March or a famous phrase from the movie. Check out the video below the break.

The current setup is temporarily breadboarded, but we are sure it will be popular enough with his visitors to make him tidy it up. The hardware consists of an Arduino with an audio shield connected to a pair of speakers. A capacitive wire loop under the mat and a capacitive sensor tuned to the mat size wire take care of the sensing.

When Earth people step on the mat, the sensor triggers the Arduino to play a random audio clip from the SD card. The capacitive sensing is taken care by the TP223 1-key touch pad detector chip (PDF), which he mounted on a home etched board with SMD parts. The whole bundle is powered by a small “power bank” battery pack like the ones used to charge mobile phones.

Continue reading “StarMAT Greets Visitors With The Imperial March”

Conjuring Capacitive Touch Sensors From Paper And Aluminum Foil

Stumbling around YouTube, we found what has to be the lowest-tech method of producing a touchpad to make a capacitive touch keyboard, and we just had to share it with you. If you’re afraid of spoilers, skip down to the video below the break now.

[James Eckert] got his hands on a Freescale MPR121 capacitive touch sensor. The chip in question speaks I2C and senses up to twelve simultaneous capacitive sense electrodes; break-out boards are available in all of the usual places. It’s a sweet little part.

So [James] had to make a twelve-key capacitive keyboard on the quick. He printed out a key template on paper — something that he does often in his woodwork — and spray-glued aluminum foil on the back side. The video doesn’t say how many hours he spent with the razor blade tracing it all out, but the result is a paper, foil, and packing tape keyboard that seems to work just fine.

A pin-header was affixed to the foil with conductive paint and more tape. If you’ve ever tried soldering directly to aluminum foil, you’d know why. (And if you’ve got any other good tips for connecting electrically to aluminum foil, we’d love to hear them.)

Continue reading “Conjuring Capacitive Touch Sensors From Paper And Aluminum Foil”

Pimp My Keyboard: Automatic Lift Kit And More

Cherry-keyboard-with-lifts

Wondering what the heck a lift kit is? You know those low-riding cars that bounce? That’s the idea with this hack. [Justblair] added automatic height adjustment to his Cherry G80, and hid a few other extras while he was at it. Since there’s a fair amount of room inside the case of this model he was able to hide everything and keep just a single cord to run it all.

Certainly what catches your eye is the keyboard’s ability to rise to a typing height automatically. This is accomplished with a few servo motors and some 3D printed replacement feet. There were some hiccups along the way with under-powered servos, but bulking up to some HXT 900 9G models provide more power than is currently necessary. The automatic feature is thanks to a capacitive sensor built with a wire that loops the perimeter of the keyboard.

Of course to monitor the sensor and drive the servos you need some kind of brain. For that [Justblair] went with an ATmega32U4 breakout board. Since he had to patch into USB for power anyway he added a USB hub and routed one of the ports out the left side of the keyboard as a convenient way to connect other peripherals. There was even room to include an RFID reader which he uses to unlock his sessions (similar to the desk install from earlier this year). There’s still a lot of potential left in that hardware. To make future improvements easier the hack includes an IDC socket as an auxiliary port.

[Justblair] did a great job of sharing his work. His post links to a Github repo for the code and a Thingiverse project for the 3D printed legs. And it wouldn’t be complete without the demo video which is found below.

Continue reading “Pimp My Keyboard: Automatic Lift Kit And More”

Mobile Chicken Coop Includes Wireless Sensors

mobile-chicken-coop-build

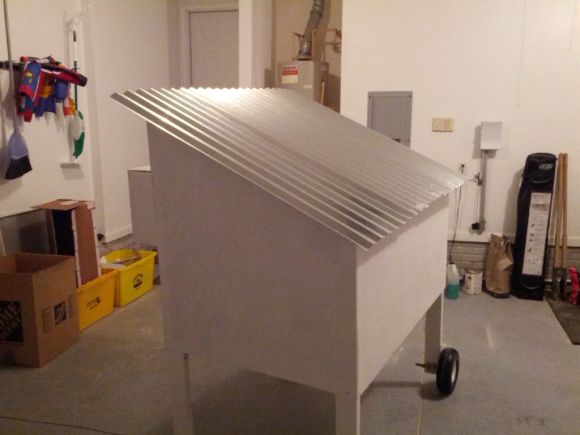
In and of itself this mobile chicken coop is a pretty nice build. There are some additional features lurking inside which you don’t find on most coops. [Neuromancer2701] built-in a set of sensors which can be accessed wirelessly. It makes it a snap to check up on the comfort of the hens without leaving the couch.

At the heart of the sensor system is an Arduino along with an Xbee module. The build isn’t quite finished yet, but so far three sensors have been implemented. A thermistor is used to read the temperature inside the coop. To make sure there’s enough water, two sheets of foil tape were applied to the water reservoir. The CapSense library measures the capacitance between these plates which correlates to the water lever (we’ve seen this type of water level sensor before). And finally, there’s a sensor that can tell if the door to the coop is open or shut.

He’s having trouble automating the door itself. This can be pretty tricky, especially if you go for a super complicated locking mechanism like this one.

The Start To Finish Of An Interactive Exhibit

[Andrew & Deborah O’Malley] were tapped to created an interactive exhibit. The mission was to show that social problems take continual support from a lot of people before they can be solved. The piece needed to be architectural in nature, and they ended up building this touch-sensitive model building with individually lighted windows.

The project log that the [O’Malleys] posted shows a well executed battle plan. They used tools we’re all familiar with to achieve a highly polished and pleasing result. The planning stages involved a virtual mock-up using Google SketchUp. The details needed to order the shell from a fabricator were pulled from this early work, while the team set their sights on the electronics that shed light and that make the piece interactive. The former is provided by a Shiftbrite module for each window, the latter comes from the Capacitive Sensing Library for Arduino. Despite some difficulty in tuning the capacitive grid, and getting all of those Shiftbrites to talk to each other, the exhibit went swimmingly. It’s not hard to imagine how easy it is to start a conversation once attendees are attracted by the seductive powers of touch sensitive blinky lights.

Keep Fun In Check With A Parental Count Down Timer

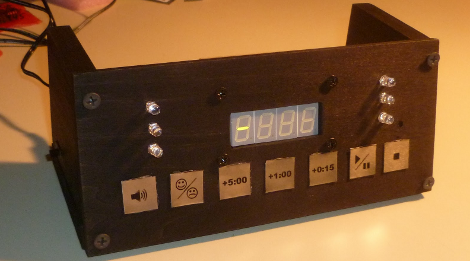
Gaming industry software engineer [Pedantite] writes in to let us know about his latest endeavor, an AVR based parental assistant timer: Good Times.   Looking for a new project that would be both useful and interesting, his wife suggested a “time out/ time’s up timer”. Like most of us [Pedantite]’s children are well studied in the arts of procrastination and mischief.  In the kids’ case this leads to time outs and break time running amok. The solution, in this case, is pretty much an advanced DIY egg timer with fun sounds.

The timer sports all of your basic countdown-timer functions including a 4 digit 7-segment LED output display, stop light style LED indicators, and controls to start/pause and stop the count down. The count down time can be input via the +5 minute, +1 minute, and +15 second buttons. There is even a happy/sad button to toggle between “time out” and “break time” modes. Two Atmel micros power the device, an AT Tiny 2313V for the capacitive touch keypad and an AT Mega 644P for the display, audio, and time measurement.  There are a lot of excellent techniques used in the build, some which we have covered here:  Four 595 Shift registers for the display; A 4 bit r2r DAC for audio output.

[Pedantite] is still in the process of writing up the project in multiple posts, and would love to know what you all want to hear about. Check out his blog for details and a quick video of the timer in action! Also, if you are interested in capacitive buttons, check out part 2 of the writeup.