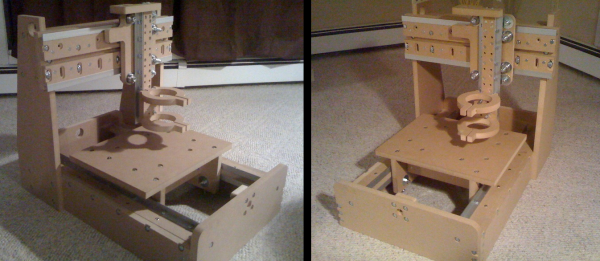
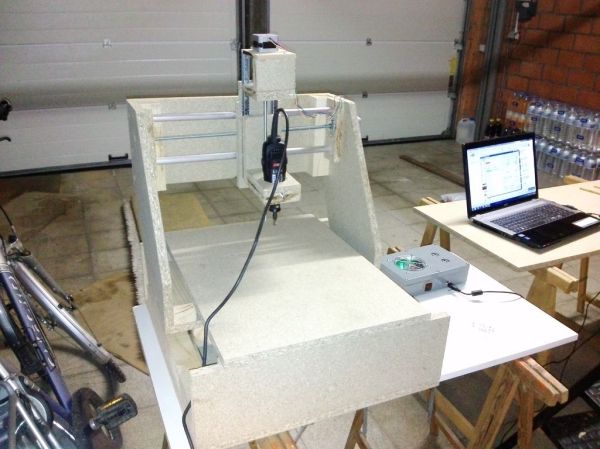
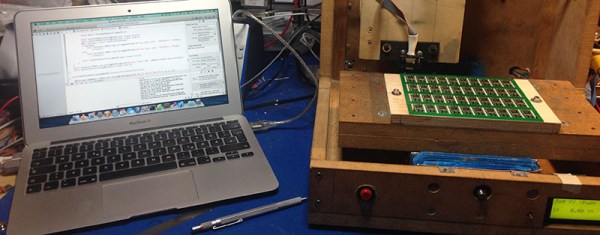
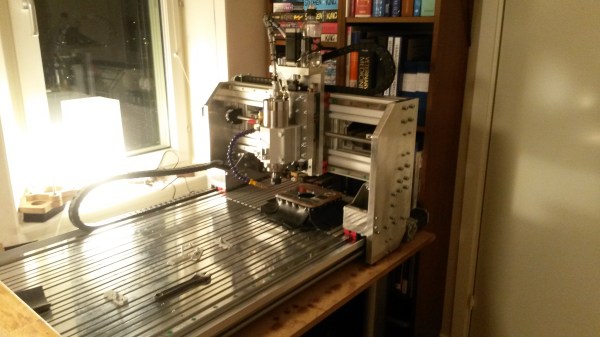
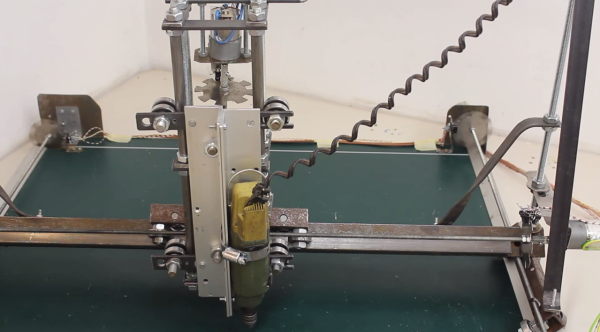
X-Carve, The Logical Upgrade To A Shapeoko

When it comes to small CNC carving machines for hackerspaces and extremely well-equipped garages, the Shapeoko, or something like it, has been the default machine. It’s dead simple – a Dremel attached to linear rails – and is useful for everything from milling PCBs to routing complex woodworking project to plotting designs with a pen. Now, [Bart Dring], the guy behind the Buildlog.net lasers and Inventables have teamed up to create the next generation of carving machines. It’s called the X-Carve, and while it’s fully compatible with the Shapeoko 2, it adds a few improvements that make for a much better machine.

The X-Carve does away with the Dremel-based spindle and replaces it with something that can produce torque. There’s a 24VDC spindle in the stock arrangement that will give you speed control through Gcode. There is, of course, adapters to fit the Dewalt and Bosch routers most commonly used in these types of machines.

As far as the gantry goes, the X and Y axes are makerslide; no change there. The Z axis leadscrew has an optional upgrade to Acme threaded rod, an improvement over the M8 threaded rod found in just about every other DIY machine kit. The entire machine is basically all the upgrades a Shapeoko should have, with stronger corners, NEMA 23 motors, and increased rigidity.

There are a few versions of the X-Carve, ranging from an upgrade kit to the Shapeoko 2 to a fully loaded kit with a square meter of machine space. The big, high-end kit ships for around $1250, but a smaller kit with 500mm rails, NEMA 17s, and threaded rod lead screw is available for around $800.

[Bart] and [Zach], the founder of Inventables sat down and shot a video going over all the features of the X-Carve. You can check that out below.

Continue reading “X-Carve, The Logical Upgrade To A Shapeoko”

Tweakie CNC Router

Home Made CNC Router Boasts Welded Steel Frame And Super Tidy Wire Management

[Cooperman] had been poking around the ‘net checking out DIY CNC machines for a while. He wanted to build one. During his search, he noticed that there was a common thread amongst homemade machines; they were usually made from parts that were on hand or easily obtainable. He had some parts kicking around and decided to hop on the band wagon and build a CNC Router. What sets [Cooperman]’s project apart from the rest is that he apparently had some really nice components available in his parts bin. The machine is nicknamed ‘Tweakie‘ because it will never really be finished, there’s always something to tweak to make it better.

The foundation for Tweakie is a welded frame made from 25mm steel square tubing. A keen observer may point out that welding a frame may cause some distortion and warping. [Cooperman] thought of that too so he attached aluminum spacers to the steel frame and lapped them flat. After that, fully supported THK linear bearings were attached to the now-straight spacer surface. Both the X and Y axes have ball-screws to minimize backlash and are powered by NEMA23 stepper motors. The Z axis uses 16mm un-supported rods with pillow block linear bearings. Unlike the X and Y, the Z axis uses a trapezoidal lead screw and bronze nut. [Cooperman] plans on replacing this with a ball-screw in the future but didn’t have one on hand at the time of assembly.

Mach3 is the software being used to control the CNC Router. It communicates via parallel port with a 3-axis StepMaster motor driver board that can handle providing 24vdc to the stepper motors. All of the electronics are mounted neatly in an electrical cabinet mounted on the back of the machine. Overall, this is a super sturdy and accurate machine build. [Cooperman] has successfully cut wood, plastic and even aluminum!

resourceful cnc router

Resourceful CNC Router Built From Hardware Store Parts

[siemen] has entered the wonderful world of Hobby CNC with his low-buck build of this gantry-style router. It embodies everything we here at HaD love: resourcefulness, perseverance and results. [siemen] has designed his frame using ideas he has found while surfing around the ‘net and is made entirely out of particle board. For linear movement, the Y and Z axes rely on ball bearing drawer slides while the X axis use a pipe and skate bearing arrangement. NEMA 17 stepper motors coupled to threaded rod move each axis.

The electronics are packaged in a nice little project box which houses an Arduino and 3 Sparkfun EasyStepper stepper motor drivers. [siemen] also cut a hole in the project box and installed a fan in order to keep those motor drivers cool. The Arduino is flashed with the CNC machine controller called GRBL. GRBL takes g-code sent from a PC to the Arduino and then in turn sends the required step and direction signals to the stepper motor drivers.

Overall, [siemen] did a great job with his first CNC project which came in at 200 Euro ($240). He’s currently working on version 2 and we are looking forward to covering it when it’s done. If you dig this project, you may also like this wooden wood router or this bolt-together one.

Continue reading “Resourceful CNC Router Built From Hardware Store Parts”

Flashing Chips With A CNC

[Eberhard] needed to flash several hundred ATMegas for a project he was working on. This was a problem, but the task did have a few things going for it that made automation easy. The boards the ‘Megas were soldered to weren’t depanelized yet, and he had a neat and weird bed of nails programming connector. There was also a CNC machine close by. This sounds like the ideal situation for automation, and it turns out the setup was pretty easy.

The boards in question were for FPV/radio control telemetry adapter and thankfully the assembly house didn’t depanelize the 40 PCBs on each board before shipping them out. A very cool ATMega flashing tool handled the electrical connections between the computer and the microcontroller, but a real, live human being was still required to move this flashing tool from one chip to the next, upload the firmware, and repeat the process all over again.

The solution came by putting a few metal pins in the bed of a CNC mill, 3D print an adapter for the flashing tool, and writing a little code to move the flashing tool from one chip to the next. An extremely simple app takes care of moving the programmer to an unflashed chip, uploading the firmware, and continuing on to the next chip.

There’s still some work to be done that would basically tie together the Gcode and AVRdude commands into a single interface, but even now a complete panel of 40 PCBs can be programmed in a little over 10 minutes. You can check out a video of that below.

Continue reading “Flashing Chips With A CNC”

Tumblemill

The Tumblemill: Homemade CNC Milling

[Jens] aka [Tumblebeer] has compiled an impressive overview of the Tumblemill, his homemade CNC mill. It warms our hearts to learn that [Tumblebeer] was inspired to pursue electronics by projects featured here on Hackaday, even if it means he dropped out of med school to pursue electrical engineering. We’re glad he’s following his passion, though, and reading through his blog reveals just how far he’s come: from fiery disaster in his first projects to a gradual obsession with making a CNC device, [Tumblebeer] has made plenty of mistakes along the way, but that’s how it should be.

His first iteration was a CNC router that used rubber wheels as linear bearings. It worked…barely. His latest build grew out of meticulous Solidworks modelling, with a moving gantry design constructed largely from aluminum, and upgraded linear motion: this time a bit overkill, using HIWIN HGH20CA blocks. Rather than sourcing a traditional spindle mount, [Tumblebeer] opted for the housing from a LM50UU bearing, which provided both the perfect fit and a sturdier housing for his 2.2kw spindle.

Visit his project blog for the details behind the mill’s construction, including a lengthy installment of upgrades, and hang around for a demo video below, along with the obligatory (and always appreciated) inclusion of the Jolly Wrencher via defacing an Arduino.

Continue reading “The Tumblemill: Homemade CNC Milling”

CNC Router Skateboard

Self Replicating Skateboard…. What?!?!?

[Bart] and company over at Pumping Station One make a lot of skateboard decks. They wanted to build a CNC Router that was not only portable but had a size that was optimized for cutting skateboard decks. The project got a little out of hand and the CNC Router ended up also being a skateboard! As crazy as that sounds, the craziest part may be that they built it in just one night.

CNC Router SkateboardThe project started off with some stock Shapeoko 2 parts. Achieving the deck-cutting size required shortening the X Axis and tripling the length of the Y Axis resulting in a 250 x 1200mm work envelope. The DC spindle used accepts ER16 collets and has a fully variable speed control. The stand alone selectable 24/48 volt power supply has a neat DIY handle to ease transportation. Even though the router itself has skateboard trucks, it also has a handle at the front so it’s easy to grab and drag behind you.

The guys that built this admit that, as a skateboard, it is kind of crappy. They do go on to mention that a 230lb dude was able to ride it without incident. As a project, however, they hit their goals on the head, ending up with an easily-transportable dedicated skateboard-deck-making CNC Router.

CNC Router Converted to 3D Printer

CNC Router Converted To 3D Printer

3D Printers have come down significantly in price over the past few years. Nowadays it is even possible to get a 3D printer kit for between $200-300. It’s arguable how well these inexpensive printers perform. [Jon] wanted a printer capable of quality prints without breaking the bank. After researching the different RepRap types that are available he concluded he really wasn’t up for a full machine build. He had previously built a CNC Router and decided it was best to add a hot end and extruder to the already built 3 axis frame.

The CNC Router frame is made from aluminum, is very rigid and has a 2′ by 2′ cutting area. All axes glide smoothly on THK linear bearings and are powered by NEMA 23 motors driven by Gecko 540 stepper drivers. The router was removed from the machine but the mounting bracket was left on. The bracket was then modified to hold the extruder and hot end. With 3D Printers there is typically a control board specifically designed for the task with dedicated outputs to control the temperature of the hot end. Since [Jon] already had the electronics set up for the router, he didn’t need a specialized 3D Printer control board. What he does need is a way to control the temperature of the hot end and he did that by using a stand-alone PID. The PID is set manually and provides no feedback to the computer or control board.

Huge Whistle[Jon] used liked Mach3 for controlling his CNC Router so he stuck with it for printing. He’s tried a few slicers but it seems Slic3r works the best for his setup. Once the g-code is generated it is run though Mach3 to control the machine. [Jon] admits that he has a way to go with tweaking the settings and that the print speed is slower than most print-only machines due to the mass of the frame’s gantry and carriage. Even so, his huge whistle print looks pretty darn good. Check it out in the video after the break…

Continue reading “CNC Router Converted To 3D Printer”