Bringing A Baofeng Into The Cyberpunk 2077 Universe

You’ve got to love the aesthetics of dystopian cyberpunk video games, where all the technology looks like it’s cobbled together from cast-off bits of the old world’s remains. Kudos go to those who attempt to recreate these virtual props and bring them into the real world, but our highest praise goes to those who not only make a game-realistic version of a prop, but make it actually work.

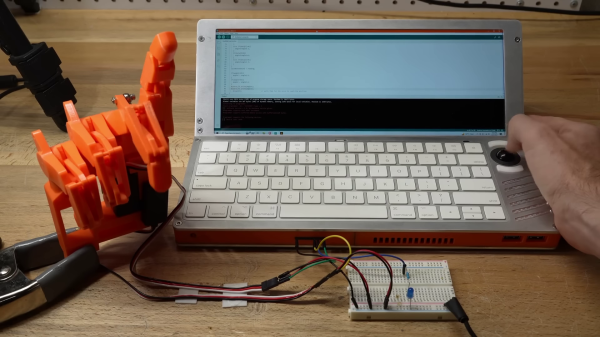
Take the Nokota Manufacturing radio from Cyberpunk 2077, for instance. [Taylor] took one look at that and knew it would be the perfect vessel for a Baofeng UV-5R, the dual-band transceiver that amateur radio operators love to hate. The idea is to strip the PCB out of a Baofeng — no worries, the things cost like $25 — and install it in a game-accurate 3D printed case. But this is far from just a case mod, since [Taylor]’s goal is to replace the radio’s original controls with something closer to what’s in the game.

To that end, [Taylor] is spinning up an interface to the stock radio’s keypad using some 7400-series bilateral analog switches. Hooked to the keypad contacts and controlled by a Mini MEGA 2560 microcontroller, the interface is able to send macros that imitate the keypresses necessary to change frequencies and control the radio’s settings, plus display the results on the yellow OLED screen that seems a dead-ringer for the in-game display. The video below shows some early testing of the interface.

While very much still a work in progress, we’ve been following [Taylor]’s project for a week or so and he’s really gaining some ground. We’ve encouraged him to enter this one in the Cyberdeck Challenge we’ve got going on now; it might not have much “deck” going for it, but it sure does have a lot of “cyber.”

Continue reading “Bringing A Baofeng Into The Cyberpunk 2077 Universe”

2023 Cyberdeck Challenge: YAHRC Takes Its Power Seriously

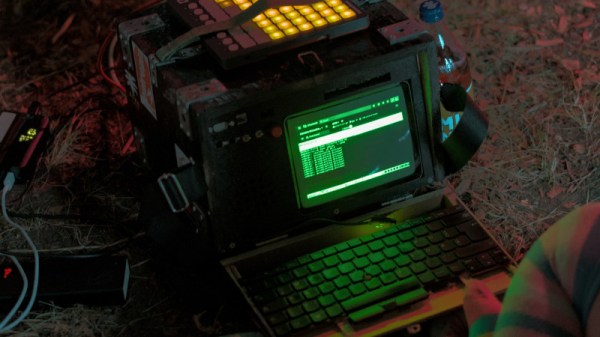
Cyberdecks are all about custom builds, and [f4drj]’s YAHRC (Yet Another Ham Radio Cyberdeck) takes its ruggedization and power seriously. There are some great power management features, and the enclosure even has a layer of RF shielding.

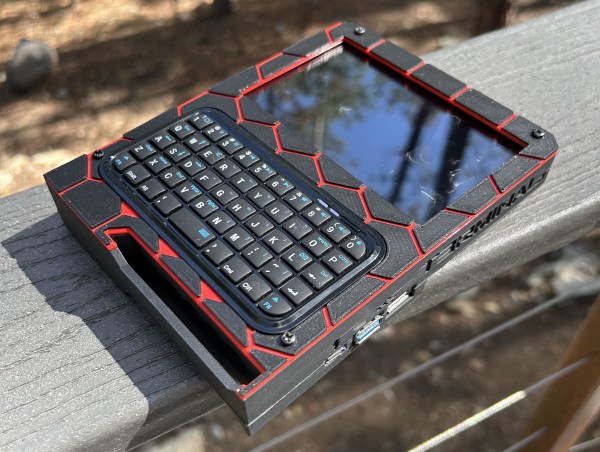
YAHRC is a Raspberry Pi-based build with a generously-sized screen that tucks a small Bluetooth keyboard into a storage area for input in a pinch. Everything is secured behind custom panels, and behind those panels are some really great build details. There’s active cooling via fans, an SSD for data, and [f4drj] even made a custom riser for the GPIO header by soldering together a couple of headers to act as an extender. This exposes the GPIO header right beside a clear area for prototyping, with easy access to USB ports next to the screen in the top panel. Continue reading “2023 Cyberdeck Challenge: YAHRC Takes Its Power Seriously”

2023 Cyberdeck Challenge: Reviving The First Notebook Computer

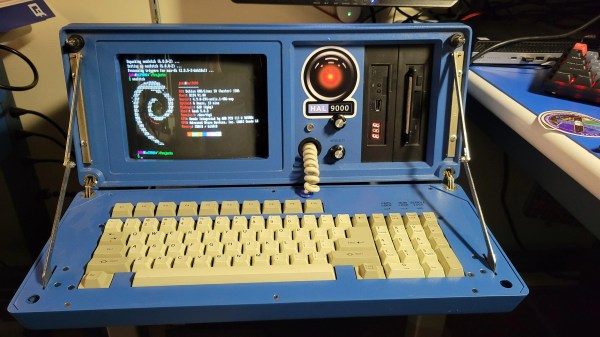
At first sight upon seeing [Don]’s HX2023 cyberdeck project one might be sad at the destruction of a retrocomputer, but in fact its classic Epson shell comes from a pile of spare parts left after restoring many other of the classic HX20 notebook computers to working order. The result stays true to the original but gives us so much more in the shape of a Raspberry Pi, and it’s worth cracking it open to see what components make this happen.

The first impression from the pictures is how tidy it all is, with the various USB-based boards contained on a large piece of perfboard spanning the whole case. As well as a USB hub and UPS board there’s an M.2 SSD interface and an audio board, and a DSI color TFT screen neatly fitted in place of the original monochrome item. Finally, there’s an Adafruit keyboard matrix interface board, allowing the use of the Epson’s original keys.

We like this conversion, because it manages to preserve a lot of what the original Epson had that made it great. We’re reminded of a cyberdeck inspired by the other great 8-bit notebook, the TRS-80 model 100.

Handheld PC Looks Great

[Bytewelder] fondly remembers the Palm III and Sharp HC-4500, so taking on the design of Decktility, a custom handheld cyberdeck , was a natural next step. The blog post goes into much detail about the design decisions and challenges throughout the project. The end result, though, looks great.

The device uses a Raspberry Pi CM4 and an IPS touchscreen. The bulk of the design work was to get the power system working. There is a custom FET board and an Arduino that manages charging and battery state.

Continue reading “Handheld PC Looks Great”

Hackaday Prize 2023: The NEOKlacker Pocket Computer

Science fiction always promised us pocket computers. These days, we’re spoiled for choice. [Spider Jerusalem] eschewed a simple smartphone or tablet, though, instead building a custom pocket computer of their own design. 

Like so many other DIY cyberdecks and handheld computers, this one relies on a Raspberry Pi. In this case, it’s built using a Pi 4 with 8GB of RAM, which offers a snappy experience that wasn’t available on the earliest boards. [Spider] paired it with a nifty 720×720 LCD screen and a full QWERTY button pad, wrapped up in a tidy 3D-printed case. Like any good pocket computer, it’s well-connected, thanks to a 4G LTE cellular data connection.

It might seem to be a build without a purpose in this era, but that’s not necessarily the case. When it comes to running barebones Linux utilities at a real command line, a Raspberry Pi offers some utility that the average smartphone doesn’t have out of the box. It’s a useful tool if you need to interface with a server on the go or do some low-level network diagnostics without carrying a whole laptop around. Video after the break.

Continue reading “Hackaday Prize 2023: The NEOKlacker Pocket Computer”

A yellow computer with a black keyboard and a small monochrome LCD screen

Low Power Challenge: The PotatoP Runs Lisp For Months Without Recharging

A common complaint among laptop users is that while battery technology has vastly improved over the past decades, a simulltaneous shrink in form factors has meant that a typical laptop today doesn’t last much longer on a battery charge than one from the early 2000s. But it doesn’t have to be that way, as [Andreas Eriksen] demonstrates with his entry for the Low Power Challenge. The PotatoP is a portable computer that should be able to run for about two years on a single battery charge, and can be topped up through an integrated solar panel.

Granted, it doesn’t have the processing power of even the cheapest laptop you can buy today, but it’s perfectly fine for [Andreas]’s use case. He’s a Lisp hacker, and a Sparkfun RedBoard Artemis can run uLisp just fine on its 48 MHz Cortex-M4F processor. The operating environment is very basic though, even requiring [Andreas] to write his own text editor, called Typo, to give him editing luxuries like backspace functionality and a movable cursor.

The Artemis board is very power-efficient by itself – typical power consumption is less than 1 mA. [Andreas] added a simple monochrome black-and-white LCD screen capable of displaying 53 columns of text, plus an SD card reader for data storage, and designed a sleek 3D-printed case to hold everything together. When running a typical piece of code, the entire system uses around 2.5 mA, which translates to about 125 days of continuous run-time on the beefy 12000 mAh lithium battery. Add a bit of solar power, plus a more realistic eight-hour working day, and the two year runtime estimated by [Andreas] appears entirely reasonable.

This has to be one of the most power-efficient portables we’ve ever seen, and one running Lisp at that. Despite its age, Lisp keeps popping up in interesting custom computers like the Lisperati1000 cyberdeck and The Lisp Badge.

Continue reading “Low Power Challenge: The PotatoP Runs Lisp For Months Without Recharging”

TRS-80 Model 100 Inspires Cool Cyberdeck Build, 40 Years Down The Line

The TRS-80 Model 100 was a strange beast. When it debuted in 1983, it resembled nothing that was available at the time, and filled a gap between desktop computers and the mostly-not-invented-yet laptop segment of the market. Collectors covet these machines, but they’re getting harder to find four decades later. So, if you want one, you just might have to roll your own.

Honestly, it doesn’t appear [Roberto Alsina]’s purpose here we to recreate the Model 100 per se, but rather to take inspiration from its oddball form factor and experiment with the latest components. The design elements from the original that [Roberto]’s creation most strongly echo are the screen with the extreme landscape aspect ratio and the somewhat compressed keyboard. The latter is based on the cheapest mechanical 65% keyboard available, while the former is a 1920×480 LCD display intended for automotive applications. The display seems like it put up a fight, between its need for a custom HDMI cable to connect it to the Radxa Zero SBC under the hood as well as the custom kernel needed to support it.

Along with a USB hub for IO and some 18650s for power, everything went into a 3D printed case with considerably sleeker lines than the Model 100. It’s worth pointing out that [Roberto] didn’t have much experience with design or 3D printing when he kicked off this project. We love to see people stretching their skills like that, and we think the results are great in this case. We’ve seen a lot of Model 100 retrofits and brain transplants, but this may be the first time we’ve seen a build quite like this.