Discrete LEDs Make A Micro Display

Few things excite a Hackaday staff member more than a glowing LED, so it should be no surprise that combining them together into a matrix really gets us going. Make that matrix tiny, addressable, and chainable and you know it’ll be a hit at the virtual water cooler. We’ve seen [tinyledmatrix]’s work before but he’s back with the COPXIE, a pair of tiny addressable displays on one PCBA.

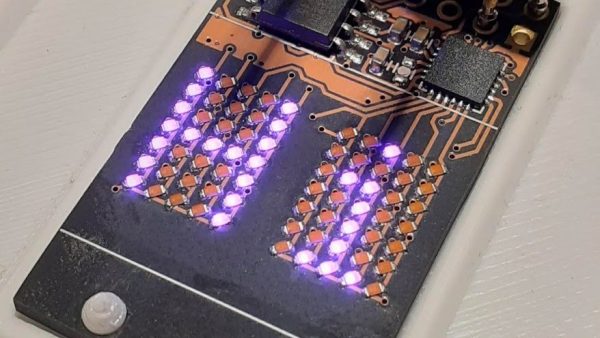
The sample boards seen at top are a particularly eye catching combination of OSH Park After Dark PCB and mysterious purple SMT LEDs that really explain the entire premise. Each PCBA holds two groups of discrete LEDs each arranged into a 5×7 display. There’s enough density here for a full Latin character set and simple icons and graphics, so there should be enough flexibility for all the NTP-synced desk clocks and train timetables a temporally obsessed hacker could want.

Continue reading “Discrete LEDs Make A Micro Display”

A Tiny LED Matrix Is Better With Friends

When we last heard from [lixielabs] he was building Nixie tube replacements out of etched acrylic and LEDs. Well he’s moved forward a few decades to bring us the Pixie, a chainable, addressable backpack for tiny LED matrix displays.

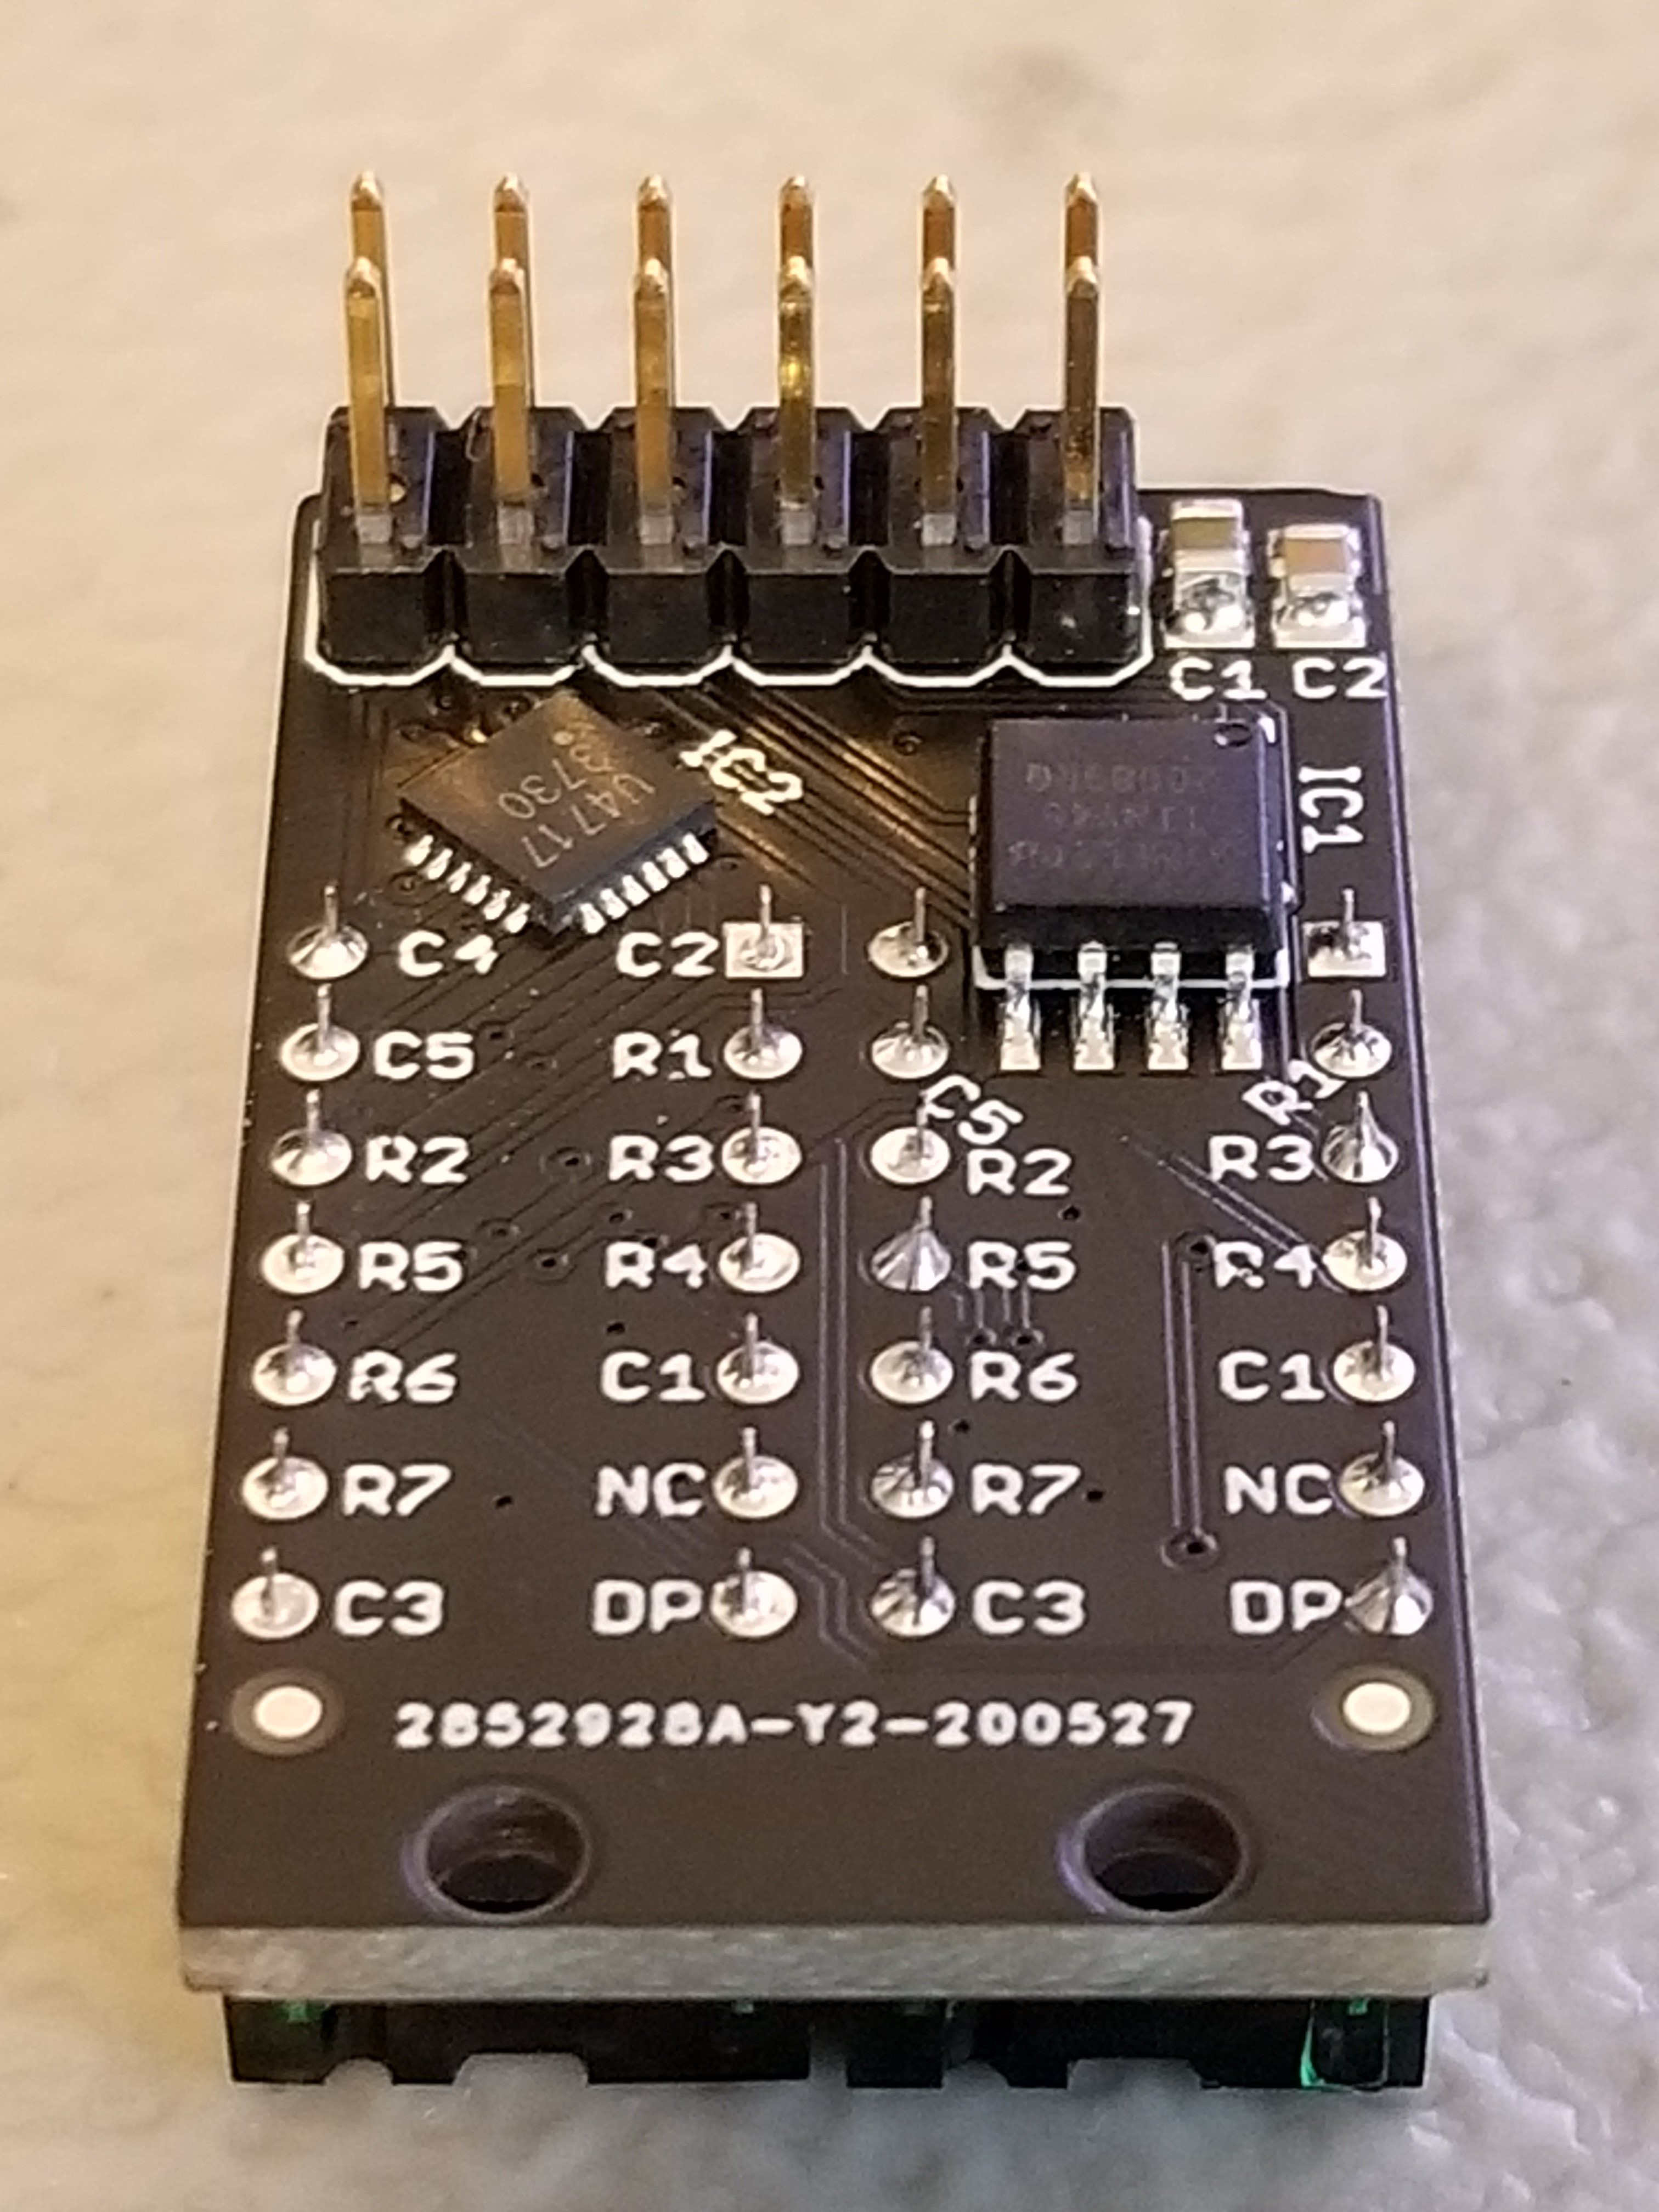
Each Pixie module is designed to host two gorgeous little Lite-On LTP-305G/HR 5×7 LED dot matrix displays, which we suspect have been impulse purchases in many a shopping cart. Along with the displays there is a small matrix controller and an ATTINY45 to expose a friendly electrical interface. Each module is designed to be mounted edge to edge and daisy chained out to 12 or more (with two displays each) for a flexible display any size you need. But to address the entire array only two control pins are required (data and clock).

[lixielabs] has done the legwork to make using those pins as easy as possible. He is careful to point out the importance of a good SDK and provides handy Arduino libraries for common microcontrollers and a reference implementation for the Raspberry Pi that should be easy to crib from to support new platforms. To go with that library support is superb documentation in the form of a datasheet (complete with dimensions and schematic!) and well stocked GitHub repo with examples and more.

To get a sense of their graphical capabilities, check out a video of 6 Pixie’s acting as a VU meter after the break. The Pixie looks like what you get when a hacker gets frustrated at reinventing LED dot matrix control for every project and decided to solve it once and for all. The design is clean, well documented, and extremely functional. We’re excited to see what comes next! Continue reading “A Tiny LED Matrix Is Better With Friends”

Palm-Sized Sixteen Segments Light The Way To Our Hearts

It’s no secret that we here at the Hackaday are suckers for cool display. LEDs, OLEDs, incandescent, nixie or neon, you name it and we want to see it flash. So it fills us with joy to discover a new way to build large, daisy-chainable 16-segment digits, and even more excited to learn how easy they are to fab and assemble.

A cousin of the familiar 7 segment display, the 16 segment gives so many more possibilities (128% more possibilities to be exact) for digit display. To be specific, those extra segments unlock the ability to display upper and lowercase latin characters as well as scads of punctuation.

But where the character set is complex, the assembly is anything but thanks to a great design from [Kolibri] called klais-16. They’re available fully assembled if you want to jump straight to code, but thanks to thorough documentation (seriously, check this out) assembly is a snap.

Each module is composed a very boring PCBA base layer which should be inexpensive from the usual sources, even when ordering one fully assembled. A stackup of three more PCBs are used for spacing and diffusion with plans for die-cut or injection mold layers if a larger production run ends up happening. Board dimensions for each character are 100 mm x 66.66 mm (about 4″ x 2.5″). Put together, each module can stand on its own or be easily daisy-chained together to make a longer single display.

Addressing all those bits with an elaborate, ugly control scheme would be a drag but fortunately the firmware for the onboard STM8 microcontroller exposes a nice boring serial interface which can be used without configuration to display strings. There’s even an example Windows Batch script!

Inventing Networking Protocols For Dozens Of Arduinos

chain

When you don’t want to use I2C or SPI, and MIDI and DMX are old hat, [Scott] comes along and invents a very strange networking protocol that is just daisy chaining a few Arduinos together with serial connections.

Strange as it may seem, this networking protocol actually makes a whole lot of sense. [Scott] is working on an animatronic birdhouse in the vein of Disney’s Imagineers and needed to network a whole bunch of Arduinos without using up precious IO pins.

The networking stack [Scott] came up with capitalizes on the hardware UART in each Arduino by simply daisy-chaining several boards together. By adding an FTDI breakout at the beginning of the chain, [Scott] can control dozens of Arduinos straight from a terminal

[Scott] isn’t using off-the-shelf Arduinos for this project – a few months ago he found 100 Arduino-compatible stepper motor controllers while dumpster diving at his job, giving him more than enough nodes to come up with some pretty crazy networking protocols. It’s a great use of the hardware he has on hand, and a very clever solution to controlling dozens of microcontrollers at once.

Check out [Scott]’s demo after the break.

Continue reading “Inventing Networking Protocols For Dozens Of Arduinos”

Simple MIDI Thru Box

midithru

[Aris] has quite a few MIDI devices that only have in and out ports. To chain together multiple devices, the MIDI slaves must have a “thru” port. Instead of daisy chaining, a better solution is to build a thru box to split the signal from the master. [Aris]’s thru box design uses an optocoupler on the input, which connected to 74HC14 hex inverting Schmitt trigger. The schematic shows three outputs, but there’s room for adding two more. A useful bit of kit for only a two hour job.