Custom Sony Camera Remote Built With ESP32

Whether you’re shooting video or photos, having a camera remote can really improve your productivity. No longer do you have to run back to the camera to press its tiny buttons! [Frank Zhao] is a Sony user, so decided to whip up a custom remote using the ESP32 for his Alpha camera, adding special features along the way.

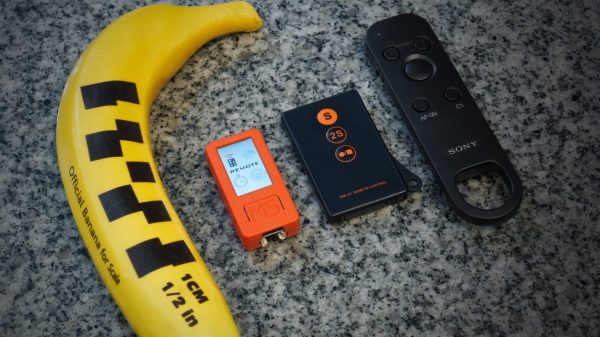
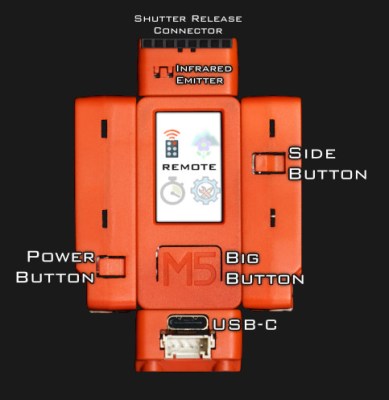
The build communicates with the camera over WiFi, but can fall back to Infrared if there’s an issue with the radio link. It’s built around the M5StickC, which is a pre-built device featuring an ESP32 and a small display in a handheld form factor. It let him build the remote in half the size of the official Sony device. With limited buttons on board, though, he relies on the IMU to control many advanced features with motion gestures.

The remote enables a bunch of functionality that Sony didn’t bake into its cameras from the factory. There’s a sound-activated shutter release, dual shutter mode, and several timer-based tools including astrophotography modes. There’s also a big knob you can add for focus pulls, and a mode to reset the auto-focus when you’re frustrated that it isn’t working properly. Some of the features work better than others, as sometimes, the camera doesn’t respond to commands quickly enough. Regardless, it’s pretty neat that [Frank] has unlocked so much extra functionality with his custom $20 remote.

We’ve seen other homebrewed tools open up new creative possibilities for cameras before, too. If you’ve got your own nifty camera hacks, let us know on the tipsline!

A Pi Camera To Be Proud Of

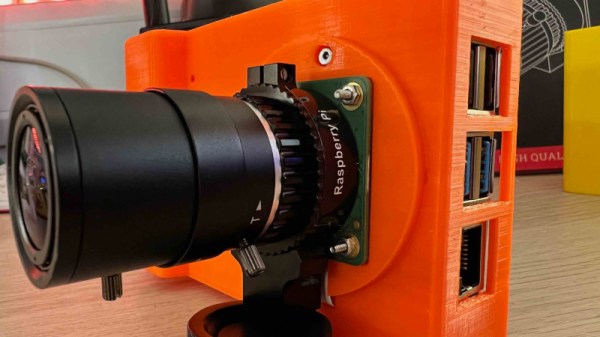
The Raspberry Pi HQ camera has appeared in a variety of builds since its introduction back in 2020, and has brought with it many opportunities for photographic projects to compete with the professionals. The latest we’ve been sent is from [Kevin McAleer], who has taken the camera with a full-size Pi and clothed it in a case very similar to the crop of mirror-less compact cameras.

Inside the box is a Waveshare touchscreen that fits on the GPIO header, and a NanoWave 5000 mAH USB battery pack. The camera module fits on the front of the unit, with the C-mount ready to take a lens. Software is still a work in progress and is promised to be a Python script controlling the various camera programs. There are enough Pi camera projects for software to be a matter of choice and taste.

We like the form factor and we like the use of the very compact NanoWave battery, so we think this is a design with some possibilities. Perhaps a cover over the Pi ports might be of use though for general robustness in the face of everyday photography. The question remains though, whether it can come close to the performance of even a budget mirror-less compact camera, and we’re guessing that will depend as much on the operator skill, lens quality, and software capabilities as it does on the Pi HQ module. We look forward to seeing what comes of this project, but meanwhile you can see a video with all the details below the break.

Continue reading “A Pi Camera To Be Proud Of”

Digital “Toy” Camera, Made For Tilt-Shift And Other Analog-Like Experimenting

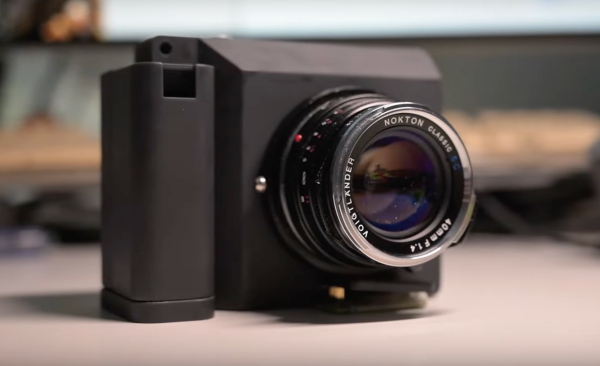
Like many others, [volzo] loves playing with photography in a playful and experimental way. Oddball lenses, vintage elements, and building from kits is what that world looks like. But that kind of stuff is really the domain of film cameras, or at least it was until [volzo] created his Digital Toy Camera design. The result? A self-built, lomography-friendly digital camera that allows for all kinds of weird and wonderful attachments and photo shenanigans.

3D-printed mounts and magnetic attachment makes swapping parts a breeze.

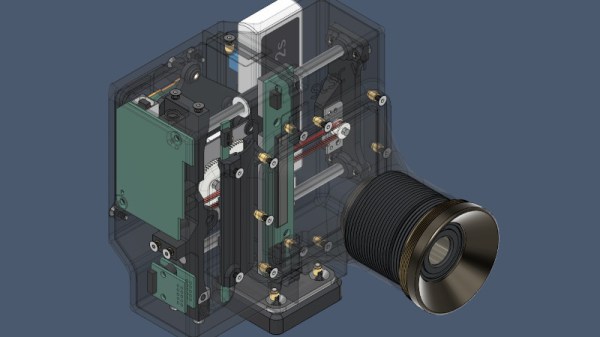
To make a DIY digital camera that allowed that kind of play, the first problem [volzo] had to solve was deciding on an image sensor. It turns out that sourcing image sensors as an individual is a pretty cumbersome process, and even if successful, one still needs to write a driver and create things from the ground up. So, the guts of [volzo]’s creations use the Raspberry Pi and camera sensor ecosystem and M12 lenses, a decision that allows him to focus on the rest of the camera.

3D printing, a bit of CNC machining, and some clever design yields a “toy” camera: simple, inexpensive, and enabling one to take a playful and experimental approach to photography. The design files are available on GitHub, and there are some neat elements to the design. Magnetic mounts allow for easy swapping of lens assemblies, and a M12 x 0.75 tap cuts perfect threads into 3D-printed pieces for M12 lenses.

Heat-set inserts also provide robust fastening that can hold up to disassembly and re-assembly (and don’t miss that our own [Joshua Vasquez] has shared how best to design for and use heat-set inserts.)

[volzo] has a fantastic video to accompany his project; give it a watch (embedded below, under the page break) and see if you don’t come away with some inspiration of your own.

Continue reading “Digital “Toy” Camera, Made For Tilt-Shift And Other Analog-Like Experimenting”

Raspberry Pi Crammed Into Old Film Camera

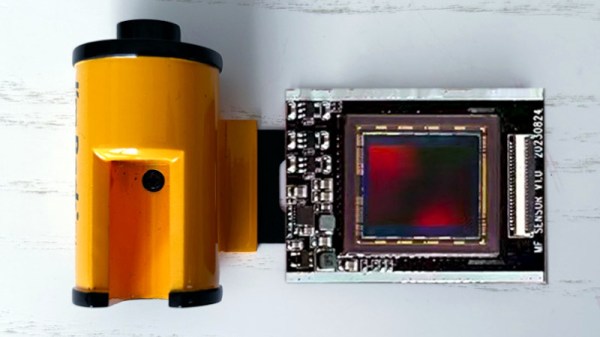
If you wanted an expensive film camera when you were a kid, you are in luck. Used film SLRs are super cheap now that everyone wants digital cameras. Of course, in reality, you want a digital camera, too. So do what [befinitiv] did. Make a film cartridge out of a Raspberry Pi that can convert your camera to digital. (Video, embedded below.)

In theory, this sounds like a genius idea. The practical aspect isn’t perfect, though. For one thing, the small image sensor used means that the camera is zoomed in quite a bit. Also, the shutter button isn’t integrated, so the shutter is open all the time. You may think that doesn’t matter, but don’t forget that the way an SLR works means if the shutter is open, there’s no viewfinder.

Continue reading “Raspberry Pi Crammed Into Old Film Camera”

One Of The Largest Large Format Cameras You Will Ever Have Seen

When fate lands a very high quality lens in front of you, what do you do with it? If you are [Tim Hamilton], the solution is obvious. Use it in a huge large-format camera.

The lens came from a newspaper magnifier made redundant by digitalisation and used as a paperweight. It’s an extremely high quality piece of optical equipment so seeing it wasted in this way was a source of distress. So after characterising it an enormous scaled-up box and bellows was constructed, and set upon a suitably substantial wheeled tripod.

Instead of a huge piece of film or some unobtainable giant electronic sensor, the image is projected onto a large screen at the rear of the camera. A modern digital camera is mounted inside the box just beneath the lens and photographs the screen, resulting in the feel of the largest of large format cameras with the convenience of a digital format. The resulting images have a special quality to them that recalls pictures from the past, and definitely makes the camera a special if slightly inconvenient device.

This may be one of the larger cameras we’ve featured, but it’s not the first that uses a similar technique.

Image Sensors Demystified By [IMSAI Guy]

The February 1975 issue of Popular Electronics had what was — at the time — an amazing project. The Cyclops, a digital camera with a 32 by 32 pixel resolution with 4 bits per pixel. It was hard to imagine then that we would now all carry around high-resolution color cameras that were also phones, network terminals, and so many other things. But how much do you know about how those cameras really work? If you want to know more, check out [IMSAI Guy’s] recent video on how image sensors work.

The video doesn’t cover any practical projects or circuits, but it has a good explanation of what goes on in modern digital cameras. If you don’t know what digital cameras have in common with an octopus, you might want to watch.

If you want to see what the state of the art in 1975 was, have a look at this post. The image sensor in that camera didn’t have much in common with the ones we use today, but you have to admit it is clever. Of course, 1975 was also the year Kodak developed a digital camera and failed to understand what to do with it. Like the Cyclops, it had little in common with our modern smartphone cameras, but you have to start somewhere.

Hacking A Digital Microscope Camera For Fun And Automated PCB Inspection

A desire for automated PCB inspection has led [charliex] down some deep rabbit holes. He’s written his own inspection software, he’s mounted his PCB vise on a stepper-controlled table, and now he’s hacked his digital microscope camera to allow remote and automated control.

Eakins cameras have become a relatively popular, relatively inexpensive choice for electronics hobbyists to inspect their small-scale work. The cameras have a USB port for a mouse and overlay a GUI on the HDMI output for controlling the camera’s various settings and capturing images to the SD card. Using the mouse-based GUI can feel clunky, though, so users have already endeavored to streamline the process to fit better in their workflow. [charliex] decided to take streamlining a few steps further.

One issue in microscope photography is that microscopes have an extremely tight focus plane. So, even at the minuscule scales of an SMD circuit board, the components are simply too tall. Only a sub-millimeter-thick layer can be in focus at a time. If you take just a single image, much of what you want to see will be lost in the blurry distance. Focus stacking solves this problem by taking multiple pictures with the focus set at different depths then combining their focused bits into a single sharp image.

This takes care of the focus issue, but even the most streamlined and intuitive manual controls become tedious given the multitude of pictures required. So [charliex] searched for a way to remotely control his camera, automating focus stacking and possibly even full PCB scans.

Continue reading “Hacking A Digital Microscope Camera For Fun And Automated PCB Inspection”