New Part Day: Time Of Flight Sensors

Every robotics project out there, it seems, needs a way to detect if it’s smashing into a wall repeatedly, acting like the brainless automaton it actually is. The Roomba has wall sensors, just about every robot kit has some way of detecting obstacles its running into, and for ‘wall-following robots’, detecting objects is all they do.

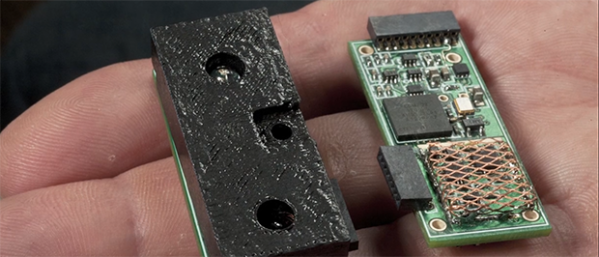
While the earliest of these robots used a piece of wire and a metal contact to act like a switch for these object detectors, ultrasonic sensors – the kind you can buy on eBay for a few bucks – have replaced this clever wire spring switch. Now there’s a new sensor for the same job – the VL6180 – and it measures the speed of light.

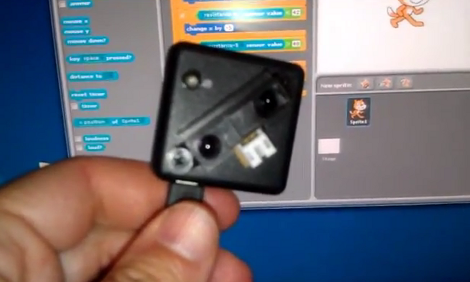
The sensors that are used for object and collision detection now use either ultrasonic or infrared light. They’re susceptible to noise, and if you’re doing anything automated, you really don’t want rogue measurements. A time of flight sensor clocks out photons and records how long it takes them to return at 299,792,458 meters per second. It’s less sensitive to noise, and if you can believe this SparkFun demo of this sensor, extremely accurate

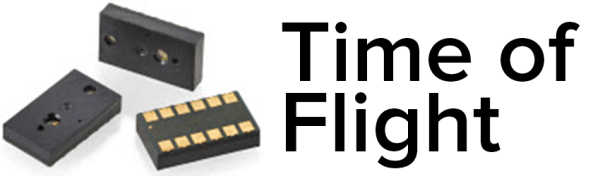
This is not the first Time of Flight distance sensor on the market; earlier this week we saw a project use a sensor called the TeraRanger One. This sensor costs €150.00. The VL6180 sensor costs about $6 in quantity one from the usual suspects, and breakout boards with the proper level converters and regulators can be found for about $25. More expensive sensors have a greater range, naturally; the VL6180 is limited to somewhere between 10cm (on paper) and 25cm (in practice). But this is cheap, and it measures the time of flight of pulses of light. That’s just cool.

LIDAR With LEDs For Under $100

If you need some sort of distance sensor for your robot, drone, or other project, you have two options: a cheap ultrasonic sensor with limited range, or an expensive laser-based system that’s top of the line. LIDAR-Lite fills that gap by stuffing an entire LIDAR module onto a small board.

In traditional LIDAR systems, a laser is used to measure the time of flight for a light beam between the sensor and an object. The very accurate clock and laser module required for this system means LIDAR modules cost at least a few hundred dollars. LIDAR-Lite gets around these problems by blinking a LED with a ‘signature’ and looking for that signature’s return. This tech is packaged inside a SoC that reduces both the cost and size of a traditional laser-based LIDAR system.

As for the LIDAR-Lite specs, it can sense objects out to 40 meters with 5% 95% accuracy, communicates to any microcontroller over an I2C bus, and is small enough to fit inside any project.

Considering the existing solutions for distance measurement for robots and quadcopters, this sensor will certainly make for some very awesome projects.

Edit: One of the guys behind this posted a link to their spec sheet and a patent in the comments

Home Automation Hack Controls Lights Based On Head Count

This home automation hardware turns on and off the lights based on room occupancy. The hack is an extension of an earlier version that was only a proof of concept. [RPisces] took the idea and made it into reality by mounting the sensor hardware in a doorway.

He prototyped the device using the MSP430 launchpad. It monitors a pair of IR distance sensors which record a change when something passes between them and the opposite side of the hallway. This is a good sensor choice as it only requires hardware on one side of the passageway. Because two of them are used, it’s quite simple to figure out if a person is entering or leaving the room based on which is tripped first.

In this case [RPisces] drives a relay to switch a lamp on and off. But it could be used for just about anything. We’d enjoy seeing it trigger an audio system like the one [Quinn’s] installing in every room.

Proximity Switch For Your Mains Devices

[Ivan’s] friend built a proximity sensor to switch his LED bench lighting off every time he walked away. The idea is pretty neat, so [Ivan] decided to implement it for mains devices by making this proximity switched outlet box.

A Sharp GP2D12 infrared distance sensor is the key to the system. It has an emitter and receiver that combine to give distance feedback base on how much of the light is reflected back to the detector. This is presented as a voltage curve which is monitored by an ATtiny85 (running the Arduino bootloader). It is small enough to fit inside the outlet box along with a tiny transformer and linear regulator to power to logic circuitry. The mains are switched with a relay using an NPN transistor to protect the chip’s I/O pins.

Check out the video after the break to see this in action. It should be a snap to add a count-down timer that gives you a bit more freedom to move around the workshop. With that in place this is a fantastic alternative to some other auto-shutoff techniques for your bench outlets.

Continue reading “Proximity Switch For Your Mains Devices”

Building Sensors For The Scratch Programming Language

[Kevin Osborn] is making it a bit easier for young programmers to write programs that interact with the physical world. The device he’s holding in the picture is an Arduino based accelerometer and distance sensor meant for the Scratch language.

Scratch is a programming language developed at MIT. It has kids in mind, and focuses on graphical building blocks. This can make it quite a bit easier to introduce youngsters to programming concepts without the roadblocks and gotchas that come with learning syntax.

As you can see in the clip after the break, [Kevin’s] Arduino sketch includes hooks that automatically pull the accelerometer and distance data into the Scratch environment. We figure his example provides everything you need to get just about any type of sensor up and running, be it a magnetometer or LDR (both of which would make a nice burglar-alarm type project). Give it a try with your own hardware and see what you can accomplish.

Continue reading “Building Sensors For The Scratch Programming Language”