A pair of hands hold two dark brown boards perpendicular two each other on a light brown benchtop. There are two light brown oval dowels in the end of one board that then project toward holes in the opposite board. Circular holes in the oval dowels are visible perpendicular to the second board, and will match up with holes in the board once pressed in. A cylindrical dowel is laying next to the joint and will be placed into the circular holes once assembled.

Creating A Signature Wood Joint

We really love when makers make their construction techniques evident in an aesthetically-pleasing way, and [Laura Kampf] has created a clever joint that reveals how a piece is made.

[Kampf] is a big fan of using her domino joiner, which is similar to biscuits or dowel joinery, but she didn’t love how it hid the construction of the joint. She first figured out an “off label” use of the joiner by running it from the outside of the joint to show the exposed domino from one end.

Building on the concept to show an interesting contrast on both sides of the joint, she drilled a hole perpendicular the domino and placed a dowel through it, creating a locking joint. The choice looks great once a finish is applied to really accentuate the contrast, and another bonus is that if glue is only applied to the dowel and domino, it becomes trivial to separate the joint if needed by drilling out the dowel.

If you’d like to see some other interesting ways to join wood, how about this laser-cut wedge tenon, soda bottle heat shrink, or this collection of CNC joints.

Continue reading “Creating A Signature Wood Joint”

Make Your Own Dowels At Home

Dowels are a useful woodworking technology making it easy to connect several pieces of timber, particularly with the aid of adhesive. However, depending on where you live, it can be difficult to come by a wide variety of stock. This is particularly important if you’re concerned about appearances – cheap pine dowels could spoil the look of a delicately finished hardwood piece, for example.

Thankfully, it’s easy to make your own dowels at home. [Pask Makes] has used a simple dowel plate before, but this time, decided to build the deluxe version. A thick steel plate is drilled with a series of holes, and then mounted to a wooden block. Square stock can then be forced through the holes to produce the dowels.

[Pask] notes that there are several methods to use the dowel plate. Hammering the wood stock through the holes works best for hardwoods, while fitting the square stock into the chuck of a power drill and forcing it through while spinning gives a better finish on softer woods. There are also useful tips on how best to produce dowels, with notes on strength and grain orientation.

It’s a useful tool to have in your workshop, and means you can turn just about any wood into dowels for your woodworking projects. If you’re fresh to the world of wood, worry not – we’ve got the primer to get you started. Video after the break.

Continue reading “Make Your Own Dowels At Home”

Pool Ball Return System Chalked Up To Ingenuity

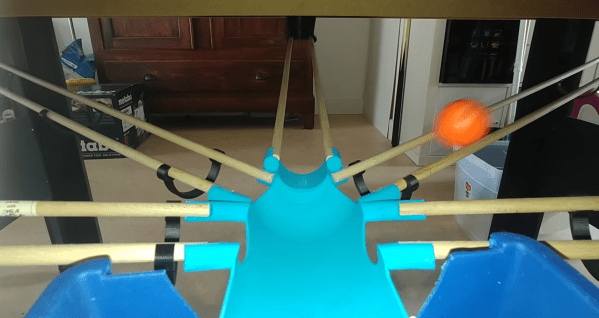
Do you play pool? If so, you probably take the automatic ball return systems in bar and billiard hall tables for granted. [Roger Makes] was tired of walking around his home table to collect the balls every time he wanted to play, so he designed a time-saving ball return system.

Instead of falling into the little netted baskets that came with the table, the balls now drop into 3D-printed pockets and ride along dowel rod rails into a central collection box, which is suspended by straps beneath the rack-em-up end of the table. The rails themselves are fortified with ABS ribs that keep the balls from falling through.

Pool is all about geometry, and this really hit home when [Roger] was trying to merge the funnel part of the pocket with the exit chute in the design phase. He covered all the angles with a modular design that lets the chute rotate freely, which takes a lot of stress away from the dowel rods. We’ve got the video cued up after the break, so don’t bother with getting out your film canister full of quarters.

We can’t wait to see what [Roger Makes] next. Maybe it’ll be something like this OpenCV score-keeping system.

Continue reading “Pool Ball Return System Chalked Up To Ingenuity”

Print Your Own Vertices For Quick Structural Skeletons

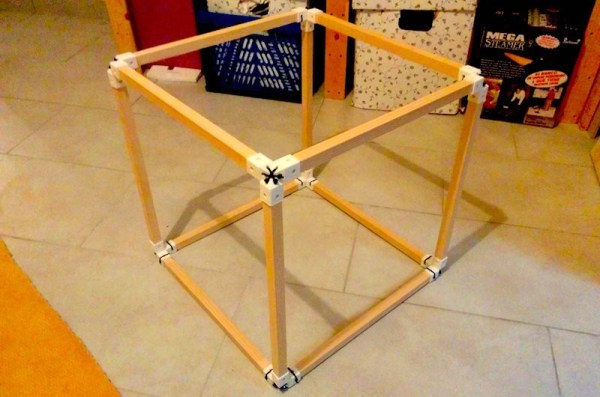
3D printing is great for a lot of things: prototyping complex designs, replacing broken parts, and creating unique pencil holders to show your coworkers how zany you are. Unfortunately, 3D printing is pretty awful for creating large objects – it’s simply too inefficient. Not to mention, the small size of most consumer 3D printers is very limiting (even if you were willing to run a single print for days). The standard solution to this problem is to use off-the-shelf material, with only specialized parts being printed. But, for simple structures, designing those specialized parts is an unnecessary time sink. [Nurgak] has created a solution for this with a clever “Universal Vertex Module,” designed to mate off-the-shelf rods at the 90-degree angles that most people use.

uvm_configurations

The ingenuity of the design is in its simplicity: one side fits over the structural material (dowels, aluminum extrusions, etc.), and the other side is a four-sided pyramid. The pyramid shape allows two vertices to mate at 90-degree angles, and holes allow them to be held together with the zip ties that already litter the bottom of your toolbox.

[Nurgak’s] design is parametric, so it can be easily configured for your needs. The size of the vertices can be scaled for your particular project, and the opening can be adjusted to fit whatever material you’re using. It should work just as well for drinking straws as it does for aluminum extrusions.

DIY Clamp Helps With Surface Mount Soldering

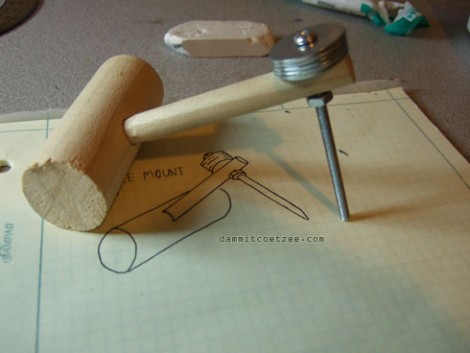
Hackaday writer [Gerrit Coetzee] built a simple clamp to aid in surface mount component soldering. This cheap, easily made device uses gravity to hold tiny components in place. The tip of the bolt is pointed, but gently like a ballpoint pen so as not to harm the components with a sharp tip. Roughly position your component, rest the tip of the clamp on its center, then nudge for final positioning. [Gerrit] also points out that this acts as a heat sink, helping to prevent damage to the component if you’re too lethargic with the soldering iron.

It seems like this device has been around in one form or another for quite a long time. But the best ideas do keep on popping up. Another nice tip to go along with this one is the use of a dowel when ironing during toner transfer for your PCBs.

Replace Batteries With USB Power

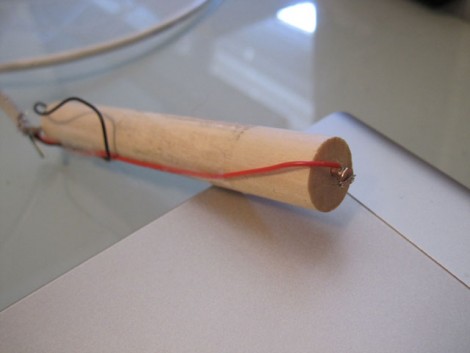
[Mark Bog] thought it was a waste to use batteries for his desktop touch pad. Quite frankly we agree that if you can avoid using disposable cells you should. He ditched the dual AA batteries inside of his Magic Trackpad and built a battery-sized adapter to feed it some juice. It consists of a dowel of similar diameter with a screw in each end. He scavenged a USB cord, connecting hot and ground wires to the corresponding pole of the adapter. Now his Trackpad is USB powered and never in need of a battery replacement or even a recharge.

We’re not familiar with the inner workings of Apple’s Magic Trackpad. We assume there’s a voltage regulator inside and we hope it doesn’t have a problem working with the 5V regulated power coming in from the adapter. If you’ve got the skinny on the hardware we’d love to hear about it in the comments. One last thing: because the forum linked above requires a login to view the images in the post, we’ve embedded the rest of them after the break for your convenience.

Continue reading “Replace Batteries With USB Power”

Drilling Perfectly Centered Holes

If you’ve ever been caught in the situation of needing to drill a clean straight hole down the center of a bolt or rod, you’ve probably tried and ended up with a broken bit or tilted hole, and a ton of cursing to boot.

[Vik] let us know about this nifty trick for drilling ‘down the middle’ using a simple hobby drill press and vice. He claims it’s ‘physics guiding the bit’ but in reality its just crafty use of a chuck. Either way the quick trick works, and will hopefully save a lot of hackers some headaches in the future.

Let us know in the comments if you have any simple quick tips that you use when you’re out in the shop.