Preserving Floppy Disks Via Logic Analyser

The floppy disk is a technology that is known only to the youth of today as the inspiration for the Save icon. There’s a lot of retro computing history tied up in these fragile platters, thus preservation is key. But how to go about it? [CHZ-Soft] has found an easy way, using a logic analyzer and a healthy dose of Python.

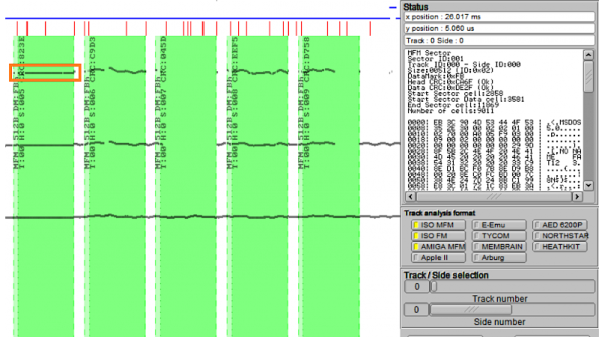
Floppy drives have particularly low-level interfaces, offering up little more than a few signals to indicate the position of the head on the disk, and pulses to indicate changes in magnetic flux. The data is encoded in the pattern of flux changes. This has important implications as far as preservation goes – it’s best to record the flux changes themselves, and create an image of the exact magnetic state of the disk, and then process that later, rather than trying to decode the disk at the time of reading and backing up just the data itself. This gives the best likelihood of decoding the disk and preserving an accurate image of floppy formats as they existed in the real world. It’s also largely platform agnostic – you can record the flux changes, then figure out the format later.

[CHZ-Soft] takes this approach, explaining how to use a Saleae logic analyser and a serial port to control a floppy drive and read out the flux changes on the disk. It’s all controlled automatically through a Python script, which automates the process and stores the results in the Supercard Pro file format, which is supported by a variety of software. This method takes about 14MB to store the magnetic image of a 720KB disk, and can even reveal a fingerprint of the drive used to write the disk, based on factors such as jitter and timing.

It’s an impressive hack that shows that preservation-grade backups of floppy disks can be achieved without spending big money or using specialist hardware. We’ve seen other projects in this space before, too.

CES 1996 Las Vegas Convention Center

Retrotechtacular: HGTV, The Place For Everything CES 1996

It’s January, and that means it’s time once again for the Consumer Electronics Show. CES is the place where electronic manufacturers from all across the globe to show off their future products and make promises they probably can’t keep. Of course there is no better indicator of a company’s future than looking at the past, and thanks to [Home & Garden Television] we have a comprehensive look at what CES was twenty three years ago. The cable channel aired a special, “Plugged In with Wil Shriner”, covering CES 1996 and it is certainly illuminating to see in hindsight. Plus it even comes complete with “cable money” tier mid 90s motion graphics.

Over on YouTube, user [videoholic] has uploaded the HGTV CES ’96 special into five separate segments (links provided below). Some of the highlights include:

Part 1 – Home Video

  • Canon introduces IR eye tracking (akin to the New 3DS) in their camcorder line
  • Dual recording VCR from Sharp on one VHS tape provided you can fix the tracking with the remote.
  • The term “I triple E 1394” may just have been said for the first (and last) time ever on cable television.

Part 2 – Audio

  • A digital alarm clock from Oregon Scientific (called the Time Machine) that will tell you the weather.
  • Magellan thought, “Who needs a cell phone when you can have a satellite phone for $8000”.
  • Soundtube, the fashionable beer cozy for your gigantic speakers as seen on MTV Beach House.

Part 3 – Games & Multimedia

  • Noise Cancellation Technologies INC wanted to turn your cars headliner into a big ol’ speaker.
  • Cyber Pong promised online multiplayer a full decade before Rockstar’s Table Tennis on Xbox 360.
  • The Simpsons Cartoon Studio helps create fan fiction on multimedia CD-ROM.

Part 4 – Home & Office

  • Compaq’s PC keyboard with an integrated fax machine.
  • Norris Communication’s handheld voice recorder full of flash memory to offload to your PDA.
  • Crestron’s idea of home automation involved a touchscreen to operate a light switch (some things never change).

Part 5 – Digital Video

Make Your Own Dowels At Home

Dowels are a useful woodworking technology making it easy to connect several pieces of timber, particularly with the aid of adhesive. However, depending on where you live, it can be difficult to come by a wide variety of stock. This is particularly important if you’re concerned about appearances – cheap pine dowels could spoil the look of a delicately finished hardwood piece, for example.

Thankfully, it’s easy to make your own dowels at home. [Pask Makes] has used a simple dowel plate before, but this time, decided to build the deluxe version. A thick steel plate is drilled with a series of holes, and then mounted to a wooden block. Square stock can then be forced through the holes to produce the dowels.

[Pask] notes that there are several methods to use the dowel plate. Hammering the wood stock through the holes works best for hardwoods, while fitting the square stock into the chuck of a power drill and forcing it through while spinning gives a better finish on softer woods. There are also useful tips on how best to produce dowels, with notes on strength and grain orientation.

It’s a useful tool to have in your workshop, and means you can turn just about any wood into dowels for your woodworking projects. If you’re fresh to the world of wood, worry not – we’ve got the primer to get you started. Video after the break.

Continue reading “Make Your Own Dowels At Home”

Vintage Programmer Gets Modern Chip Adapter

While trying to revive a Donkey Kong Jr arcade board, [Jelmer Bruijn] found himself in the market for an EPROM programmer and became the proud owner of a 1990’s era Dataman S4. Despite its age, it’s a fairly nice tool which allows you to read and write a laundry list of different EPROM types, all without being tied to a computer. The only catch is that a few types of chips need an adapter to work in the Dataman S4, some of which are unsurprisingly no longer available.

After some above and beyond support from the current crew at Dataman set him on the right track, [Jelmer] decided to try his hand at reverse engineering how the old adapters worked so he could build his own. His ultimate goal was to read 40 pin EPROMs on the 32 pin Dataman S4, but in the end he says the information he gathered should be applicable for building other adapters if you ever find yourself in need of such things.

As you might expect, there’s a bit more to the project than a simple pin adapter. [Jelmer] assumed some kind of shift register or latching arrangement would be required to make up for the shortage of pins on the Dataman S4’s ZIF socket. It was just a matter of figuring out how it all went together.

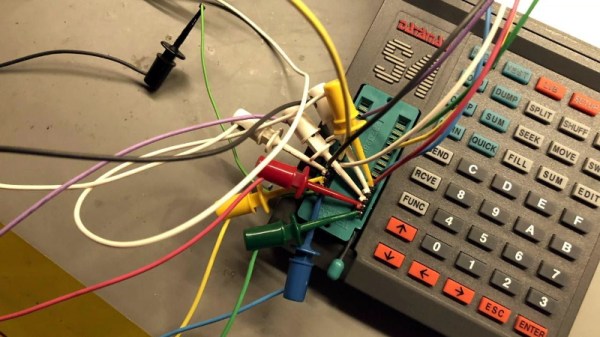
Luckily, [Jelmer] found that the programmer would happily attempt to perform operations on a 16 bit EPROM even though no adapter was physically present. This gave him a chance to probe around with a logic analyzer to figure out what it was trying to accomplish. The trick turned out to be splitting the 16 bit bus into two 8 bit buses which are requested sequentially.

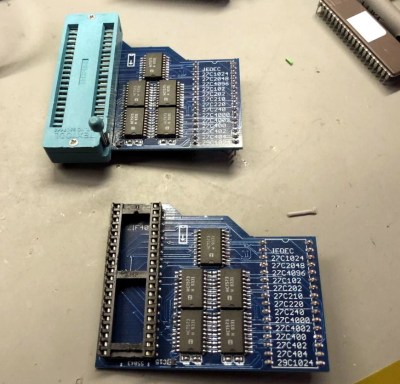
With careful observation, close studying of 16 bit chip datasheets, and much brow furrowing, he was eventually able to come up a design that used five 74xx573 latches and put a schematic together in Eagle. There were a few kinks to iron out when the boards finally arrived, but ultimately the design worked on the first try. [Jelmer] says the same technique should work for 42 pin EPROMs, but as Dataman still actually sell adapters for those he decided not to supply schematics for it.

[Jelmer] tells us that he was inspired to send this success story our way after reading how our very own [Elliot Williams] took the long away around to erase a couple UV EPROMs recently While this isn’t the first time we’ve seen somebody have to hack support for 16 bit EPROMs into their programmer, it’s good to see that the manufacturer at least had the customer’s back in this case.

Bad Apple!! Via The Arduino Mega

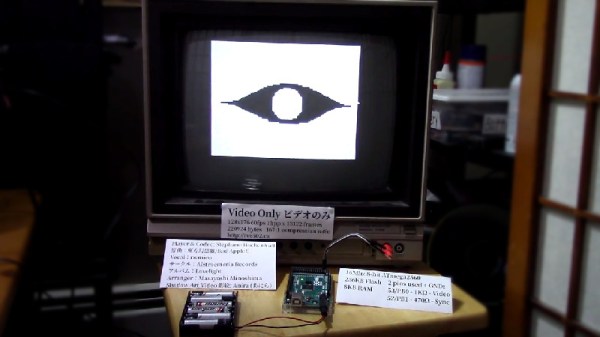
The Arduino Mega is a useful tool for the maker. Generally, once one has come up with plans for blinking LEDs that require more IO than is available on the Arduino Uno, one graduates to the Mega and goes for broke. However, it’s not typically what we’d consider as our first choice for video work. [Stephane] begs to differ, and coded this Bad Apple!! demo for the Arduino Mega 2560.

For those unfamiliar, video on the Arduino is actually somewhat of a solved problem – merely requiring a pair of resistors and some nifty code. The real meat of this hack is the video storage itself. It’s been done before, but by streaming data off an SD card or serial link. [Stephane] was determined to store everything on the Arduino itself, and thus the hack begun. Video data is stored as 1 bit per pixel, as it’s a simple black and white video as per the original inspiration. LZ77 compression was used to cram the data down without requiring too much RAM, which is a limited resource on the Mega. It’s video only, as the Mega is tapped out handling 3 minutes and 39 seconds of video storage, but future work may include syncing with a second Arduino to deliver the soundtrack.

It’s a hack that shows off [Stephane]’s ability to get impressive performance out of limited platforms. We’ve seen this before, with his excellent Star Fox port to the Arduboy. Video after the break.

Continue reading “Bad Apple!! Via The Arduino Mega”

Irène Joliot-Curie And Artificial Radioactivity

When Marie and Pierre Curie discovered the natural radioactive elements polonium and radium, they did something truly remarkable– they uncovered an entirely new property of matter. The Curies’ work was the key to unlocking the mysteries of the atom, which was previously thought to be indivisible. Their research opened the door to nuclear medicine and clean energy, and it also led to the development of nuclear weapons.

Irène Joliot-Curie, her husband Frédéric, and many of their contemporaries were completely against the use of nuclear science as a weapon. They risked their lives to guard their work from governments hell-bent on destruction, and most of them, Irène included, ultimately sacrificed their health and longevity for the good of society. Continue reading “Irène Joliot-Curie And Artificial Radioactivity”

An Electronic Love Letter To The Wind

Home weather stations are a great way for hackers and makers to put their skills to practical use. After all, who wants to hear the current conditions for the whole city when they could setup their own station which drills that information down to their very own street? Such a setup doesn’t need to be any more complex than a temperature sensor wired up to a microcontroller, but then not all of us are quite the weather fanatic that [Richard] clearly is.

The system he’s built to monitor the wind over his home is, to put it mildly, incredible. We might not all share the obsession [Richard] apparently has with the wind, but we can certainly respect the thought and design that went into this comprehensive system. From his scratch built anemometer to the various ways he’s come up with to display the collected environmental data throughout his home, if this build doesn’t inspire you to hack together your own weather station then nothing will.

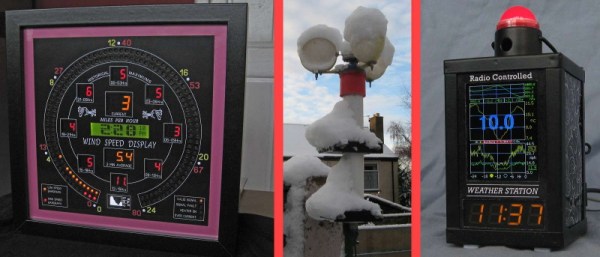
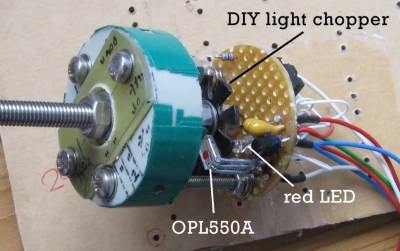
At the heart of the system is the anemometer itself, which makes use of several scavenged parts such as the bottom halves of plastic Easter eggs as wind cups. The cups spin on a short length of M5 threaded rod inside of a 635ZZ bearing, which ultimately rotates a “light chopper” placed between a red LED and a OPL550A optical sensor. In a particularly nice touch, [Richard] has even included a few power resistors arranged around the moving parts to use as a heater which keeps the device from freezing up when the temperature drops. The sensor creates eight digital pulses per revolution, and feeds data into the base station though a 30 meter (98 feet) cable.

From there, the base station uses an ESP8266 to upload wind and temperature data to ThingSpeak and Weather Underground to be viewed through their respective web interfaces and applications. The project really could have ended here and still been impressive in its own right, but the station also includes 433 MHz and NRF24L01 transmitters to send the data to the other display devices which [Richard] has designed.

The 433 MHZ display is built into the frame of a lantern, and shows the current time and temperature on an LED readout as well as historical wind and temperature graphs on a 2.2 inch ILI9341 TFT screen which [Richard] has rotated into a portrait layout. There’s a red light on top that blinks whenever a signal is received to show that the system is working, and even a touch sensor which can be used to turn off the TFT screen at a tap if you’re not interested in seeing the full charts.

The other display, which [Richard] calls the “picture frame” utilizes a dizzying array of single LEDs, a handful of digital LED readouts, and even an OLED screen for good measure. They all work together to show the current wind speed as well the averages for the past day in three hour segments. As this display features a real time display of current wind conditions and averages for as short a period of two minutes, it uses the NRF24L01 receiver to get data from the base station at a rate of 3 Hz.

In the past we’ve seen 3D printed weather stations, and of course some pretty simple affairs using little more than an ESP8266 board and some sensors. But few have ever put so much thought into how to present the collected data to the user. If you’re serious about knowing what it’s like outside the confines of your bunker, [Richard] has got some tricks to show you.

Continue reading “An Electronic Love Letter To The Wind”