Building A Raspi Case In True Hackaday Fashion

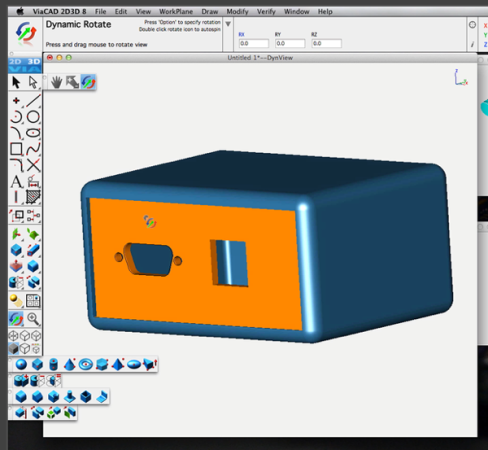
[Ben] needed a case for his Raspberry Pi. Instead of going the usual laser-cut plastic or 3D printed route, he took a path far more familiar to us here at Hackaday. His case is built out of aluminum found in his basement, providing a neat reuse for some old aluminum extrusion he had lying around.

Part one of [Ben]’s thoroughly documented build goes over the process of acquiring some of this very handy aluminum extrusion. Part two covers a very neat feature of [Ben]’s scrap of aluminum: because of a pair of internal chamfers, [Ben] was able to mount his Raspi and USB hub to a separate piece of PVC and slide the whole assembly in.

The final assembly included dremeling a piece of aluminum plate for the Raspi and USB hub ports and wiring the whole thing together.

Right now the newly enclosed Raspi is working happily as [Ben]’s home server. Not exactly the use case a rugged aluminum case would see the best use from, but it looks great all the same.

This Diy Fume Extractor Will Be A Showpiece For Your Workbench

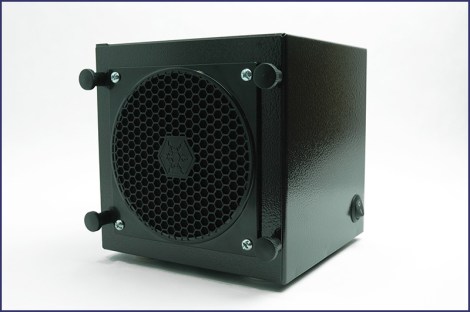
We have no idea how well this diy fume extractor works, but it sure does look great! We’ve been thinking that it’s time to stop trying to blow away the solder fumes while working on project and this might be just the kind of motivation we need. The 6″ cube doesn’t get in the way of your work, and since it includes a carbon filter it should keep the smell of burning flux to a minimum.

[Jeff’s] project basically brings together a 120mm PC cooling fan with a power source. The fan mounts inside of a steel enclosure he picked up from Digikey. The face plates that come with it were modified to accept the fan, as well as the grill hardware that goes with it. Before assembling he painted the box with some Rustoleum “Hammered” black spray paint. This gives it a texture that will hide any imperfections in your application.

We’re a bit hazy on how this is being powered. It sounds like he’s plugging the cord into mains but we don’t see any type of regulator to feed what must be a 12V DC fan. There are build instruction available but they didn’t clear up our confusion.

Summer Vacation Home For The Indoor Cats

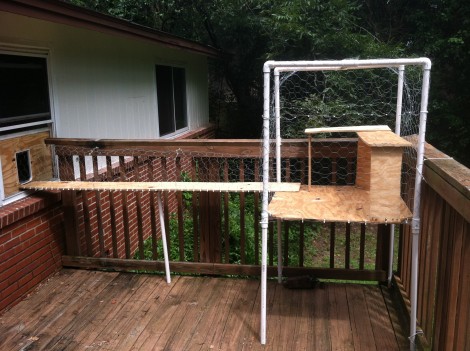
Throw your indoor cat a bone (or a tuna steak as it were) this year by building them a summer vacation spot. Since [Travis Brown] lives on a busy street he worries that his cat would get hit by a car if allowed to roam outside. He and a friend found a suitable alternative with this outdoor cat enclosure.

The centerpiece of the build is a platform that overlooks the back yard. It’s got a couple of different levels which lets the cat see over the deck railing, and provides a bit of shade from the sun during the day. Chicken wire encloses the entire structure to make sure our feline friends don’t go off on their own, but the gang-plank that connects the platform to the house lets them decide when to go outside or come back in. The entrance to the house is an open window covered with plywood and fitted with a cat door. This is a nice touch since the cat door can be locked to keep them in a night.

Between this for summer and the heated bed for winter you’re going to have the most spoiled cat on the block.

Raspberry Pi Case Roundup

raspberry-pi-case-roundup

If you haven’t heard of it yet, the [Raspberry Pi] is all the rage on [HAD] these days, so why not a round up of some of the excellent cases available?

[Nhslzt] wrote in to tell us about his laser cut Bramble Pi finger jointed case.  These are available for only 12 Euros, or roughly $14.95 in the US. Sure, the exchange rate may not be in America’s favor these days, but it’s cheaper than a trip to Dresden, Germany where some of the profits from this are to go towards setting up a makerspace there!

If you’re feeling more into the additive 3D printing DIY process, why not just download one and make it on your printer? [Thingiverse] has an excellent selection of cases many featuring, as you may have guessed, a picture of a Raspberry on the top!  (Here’s the printed case pictured).

Finally for something more colorful (see the pic after the break), you can’t get much better than the [Pibow]. If you’re looking for something colorful, and very solid (as described) this may be the case for you! You can order one here or use the unique design to inspire your own case (Thx Brian!).

As for stuff that we’ve already written about at HAD, this case looks quite slick made out of black acrylic, as does this one, combining the use of a laser cutter and 3D printer. Of course, if you’re going for the strictly utilitarian model, you can always go with one held together with rubber bands and tape!

Continue reading “Raspberry Pi Case Roundup”

Raspberry Pi Enclosure Turns It Into A Desktop PC

While you’re still waiting for your Raspberry Pi to be delivered, why not build an enclosure for it? This build comes from the fruitful workshop of [builttospec], and gives the Raspi a very nice case well-suited for being placed on your desktop.

Like most of [builttospec]’s case builds, this enclosure was made on a laser cutter out of acrylic and features everything you would expect in a good Raspi enclosure. All the hardware ports are available, and there’s also a slot for a GPIO ribbon cable, perfect for connecting an enclosed Raspi to whatever hardware project you’re working on.

One thing we’re loving about [builttospec]’s enclosure is the tasteful use of light pipes that funnel the light from the LED indicators on the Raspi to the surface of the case. Sure, they’re just a few bits of laser-cut polycarbonate, but its little touches like this that transform a good case build into a great one.

Files available on Thingiverse.

Building Better Cases With A Laser Cutter

[Ryan] just got his Raspberry Pi, and what better way to add a new toy to your workbench than by building a case for it? Using a laser cutter and 3D printer, [Ryan] managed to make a case that is sure to be the envy of all the other tinkerers at his hackerspace.

The build started off with a piece of dark red acrylic in a laser cutter. After cutting the Raspberry Pi logo out of this acrylic, [Ryan] cut the same logo – a little bit larger – out of plywood. Because he was very careful to measure the kerf (or the width of the laser beam/saw blade/what have you), the wooded version of the Raspi logo fit snugly inside the acrylic cut out.

The sides of the enclosure are a single piece of plywood with a kerf bend, making for a very attractive rounded case. Finally, the Raspberry Pi is mounted on a Pi plate printed on a Ultimaker.

For as many builds we see using a laser cutter here on Hackaday, there’s surprisingly little information on exploiting the true potential of these machines with marquetry, intarsia, or fretwork. Enclosures are always cool, so if you have a very elegant laser cut box, send it in and we’ll put it up.

Make Your Next Enclosure Out Of Stone

Sure, a laser-cut plywood enclosure adds a lot of maker cred, and custom plastic or cast aluminum enclosure belies an engineering and design prowess. [ardiyno] didn’t want one of these run-of-the-mill enclosures, so he made one from scratch out of limestone.

The stone [ardiyno] used comes from the southern bit of his native Netherlands. It’s a very nice limestone, easily carvable and capable of very fine detail as seen in [ardiyno]’s scary/creepy carved limestone bookends.

Inside the enclosure, [ardiyno] has a calendar/clock/environmental sensor displaying the current date, time, relative humidity, and light level on twelve 14-segment displays. [ardiyno] admits the enclosure is a bit oversized for how much space his project takes up, but the extra space is meant for future internal expansions.

After the break, you can check out [ardiyno]’s method of using a screw driver to carve the limestone. Normally, we’d call foul over someone abusing tools, but the limestone is so soft (the pyramids were made out of limestone using soft copper tools), there’s most likely very little damage to the screwdriver.

via reddit

Continue reading “Make Your Next Enclosure Out Of Stone”