Quick-Swap Socket For Stemma QT Experiments

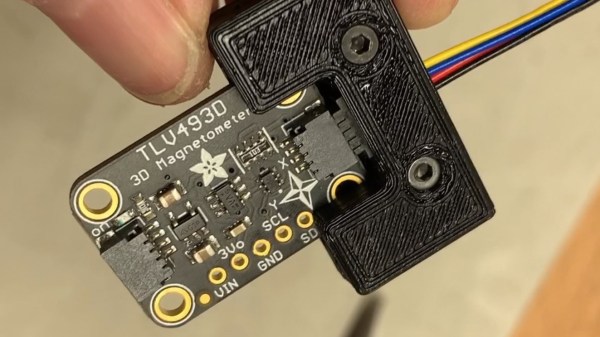
[kmatch98] shares a quick hack with us over at Hackaday.io – a 3D-printed socket for Adafruit Stemma QT-based I2C modules. Since Adafruit has standardized the dimensions for their Stemma QT boards, it’s possible to make a socket that would fit many different sensors at once, where the board just slides in.

This reminds us of sci-fi datadisks, or, thinking of something more grounded in reality, game console cartridges – except that here, the fun you’re having is from exploring all the different devices you can get to speak I2C. To make such a socket, you only need to 3D-print two plastic parts, put a JST-SH plug between them, and screw them together – if you want to modify these to your liking, .f3d sources are available. Now you no longer have to use fingernails or tin snips to take the JST-SH plug out of your modules!

[kmatch98] is no stranger to sharing his projects on Hackaday.io with us, and we’ve covered some of his larger projects before, like this CircuitPython-powered cyber-duck cyberdeck, or the 3D-printable Maypole braider machine!

A 3D-printed macropad that needs no solder or screws.

Snap-Together Macropad Does It Without Solder

Maybe we’re biased, but we think everyone has a use for a macropad. It’s just a matter of time before a highly personalized set of speed controls starts to sound like a great time-saving device to have around.

The column wire is red, and the row wire is blue. A printed clip snaps on to separate the two.Trouble is, macropads are usually kind of expensive to buy outright, and not everyone feels comfortable building keyboards. Okay, so what if you didn’t even have to solder anything? That’s the idea behind [Jan Lunge]’s hand-wired macropad.

You will still want to open a window for ventilation if you build this one, because this macropad requires a lot of 3D printing. What it doesn’t require is glue or screws, because everything snaps together.

Of course, the star of this build is [Jan]’s hot swap socket design. We especially love the little clip that holds the column wires in place while also providing a spacer between those and the row wires. Everything is connected up to a Pro Micro with non-insulated wire and held in place with bends at the ends and the magic of tension. Be sure to check out the build video after the break.

Thirsty for more than a six pack of switches? This design is easy to scale up until you run out of microcontroller inputs. At that point, you might want to add screens to keep track of all your macros.

Continue reading “Snap-Together Macropad Does It Without Solder”

Printable Hot-Swap Sockets Make Keyboard Building Even Cooler

Okay, so you want to build a keyboard — something crazy-curvy like the dactyl or dactyl manuform. The kind of keyboard that has to be hand-wired, because key wells and rigid PCBs do not play well together. You want to build this keyboard, but all that hand-wiring would mean that you can’t easily swap switches later. And it will means hours and hours of fiddly soldering. What do you do? You could buy or design your own switch PCBs, but again, those are rigid and space is limited inside of most of these designs.

If you’re [stingray127], you trade those hours of soldering for a week of designing and printing some sweet little hot-swap sockets with wire guides. This is version four, which is easier to print than earlier versions. They are designed to use through-hole diodes and 24 AWG solid-core wire and give a tight fit. Can’t figure out how to use them? [stingray127] has a wiring guide with plenty of pictures.

We really like this idea, and it makes the end result feel more like a totally hand-wired keyboard than individual switch PCBs would As you can see, it involves little solder. The only downside is that you can only swap a few switches at a time, otherwise the matrix might fall apart. But that’s hardly even a downside.

Just want to make a macropad? You can easily print your way out of using a PCB for those, too.

Via KBD and r/mk

Launching An Open Source Keyboard; System76 Has Published Their Design Files

System76, a computer manufacturer known for selling machines which run Linux, recently unveiled the complete sources for their forthcoming Launch mechanical keyboard. Made with familiar tools, mass produced, and backed by a stable company it looks like the Launch will be a compelling entrant into the world of mechanical keyboards.

Back in March of 2020 System76 published a blog post about a new project they were embarking on; a mechanical keyboard with an unusual layout. At the time there was scant information available besides a summer 2021 target and little was heard until last week when they opened up access to the Launch repository. Everything should be recognizable if you’ve ever looked at the sources for a customized mechanical keyboard before, which is what gets our attention. Electrical sources are authored with KiCad and should be easy to tweak or fabricate. And mechanical components are provided in STEP files with mechanical drawings, presumably because they intend to actually manufacture these.

launch-chassis.png
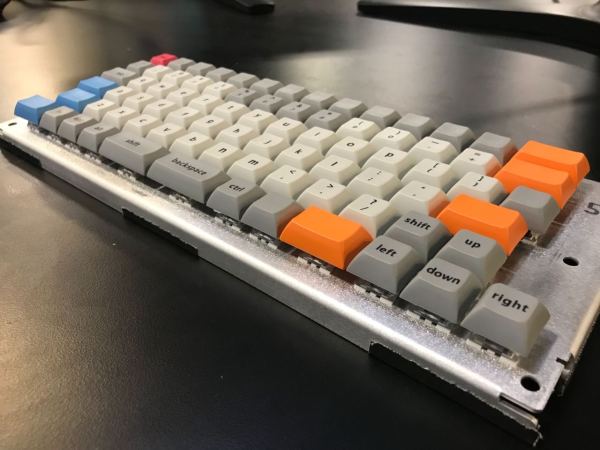
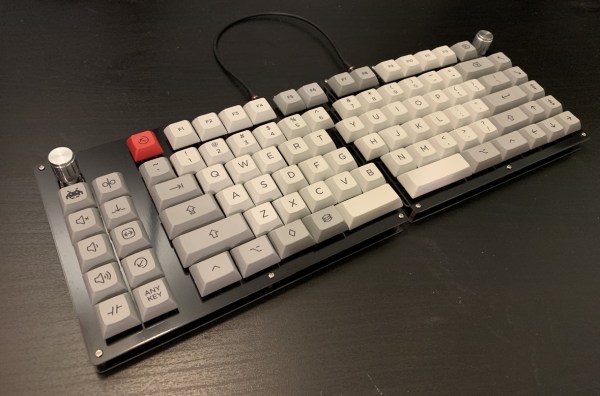
Feature wise all the usual hallmarks of a well designed keyboard are here. The Launch uses hostswap sockets to make it easy to install the usual Cherry MX compatible switch options, and includes per-key RGB backlighting courtesy of SK6805 LEDs. The ATmega32U4 runs the popular and extremely capable QMK firmware instead of something bespoke, so it should be easy to customize to the user’s desire.

System76 touts an unusual key layout, but if you’ve seen a 75% keyboard before it shouldn’t be too threatening (though we do wonder about that shrunken right shift). The most unusual feature is that it features a USB hub capable of full speed 10 gigabit USB 3.1 Gen 2 on two USB-C and two USB-A ports. It’s worth checking out the schematic to appreciate how much more complicated the hub design is than the rest of the keyboard, which is practically vestigial in comparison.

The remaining unknown is how the Launch integrates with Pop!_OS, System76’s awkwardly named remix of Ubuntu. They promise deep, compelling integration and we’re excited to see how that manifests.

Tired Of Regular Keebs? Might Be Time To Split

No matter how much geek cred your old vintage keyboard pulls, it’s not worth suffering through wrist pain or any other discomfort while using it. Especially now, when there are so many points of entry into the rabbit hole world of DIY mechanical keebs.

Once the wrist pain started, [Ben Congdon] switched from a big old Apple keeb to a Kinesis Freestyle — it’s basically a regular keyboard, but in two halves that can be placed far enough apart that [Ben]’s wrists are straight while typing. Comfortable as that split rectangle may be, it’s just not that cool looking, and he was ready to build something new, as long as it had enough keys.

[Ben] settled on building a Keebio Sinc, a new board which comes mostly soldered already and supports a handful of layouts. In the spirit of leaving doors open, [Ben] soldered in hot-swap sockets instead of permanently attaching the key switches to the PCB. This way, those Gateron reds can be easily switched out for something else, for instance should [Ben] want to try a little tactility down the road.

We think the Sinc is a cool offering precisely because it is such a full keyboard. Not everyone is ready to jump into 60% layouts or thumb clusters, and it’s nice to have options. This is entry-level ergo and DIY all at once. What’s not to like? Even if you want to go for something small and ortholinear, there are options. Here’s a build we saw recently that starts with a breakaway PCB that lets you choose between small and smaller.

Via reddit