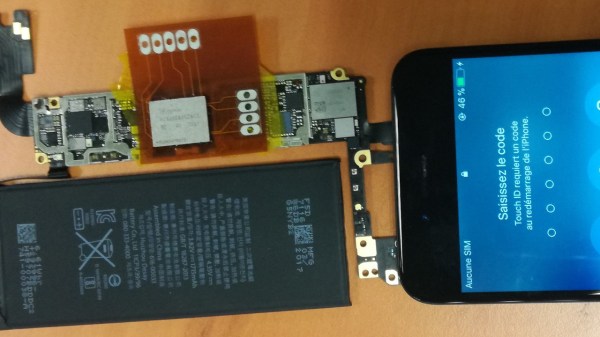
The FPC adapter shown soldered between the BGA chip and the phone's mainboard, with the phone shown to have successfully booted, displaying an unlock prompt on the screen

IPhone 6S NVMe Chip Tapped Using A Flexible PCB

Psst! Hey kid! Want to reverse-engineer some iPhones? Well, did you know that modern iPhones use PCIe, and specifically, NVMe for their storage chips? And if so, have you ever wondered about sniffing those communications? Wonder no more, as this research team shows us how they tapped them with a flexible printed circuit (FPC) BGA interposer on an iPhone 6S, the first iPhone to use NVMe-based storage.

The research was done by [Mohamed Amine Khelif], [Jordane Lorandel], and [Olivier Romain], and it shows us all the nitty-gritty of getting at the NVMe chip — provided you’re comfortable with BGA soldering and perhaps got an X-ray machine handy to check for mistakes. As research progressed, they’ve successfully removed the memory chip dealing with underfill and BGA soldering nuances, and added an 1:1 interposer FR4 board for the first test, that proved to be successful. Then, they made an FPC interposer that also taps into the signal and data pins, soldered the flash chip on top of it, successfully booted the iPhone 6S, and scoped the data lines for us to see.

This is looking like the beginnings of a fun platform for iOS or iPhone hardware reverse-engineering, and we’re waiting for further results with bated breath! This team of researchers in particular is prolific, having already been poking at things like MITM attacks on I2C and PCIe, as well as IoT device and smartphone security research. We haven’t seen any Eagle CAD files for the interposers published, but thankfully, most of the know-how is about the soldering technique, and the paper describes plenty. Want to learn more about these chips? We’ve covered a different hacker taking a stab at reusing them before. Or perhaps, would you like to know NVMe in more depth? If so, we’ve got just the article for you.

We thank [FedX] for sharing this with us on the Hackaday Discord server!

Vintage Audio Gear Gets A Display Upgrade

The lengths the retrocomputing devotee must go to in order to breathe new life into old gear can border on the heroic. Tracing down long-discontinued parts, buying multiple copies of the same unit to act as organ donors for the one good machine, and when all else fails, improvising with current productions parts to get that vintage look and feel.

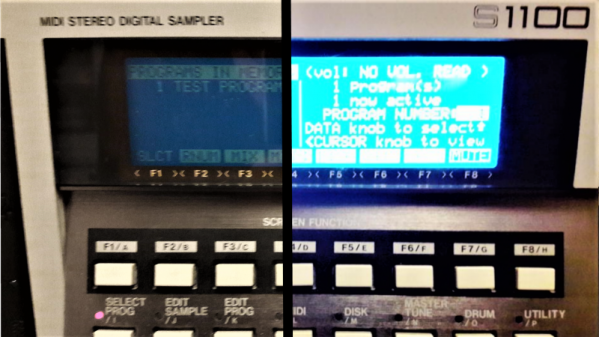
This LCD display backlighting fix for a vintage audio sampler falls into that last category, which was pulled off by [Inkoo Vintage Computer]. The unit in question is an Akai S1100 sampler, a classic from the late 1980s that had already been modified to replace the original floppy drive with a USB reader when the backlight on the LCD began to give out. Replacements for the original electroluminescent backlight are available, but [Inkoo] opted for a cheaper way out. An iPhone 6s 6 Plus backlight was an inexpensive option, if it could be made to fit. Luckily, [Inkoo] was able to trim the diffuser without causing any electrical issues. A boost converter was needed to run the backlight from the sampler’s 5 V DC rail, and interfacing the backlight’s flexible circuitry to the 80s-era copper wiring was a bit fussy, but the results were great. The sampler’s LCD is legible again, and looks just like it might have in the studio back when [Depeche Mode] and [Duran Duran] were using it to crank out hits.

As much as we like this repair, it doesn’t imply that EL is a dead technology. Far from it – [Ben Krasnow] is using it to create unique displays, and EL wire makes for some dazzling wearables. It doesn’t last forever, but while it does, it’s pretty neat stuff.