Put A Pi In Your JAMMA

Most of us who play an occasional arcade game will have never taken a look inside a cabinet however much its contents might interest us. We’ll know in principle what kind of hardware we’d expect to see if we were given the chance, but the details are probably beyond us.

In fact, there is a standard for the wiring in arcade cabinets. Arcade operators demanded running costs as low as possible, and the industry responded with the JAMMA wiring standard. The Japan Amusement Machinery Manufacturers Association was the name the Japanese trade body was known under in the 1980s, and they originated a specification for both wiring and connector that would allow hardware to be easily installed for any game that supported it.

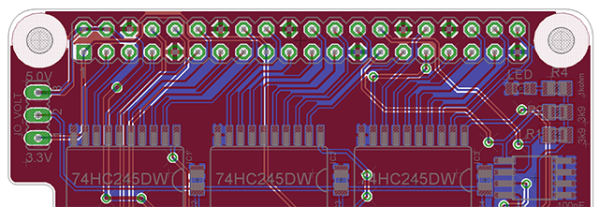
[Jochen Zurborg] has created an interesting board supporting the JAMMA connector, one that interfaces it with a Raspberry Pi and offers full support of the Pi as a video source. He’s launching his Pi2Jamma as a commercial product so sadly there are no schematics or Gerbers for you to look at, but if you’d prefer to roll your own it probably wouldn’t be beyond most Hackaday readers to do so. What it does though is open up the huge world of emulation on the Pi to owners of classic cabinets, and if you don’t mind forking out for one then we can see it might make for a very versatile addition to your cabinet.

We’ve featured [Jochen]’s work before here at Hackaday with a joystick that faithfully replicates arcade items. As to the Pi, this is the first JAMMA board we’ve seen with video, but we’ve featured another board using a Pi to bring console controllers to JAMMA boards in the past.

Console Controllers For JAMMA Boards

Back in the day, and by that we mean the late 80s and early 90s, arcade machines started using the JAMMA standard, a means for a single arcade board to be wired in to the controllers, video output, and other ephemera found in arcade cabinets. Since then, quite a few people have amassed a collection of these vintage arcade boards. Putting them to use requires a means of providing power, video output and controller connections. The usual way of wiring in a joystick and buttons is with a wiring harness, but [Mike] and [Jasen] are connecting Xbox 360 and PS3 controllers to their machines with the help of a Raspberry Pi Hat.

[Mike] and [Jasen] created Project Kajitsu to replace the expensive ‘Supergun’ controllers arcade game collectors usually use to play Street Fighter, X-Men, and Battletoads. They’re using the USB ports on a Raspberry Pi B+ to listen to two XBox or PS3 controllers and translate button mashing into something these old games can understand.

The guys are using a custom Linux Kernel that boots in just a few seconds, providing the bare minimum of an OS to support the controllers. The board itself is extremely simple; just a few bus transceivers, caps, resistors, and headers. They have an iPhone-quality vertical video proof of concept video (below), and although they’re still figuring out the best way to simplify the Bluetooth pairing process, they’re well on their way to supporting wireless controllers.

This board only provides controller input. If you have one of these old boards, you will need video output. That’s another project entirely, but very simple if you have an SCART monitor.

Continue reading “Console Controllers For JAMMA Boards”

A Raspberry Pi Arcade Stick

rpiArcadeStick

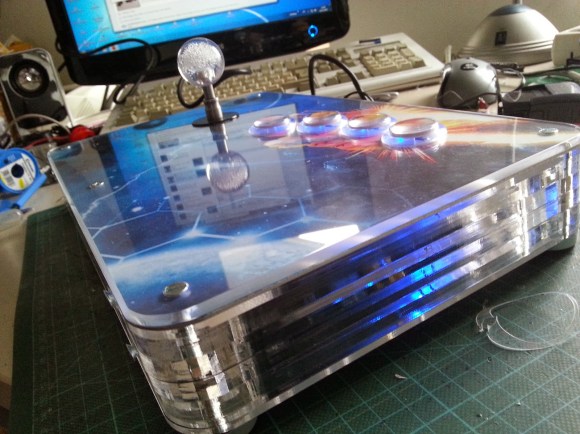
There are plenty of Raspberry Pi arcade builds out there, but rarely do we come across something as sleek as [Jochen Zurborg’s] RasPi Arcade Stick. The build combines everything you’d expect from other RasPi arcade projects, but manages to pack everything into the form factor of a portable stick modeled on the Neo Geo 4’s button layout. It may not be as small as the tiny MAME cabinet from last year, but it definitely delivers a more authentic arcade experience.

[Jochen] had previously developed an add-on PCB for the Pi called the PiJamma, which simplifies connections from the RasPi’s GPIOs by providing a JAMMA interface for the controller(s). The Pi and the PiJamma sit inside a custom-made acrylic enclosure and hook up to the buttons and joystick above. Rather than try to fit the Pi directly against a side panel for access to the various outputs, [Jochen] rerouted the USB, HDMI, and headphone jacks and arranged them into a tidy row on the back side of the box. The top piece of the enclosure consists of a sheet of aluminum wrapped in custom artwork, with an additional sheet of acrylic on top for protection. [Jochen] also modified each of the arcade buttons to include LEDs that illuminate the buttons’ acrylic holder, and the case itself appears to have been cut into slats on each side to provide better ventilation.

Check out his project blog for further details and for a huge gallery of progress photos, then see a quick video of the RasPi Arcade Stick after the break.

Continue reading “A Raspberry Pi Arcade Stick”

Mini Supergun PCB

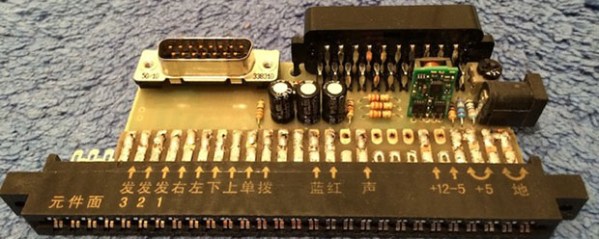
A few decades ago, Japanese manufacturers of arcade games realized they should make a connector for all their boards that provides the power, controller, video, and audio I/O. This became the JAMMA standard and it make arcade owner’s lives awesome. Because you can buy arcade boards off the Internet, arcade enthusiasts figured out they could build their own console with an ATX power supply, AV connectors, and a few controllers. These ‘superguns’ as they’re called are big devices with wires all over the place. [Charlie] wanted to condense the size of his supergun and ended up creating a single PCB solution (link dead, try the Internet Archive version).

The JAMMA compatable boards require a few power connections; +5 V, +12 V, and -5 V. Of all the boards [Charlie] has collected so far, he realized only one used the negative supply. This, along with a big 12V laptop power supply, means the only power connection for this mini supergun is a single barrel connector.

For the controls and A/V, DSub and SCART connectors are commonplace. Laying these parts out in Eagle resulted in a single-sided board that is easily fabbed by etching with a toner transfer at home.

There are a few problems with the build, as [Charlie] admits. Some of the pins on the JAMMA connector aren’t on the board. These are only ground pins on the pinout, and so far everything works okay. It’s still a great project, though, that turns old arcade boards into a playable device with a minimal amount of hardware.

Coffee Table Arcade Hides Its Controls

arcade-coffee-table-with-self-hiding-controls

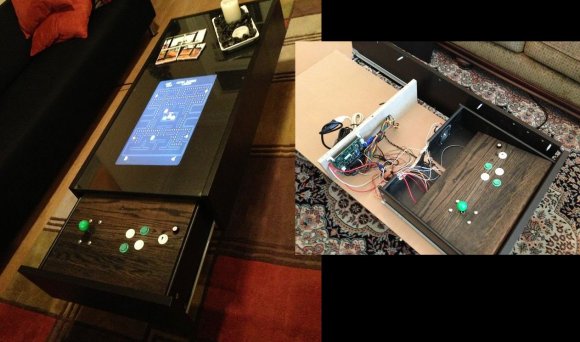
[Hoogen] did a fantastic job of building arcade hardware into this Ikea coffee table. Sound familiar? We just looked at another Ikea coffee table arcade, but this one goes quite a different route. It uses a Ramvik table which has a very deep drawer in the end where the controls are located. The image to the left shows that you’re going to have a problem with the joystick when you try to close it. [Hoogen] came up with a clever mechanism to overcome this issue.

This is not an emulated system. It uses a JAMMA board called the iCade 60-in-1 to bring sixty classic arcade games to the build. To interface with this hardware [Hoogen] included a JAMMA full cabinet wiring harness. The inset image on the right is pretty small, but it shows the speaker mounted in the back of the drawer, as well as the control surface angled down. This tilting surface is what allows the controls to move out of the way when closing the drawer. This happens automatically as described by [Hoogen] in his write-up.

Arcade Cabinet That Doesn’t Monopolize Your Space

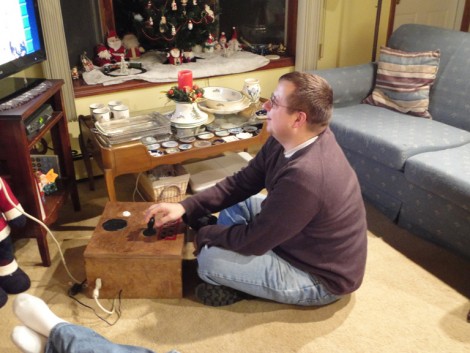
We’re guessing that if you ever though of buying an arcade cabinet it was only briefly, and you decided against based on the difficulties of moving and finding a place for such a large and heavy item. You could go the opposite way and build a controller for a  MAME box, but for some, there’s no replacement for the real hardware. This Christmas gift is the best of both worlds, a JAMMA box which uses traditional hardware in a more compact cabinet.

[Majtolycus’] boy friend is a sucker for a game of Battle Balls. She looked around for an original logic board and after several weeks of searching had to settle for the Japanese version of the game called Senkyu. To patch into the board she also picked up a JAMMA harness, power supply, RGB to VGA video converter, speaker, and some Happ arcade controls. The whole thing goes into a wood box which connects to a VGA monitor (or the VGA port on your HDTV).

The system is easier to store than a full-sized cabinet, and if a deal comes along, you can buy additional JAMMA logic boards to play.

[Thanks Adam]

Arduino Arcade Rom Dumper

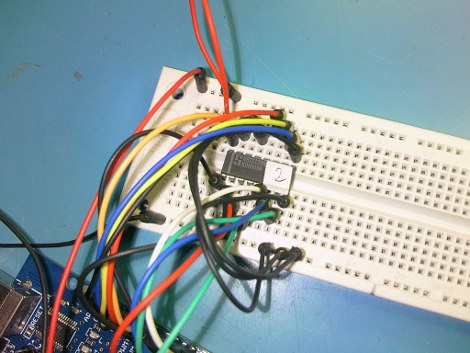
[Vincenzo] wanted to read some 82S129 bipolar proms, and why not, they were very common in the 1980’s arcade scene. The problem is that its kind of an odd ball part now, and typically only (even) more expensive EPROM programmers can read them. An Arduino, breadboard and some quick scripting quickly takes care of that problem with this Arcade Rom Reader.

You stick the prom in your breadboard, and wire it up to the appropriate ports and pins of the Arduino, which bit bangs the prom and returns the results though the serial connection of the Arduino. Using a terminal program on the pc side you capture the text and use a script to convert the ascii values into a binary nibble format and save as hex.

This makes it much easier for us to dump roms from old arcade boards, because you never know when you might run across an old Polybius arcade board on your next outing to the salvage or scrap yard.

Join us after the break for all the details and as always comments!

Continue reading “Arduino Arcade Rom Dumper”