Put A Pi In Your JAMMA

Most of us who play an occasional arcade game will have never taken a look inside a cabinet however much its contents might interest us. We’ll know in principle what kind of hardware we’d expect to see if we were given the chance, but the details are probably beyond us.

In fact, there is a standard for the wiring in arcade cabinets. Arcade operators demanded running costs as low as possible, and the industry responded with the JAMMA wiring standard. The Japan Amusement Machinery Manufacturers Association was the name the Japanese trade body was known under in the 1980s, and they originated a specification for both wiring and connector that would allow hardware to be easily installed for any game that supported it.

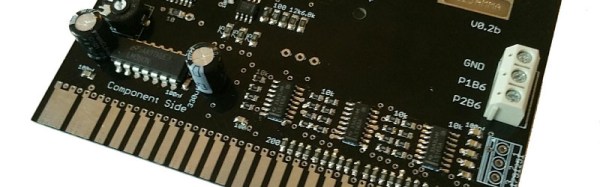
[Jochen Zurborg] has created an interesting board supporting the JAMMA connector, one that interfaces it with a Raspberry Pi and offers full support of the Pi as a video source. He’s launching his Pi2Jamma as a commercial product so sadly there are no schematics or Gerbers for you to look at, but if you’d prefer to roll your own it probably wouldn’t be beyond most Hackaday readers to do so. What it does though is open up the huge world of emulation on the Pi to owners of classic cabinets, and if you don’t mind forking out for one then we can see it might make for a very versatile addition to your cabinet.

We’ve featured [Jochen]’s work before here at Hackaday with a joystick that faithfully replicates arcade items. As to the Pi, this is the first JAMMA board we’ve seen with video, but we’ve featured another board using a Pi to bring console controllers to JAMMA boards in the past.

3D Printing Permanent Magnets

Researchers at TU Wien wanted to create magnets with exactly the right magnetic field for a particular application. Their solution? 3D printing of magnets. Previously, it has been difficult to produce permanent magnets with a specific shape of the magnetic field. The resulting magnets will be a boon to magnetic sensor construction.

Previously, after designing a magnet with a specific shape and magnetic field, a researcher would have to create tooling for injection molding. This is expensive and time-consuming and often not worth it for small quantities of magnets.

Continue reading “3D Printing Permanent Magnets”

DIY KVM Switch Lets You Use One Keyboard And Mouse With Multiple Computers

Here’s a quick DIY hack if you happen to have multiple computers at home or at the office and are tired of juggling mice and keyboards. [Kedar Nimbalkar] — striving for a solution — put together a keyboard, video and mouse switcher that allows one set to control two computers.

A DPDT switch is connected to a female USB port, and two male USB cables — with the ground and 5V wires twisted together and connected to the switch — each running to a PC. [Nimbalkar] suggests ensuring that the data lines are correctly wired, and testing that the 5V and ground are connected properly. He then covered the connections with some hot glue to make it a little more robust since it’s about to see a lot of use.

Now all that’s needed is a quick press of the button to change which PC you are working on, streamlining what can be a tedious changeover — especially useful if you have a custom keyboard you want to use all the time.

Continue reading “DIY KVM Switch Lets You Use One Keyboard And Mouse With Multiple Computers”

How Not To Build A CPU Hand Warmer

Winter is coming, along with mittens, cold hands, snow, and jackets. Now that we’re all carrying around lithium batteries in our pocket, wouldn’t it be a great idea to build an electronic hand warmer? That’s what [GreatScott!] thought. To build his electronic hand warmer, he turned to the most effective and efficient way to turn electricity into heat: a ten-year-old AMD CPU.

Building an electronic hand warmer is exceptionally simple. All you need is a resistive heating element (like a resistor), a means to limit current (like a resistor), and a power supply (like a USB power bank). Connect these things together and you have a hand warmer that is either zero percent or one hundred percent efficient. We haven’t figured that last part out yet.

Because more power and more retro is more betterer, [GreatScott] pulled an AMD Sempron out of an old computer. Finding and reading data sheets is for wimps, apparently, so [GreatScott] just poked some pins with a variable power supply until the CPU was drawing about 500mA at 5V.

The video continues with some Arduino-based temperature measurement, finding some new pins to plug the power leads into, and securing all the wires on this heating element with hot glue. For anyone in the comments ready to say, ‘not a hack’, we assure you, this qualifies.

With the naive method of building a CPU hand warmer out of the way, here’s the pros and cons of this project, and how it can be made better. First off, using an old AMD processor was a great idea. These things are firestarters, and even though this processor preceded the 100+ W TDP AMD CPUs, it should work well enough.

That said, this is not how you waste power in a CPU. Ideally, the processor should do some work, with more active gates resulting in higher power consumption. If this were an exceptionally old processor, a good, simple option would be freerunning the chip, or having the CPU count up through its address space. This can be done by tying address lines low or high, depending on the chip. That’ll waste a significant amount of power. Randomly poking pins hoping for the right power consumption is not the way to get the most heat out of this CPU.

Of course, the above paragraph is just theory. The eating is in the pudding, or some other disfigured colloquialism, so here’s a quad-core 386 coffee warmer. This project from [magnustron] uses four 80386 CPUs powered via USB to make a nice desktop hotplate for your cuppa. Of course being powered by USB means there’s only 500mA to go around, and the ΔT is comparable to [GreatScott]’s AMD and hot glue hand warmer. Thus we get to the crux of the issue: 5V and 500mA isn’t very hot. Until cheap USB-C power banks, with ten or twelve Watts flood in from China, the idea of a USB powered heater is a fool’s errand. It does make for some great AMD firestarter jokes, though, so we have to give [GreatScott] credit for that.

Continue reading “How Not To Build A CPU Hand Warmer”

Hackenings: KiCAD, Science, DevOps, And Cyber

This week in [Hackenings], we’ve got a full roster of interesting upcoming events scattered all over the world. Can’t afford airfare to India, but Dublin is in the next county over? We’ve got you covered.

KiCad in Bangalore

IKP EDEN, in Bangalore, is hosting an Introduction to KiCad workshop on Sunday, Nov 13 from 10:00-2:00 pm. If you’re just getting started with PCB layout, or just want a quickstart learning KiCad, Hackaday contributor [Anool Mahidharia] will be there to show you how! Sign up on the link above, and bring your laptop with KiCad already installed.

Science in Dublin

20151115_124704-e1476655395528_thumbnailTOG hackerspace in Dublin is putting on their fifth annual Science Hack Day, a 36-hour hardware and software hackathon on Nov 19 & 20th. Looking through their photos, past creations have included a laser mission-impossible crawl-through maze thing, some kind of freaky turtle, and many objects that move, make noise, or otherwise amuse.

“Each year we bring together, designers, coders, scientists, engineers and makers. Simply to make interesting things. Why? For adventure, for playfulness, for science!”

DevOppery (and Foppery) in Stuttgart

logo_webDo you have what it takes to meet the needs of DevOps, Agile, and Cyber in the Enterprise Environment? Interested in Disruptive Cloud Computing or Mobile First Growth Hacking? Can you rub two buzzwords together and come up with marketing gold? Then you might have a fun time at the shack hackerspace in Stuttgart on Nov. 19th, for the eloop 2016 conference (translated here).

A full day’s talks include topics such as “Enterprise Patterns”, “Good Enough”, and the “Cult of Done Manifesto” as it relates to computer security. “What’s discussed at eloop today moves the digital markets of tomorrow.” YOLO!

Vote for Swindon

If you’re a UK citizen, you can vote to get the Swindon Makerspace some community funding so that they can furnish a new space. Why not?

Game Retro

And if you’re in Huntsville, Alabama, or environs, don’t forget Makers Local 256’s Retro Gaming night tonight (Saturday, 12th).

Hackenings? Hackenings!

[Hackenings] is our weekly Saturday morning (US, Pacific Time) roundup of what’s going to be going on in the hackerspace world in the upcoming week. If you’d like us to cover your event, email us at tips@hackaday.com and put [Hackenings] in the subject so that we don’t miss it. Thanks!

Pi Zero Transforms To Game Boy

[GreatScott] bought a Game Boy case. Normally, you’d assume you wanted this to repair a damaged Game Boy, but in this case [GreatScott] used a Pi Zero and some 3D printing to build a game system into the tiny box. You can see some videos, below.

Two interesting parts of the project are the source of the LCD display (a rearview camera screen) and the selection of batteries. Lithium ion batteries are all the rage. But if you watch the news, you know there are some safety issues with using the batteries, especially if you use them improperly. [GreatScott] decided to go with nickel metal hydride cells which still need a protection circuit, but are typically less of a danger than the newer technology cells.

Continue reading “Pi Zero Transforms To Game Boy”

Raspberry Pi Spies On… Err… Monitors Baby

“Quick! We’re having a baby and we need a baby monitor!” Rather than run to the local big box and plunk down cash for an off-the-shelf solution, any self-respecting hacker would rise to the challenge and hit the shop to build something like this live streaming eye-in-the-sky baby camera. Right?

baby-monitor-raspberry-pi-camera
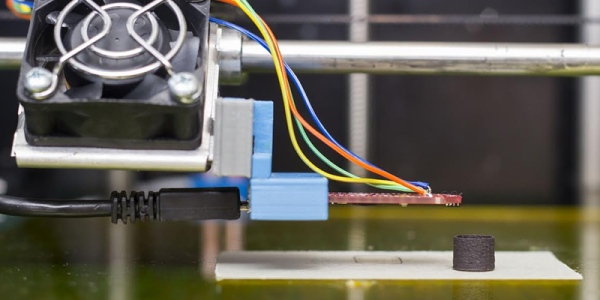
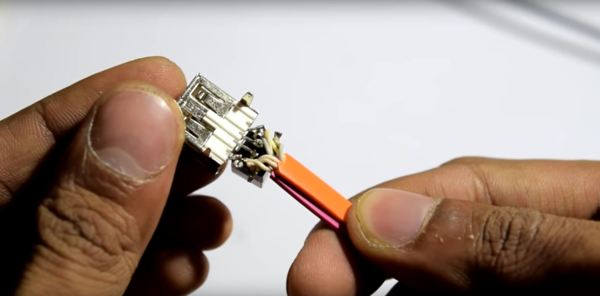
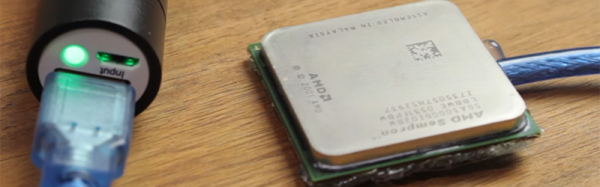
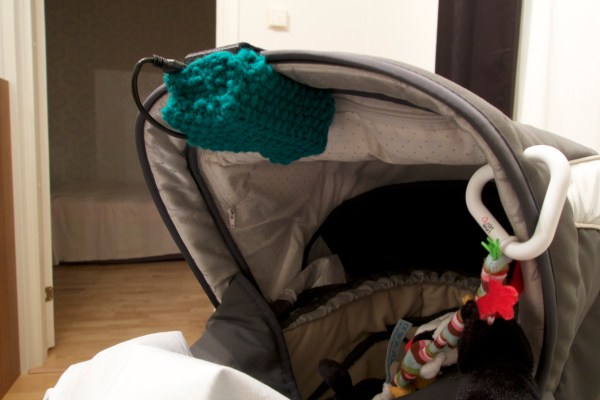
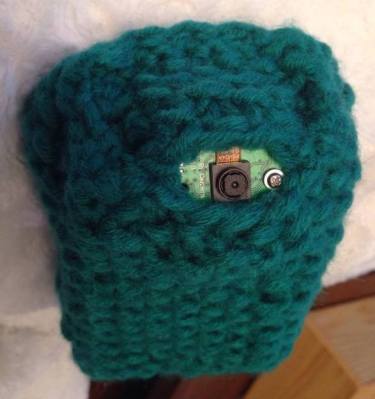
At least that’s how [Antibore] handled the situation, and the results are pretty good. He designed his build around an old Raspberry Pi 2 that was hanging around. That required a WiFi adapter, and since he wanted video and audio he needed a camera and mic. The first USB mic had a nice compact design but didn’t perform well, so a gutted gooseneck mic soldered right to the USB connector joined the design spec. A camera module, cell-phone quick charge battery bank, and a 3D printed case round out the BOM. A knitted cozy to keep it looking warm and fuzzy was provided by the mother-to-be — although we think it looks a little like [Mike Wazowski].

This self-contained unit will work anywhere it has access to a WiFi network. Mounted on the baby carrier, it’ll provide a live stream to any browser and provide the new parents with a little peace of mind.

There are a lot of baby monitors on the market, some of them terrible and in need of a rebuild. Kudos to [Antibore] for deciding to roll his own custom solution and for getting it done before the blessed event. Now how about painting that nursery?