Building A Minecraft Lantern For Halloween

Sometimes it’s fun to bring props from video games into the real world. [Hulk] has done just that with their latest Halloween build—creating a working replica of the lantern from Minecraft.

Key to the build is the 3D printed enclosure, which faithfully mimics the look of the in-game item. By virtue of Minecraft’s simplistic visual style, it’s a relatively straightforward print, without a lot of quirky geometry or difficult overhangs that might otherwise trip up your printer. It’s printed in six parts and assembled with acrylic lenses which act to diffuse the light coming from inside.

Electronically, an Arduino Nano runs the show. It’s hooked up to a pair of NeoPixel addressable LED rings, which provide rich RGB colors on demand. Rotary pots are installed on the enclosure to enable the color to be tuned to the user’s desire. Power is courtesy of an 18650 lithium-ion cell and a TP4056 module ensures the battery is kept happy when charging.

It’s a fun prop build, and one that would be the perfect addition to any Minecraft costume. Except for maybe a chicken jockey, because they don’t use lanterns. In any case, we’ve seen similar work before, too.

Continue reading “Building A Minecraft Lantern For Halloween”

Candle Powered Lantern Isn’t As Silly As You Think

[Gilles Messier] at the Our Own Devices YouTube channel recently took a look at an interesting device — an electric lantern powered by a candle. At first glance, this sounds completely absurd. Why use a candle to power LEDs when you can use the light from the candle itself? This gadget has a trick up its sleeve, though. It lets candle light out and uses the heat from the candle flame to generate power for the LEDs.

The small Peltier “solid-state heat pump” module in the lantern acts as a thermoelectric generator, converting heat from the candle into electricity for the LEDs. The genius of the device is how it handles the candle “exhaust”.  A bimetallic disk in the chimney of the lantern closes when the air inside the device is hot. The Peltier device converts the heat differential to electricity, causing the air inside the lantern to cool. Meanwhile, the candle is beginning to starve for oxygen.  Once the air cools down a bit, the disk bends, allowing stale smoke out, and fresh air in, allowing the candle to burn brightly again. Then the cycle repeats.

[Gilles] does a deep dive into the efficiency of the lantern, which is worth the price of admission alone. These lanterns are pretty expensive — but Peltier modules are well-known by hackers. We’re sure it won’t be too hard to knock together a cheap version at home.

Continue reading “Candle Powered Lantern Isn’t As Silly As You Think”

This Kerosene Lantern Becomes A Compact Bioreactor

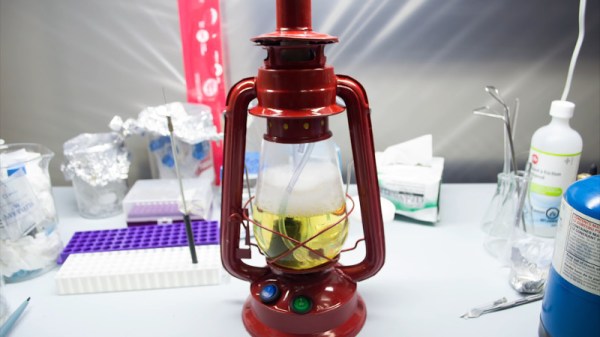
A bioreactor is a useful thing to have in any biology lab. Fundamentally, it’s a tank in which biological activity can be nurtured and controlled. [The Thought Emporium] needed a visual aid for an upcoming video on bioluminescent bacteria, but figured a single test tube full of the little critters just wasn’t visually striking enough. Thus began the build to turn a kerosene lantern into a full-featured bioreactor.

The ideal bioreactor for the project needed to be visually appealing, biologically safe, and to have the possibility for continuous operation. First, the lantern’s base was sealed with aluminium plate and silicone sealant. The top was then fitted with a plastic plug, which contained passthroughs for air and fluid feeds, UV LEDs for luminescence tests, as well as potential sterilization purposes. Wiring was neatly passed through the arms of the lantern, and an air pump hidden in the top. A battery compartment was also installed so the reactor can be portable, even when fully loaded.

The bioreactor was first filled with highlighter ink, and the UV lights switched on, confirming that the reactor does look the part when filled with glowing fluid. Then, it was flushed with hydrogen peroxide, before being refilled with growth medium and an E. Coli strain which produces a fluorescent red protein. Growth was successful, and there are future plans to use the bioreactor for other projects, too.

It goes without saying that it’s important to take the proper precautions when hacking on biological projects, lest you inadvertently create the zombie virus and take down half the population of the eastern seaboard. Regardless, it’s an impressive build that showcases various techniques for working with biological matter that may not be familiar to the home hacker. If you’re looking for more automation for your home biology hacks, perhaps the OpenLH project may interest you. Video after the break.

[Thanks to Baldpower for the tip!]

Continue reading “This Kerosene Lantern Becomes A Compact Bioreactor”

Lamp’s Ghostly Glow Benefits From Happy Mistake

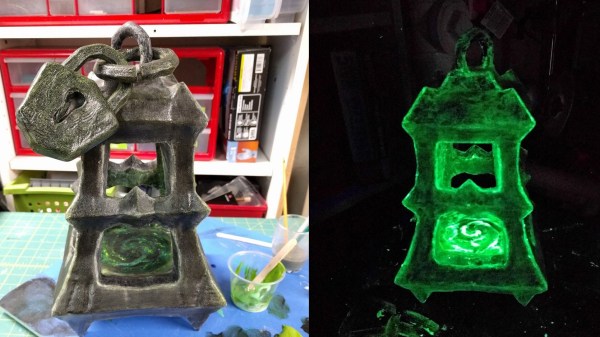
[cyborgworkshop]’s youngest sister is a fan of a character in a popular video game (Thresh from League of Legends) who wields an iconic lantern with a mystical green glow. He resolved to make a replica of that lantern. Perhaps as a gift for the cherished family member? Certainly not! [cyborgworkshop]’s goal was the simple joy of having something “to lord over her.” Ah, ain’t siblings grand?

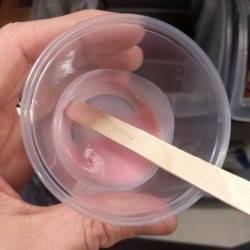
Why the glow powder turned pink in clear varnish is a bit of a mystery.

There were some interesting things learned in the process of making the ghostly green lamp. The first part of the build log is all about post-processing the lantern model, which was 3D printed at a chunky 0.48 mm layer height, but the rest is about getting the ghostly green glow to come out the way it did. [cyborgworkshop] used both glow in the dark paint and glow in the dark powder to really make the object pop, but the process involved some trial and error. Originally he mixed the glow powder into some clear varnish, and despite the mixture turning pink for some mysterious reason, a small sample spot appeared to turn out fine. However, after applying to the lantern and waiting, the varnish remained goopy and the glow powder settled out of the mixture. He ended up having to remove it as best he could and tried a heavy application of the glow paint instead. This ended up being a real blessing in disguise, because the combination resulted in a gritty stone-like texture that glowed brightly! As [cyborgworkshop] observes, sometimes mistakes end up being the highlight of a piece.

After more glow powder for highlighting, the finishing touches were a thin black wash to mute the powder’s whiteness, and a clear coat. The result looks great and a short video is embedded below. Oh, and if anyone has an idea why glow powder would turn pink when mixed into varnish, let us know in the comments!

Continue reading “Lamp’s Ghostly Glow Benefits From Happy Mistake”

IKEA Lantern Houses Full-Featured Weather Station

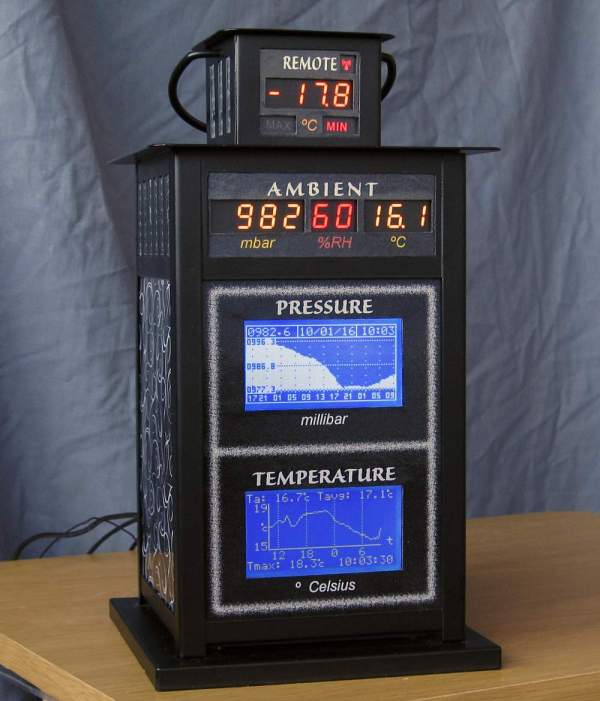
From plain and utilitarian to the sleek and professional, there are a lot of ways to build a multifunction weather station. We’d thought we’d seen it all here, but building a weather station into an IKEA lantern is a pretty unique presentation.

There’s  an active community over at ikeahackers.net, and the variety of IKEA hacks they’ve come up with is pretty astounding. For this weather hack, [Richard Stevens] chose the Borrby, a $15 candle lantern. While it doesn’t exactly scream “weather station”, the form factor makes sense – plenty of room for electronics, easily replaced windows, and a nice cupola for mounting extra displays. [Richard]’s build includes a barometer, a hygrometer, and a thermometer, along with graphing displays for trends and historical data. There’s also an alarm clock and a rear panel bristling with more connectors and switches than an 80s-era HP oscilloscope. The wiring is admittedly “rats-nest style”, but as you can see in the video after the break, it works pretty well and looks good too.

Interested in rolling your own non-lantern weather station? Check out this headless Weather Underground sensor suite, or a simple panel of analog meters.

Continue reading “IKEA Lantern Houses Full-Featured Weather Station”

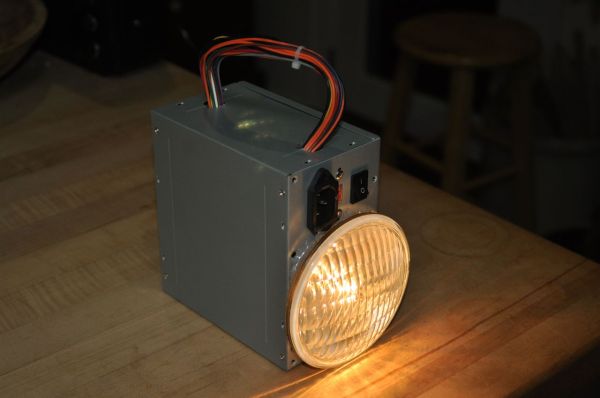
DIY Lantern

Lantern Made In Preparation Of Zombie Apocalypse

[BenN] was at his local hackerspace one day when a friend stopped by and offered him a used 5AH lead acid battery. As any good tinkerer would, he jumped on the opportunity and immediately started looking around for a project to use the battery in. One of [BenN’s] recent other projects involved 12volt landscaping lights, the same voltage as the battery he was just given. At this point it was clear that he had a good start to making a lantern. This lantern project also supports [BenN’s] obsession with hobby of preparing for the zombie apocalypse.

A lantern needs an enclosure. Over on the hackerspace’s spare-parts rack was an old ATX power supply. All of the internal electrical components were removed to make room for the battery which fit inside nicely. The landscaping light just happened to be slightly larger than the power supply’s fan cut outs. Once the grill was removed from the metal power supply enclosure, the lamp fit in nicely and was secured using silicone glue which can tolerate any temperature the bulb can produce.

The feature that separates a lantern from a flashlight is the top-mounted carrying handle and this lantern will receive one made from the wiring removed from the ATX power supply. The electrical wiring is fairly straight forward. The battery is connected to the landscaping light by way of the original ATX on/off switch. The two terminals of the battery were also wired to the power supply’s AC input connector. This allows [BenN] to connect a DC battery charger to two of the three pins in order to charge the battery. Although this is a creative way to re-use the AC connector, it leaves quite a bit of potential to accidently plug in a 120v AC cord!


Trimethyl Borate Lantern Built From Garbage

scratch-build-lantern

This lantern was built from recyclable goods. It’s a bit dangerous when used like the image above, but [The Green Gentleman] does give you a few other options in his build instructions which make for much safer operation.

The lantern enclosure is made from old cans and a glass jar. He screwed a couple of boards together at a right angle to act as a jig for cutting the glass. The V-shape created by the boards holds the jar on its side, giving his glass cutting tool something to rest upon. He then turns the jar to score it around the top, and then bottom. He alternated pouring boiling and chilled water on the score mark to shock the glass into breaking along the line.

This makes up the clear part of the enclosure which is later mated with metal top and bottom pieces. From there he adds either an LED, an alcohol lamp, or the Trimethyl Borate lamp seen above. The first two are relatively safe, but the latter burns at around 1500 degrees F. We have reservations about using a plain old glass jar as the enclosure for something burning this hot. It really should be heat resistant glass.