Junkbox Build Keeps Tesla Coils Perfectly Varnished

Admittedly, not a lot of people have a regular need to varnish coils. It’s mainly something that Tesla coil builders and other high-voltage experimenters are concerned with. But since that group probably constitutes a not insignificant fraction of the Hackaday audience, and because there are probably more applications for this homebrew coil varnishing setup, we figured it would be a good idea to share it.

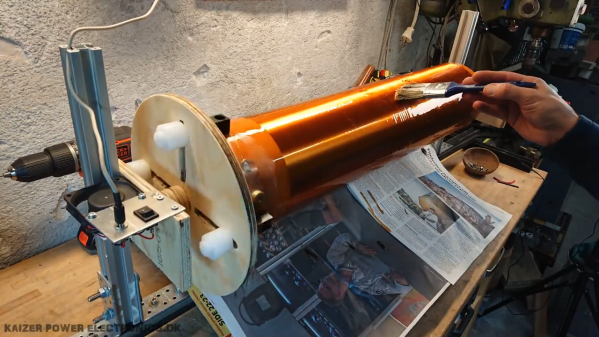
For [Mads Barnkob], coil maintenance isn’t something to take lightly. If you check out his Kaizer Power Electronics channel on YouTube, you’ll see that he has quite a collection of large, powerful Tesla coils, some of which are used for demos and shows, and others that seem to be reserved mainly for blowing stuff up. To prevent one of his coils from joining the latter group, keeping the coat of insulating varnish on the secondary coil windings in tip-top condition is essential.

The setup seen in the video below helps with that tedious chore. Built entirely from scraps and junk bin parts, the low-speed, low-precision lathe can be set up to accommodate coils of all sizes. In use, the lathe turns the coil very slowly, allowing [Mads] to apply an even coat of varnish over the coil surface, and to keep it from sagging while it dries.

[Mads]’ setup is probably not great for coil winding as it is, but for coil maintenance, it’s just the thing. If your needs are more along the lines of a coil winder, we’ve got a fully automated winder that might work for you.

Continue reading “Junkbox Build Keeps Tesla Coils Perfectly Varnished”

Raspberry Pi Jukebox Hits All The Right Notes

We (and by extension, you) have seen the Raspberry Pi crammed into nearly every piece of gear imaginable. Putting one inside a game console is so popular it’s bordering on a meme, and putting them into old stereos and other pieces of consumer electronics isn’t far behind. It’s always interesting to see how hackers graft the modern Raspberry Pi into the original hardware, but we’ll admit it can get a bit repetitive. So how about somebody scratch building an enclosure for their jukebox project?

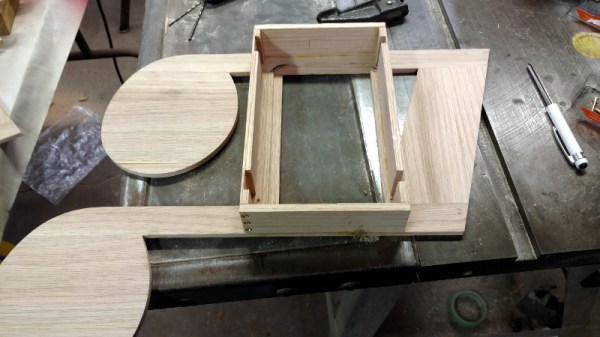
[ComfortablyNumb] took the road less traveled when he created this very nice wooden Raspberry Pi enclosure in the shape of an eighth note. Stained and varnished and with a nice big touch screen in the middle to handle the controls, it’s an attractive and functional piece of home audio gear that we imagine most people would be happy to hang on their wall.

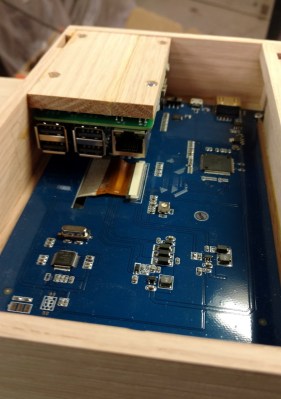
The process starts by printing out the desired shape on a piece of paper to use as guide, and then gluing together strips of wood to create the rough outline. Then the surface was thoroughly sanded to bring all of the strips of wood to the same level, and the final design was cut out. On the back of the note, [ComfortablyNumb] boxed out an area to hold the Waveshare seven-inch touch screen panel and the Raspberry Pi itself.

Having seen so many projects where the Pi is rather unceremoniously shoehorned into another device, it’s refreshing to see the results of a purpose-built enclosure. Since [ComfortablyNumb] was able to build the electronics compartment to his exact dimensions, the final result looks exceptionally clean and professional. Not a drop of hot glue to be seen. It also helps that this build only required the Pi and the display; as the device is meant to be plugged into an existing audio setup, there’s no onboard amplifier. The audiophiles out there might recoil in horror, but adding a dedicated digital to analog converter (DAC) would be easy enough to add if the stock audio on the Pi isn’t good enough for you.

The project is finished off with stain and several coats of varnish to get that deep and rich color. We don’t often find ourselves working with dead trees around these parts, but we’ve got to admit that the final product does look quite handsome. Certainly beats the LEGO cases many of our Pi projects live in.

If you’re looking for more wooden-encased Pi jukeboxes, you might enjoy this somewhat abstract magstripe-based take on the concept. Of course, we’ve also seen our fair share of actual jukeboxes receive a Raspberry infusion over the years.

[via /r/raspberry_pi]

Gorgeous Bartop Arcade Build Is A Cut Above

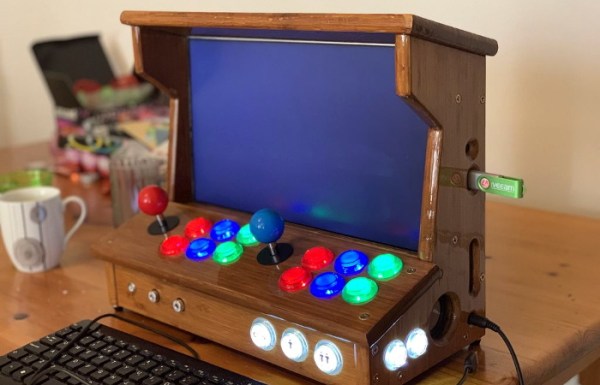
At this point we’ve seen a good number of desktop-sized arcade cabinets, and while they’ve naturally all been impressive in their own ways, they do tend to follow a pretty familiar formula. Cut the side panels out of MDF (or just buy a frame kit), stick a Raspberry Pi and an old LCD monitor in there, and then figure out how to control the thing. Maybe a couple strategically placed stickers and blinking LEDs to add a few extra horsepower, but nothing too surprising.

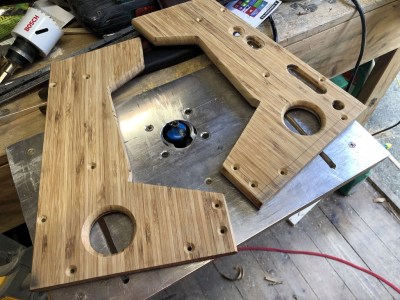
[Andy Riley] had seen plenty of builds like that, and he wasn’t having any of it. With the heart of an old laptop and bones made of IKEA cutting boards, his build is proof positive that there’s always more than one way to approach a problem that most would consider “solved” already. From the start, he set out to design and build a miniature arcade cabinet that didn’t look and feel like all the other ones he’d seen floating around online, and we think you’ll agree he delivered in a big way.

Powering the arcade with an old laptop is really a brilliant idea, especially since you can pick up older models for a song now that they’re considered nearly disposable by many users. As long as it doesn’t have a cracked display, you’ll get a nice sized LCD panel and potentially a rather powerful computer to drive it. Certainly the graphical capabilities of even the crustiest of used laptops will run circles around the Raspberry Pi, and of course it opens the possibility of playing contemporary PC games. As [Andy] shows in his detailed write-up, using a laptop does take more custom work than settling for the Pi, but we think the advantages make a compelling case for putting in the effort.

Of course, that’s only half the equation. Arguably the most impressive aspect of this build is the cabinet itself, which is made out of a couple IKEA bamboo cutting boards. [Andy] used his not inconsiderable woodworking skills, in addition to some pretty serious power tools, to turn the affordable kitchen accessories into a furniture-grade piece that really stands out from the norm. Even if you aren’t normally too keen on working with dead trees, his step-by-step explanations and pictures are a fascinating look at true craftsman at work.

If you’re more concerned with playing Galaga than the finer points of varnish application, you can always just turbocharge the old iCade and be done with it. But we think there’s something to be said for an arcade cabinet that could legitimately pass as a family heirloom.

Lamp’s Ghostly Glow Benefits From Happy Mistake

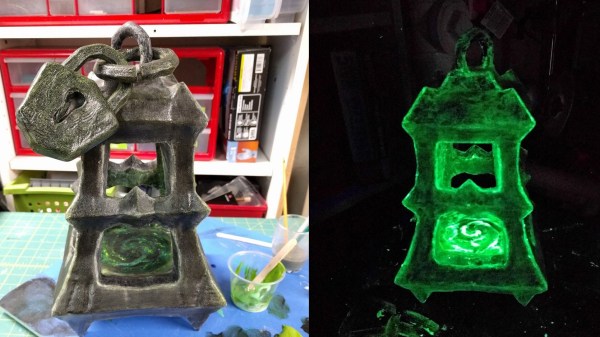
[cyborgworkshop]’s youngest sister is a fan of a character in a popular video game (Thresh from League of Legends) who wields an iconic lantern with a mystical green glow. He resolved to make a replica of that lantern. Perhaps as a gift for the cherished family member? Certainly not! [cyborgworkshop]’s goal was the simple joy of having something “to lord over her.” Ah, ain’t siblings grand?

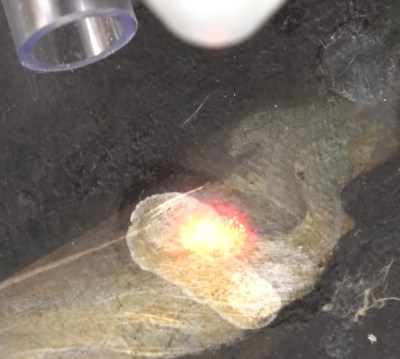
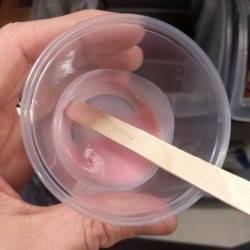
Why the glow powder turned pink in clear varnish is a bit of a mystery.

There were some interesting things learned in the process of making the ghostly green lamp. The first part of the build log is all about post-processing the lantern model, which was 3D printed at a chunky 0.48 mm layer height, but the rest is about getting the ghostly green glow to come out the way it did. [cyborgworkshop] used both glow in the dark paint and glow in the dark powder to really make the object pop, but the process involved some trial and error. Originally he mixed the glow powder into some clear varnish, and despite the mixture turning pink for some mysterious reason, a small sample spot appeared to turn out fine. However, after applying to the lantern and waiting, the varnish remained goopy and the glow powder settled out of the mixture. He ended up having to remove it as best he could and tried a heavy application of the glow paint instead. This ended up being a real blessing in disguise, because the combination resulted in a gritty stone-like texture that glowed brightly! As [cyborgworkshop] observes, sometimes mistakes end up being the highlight of a piece.

After more glow powder for highlighting, the finishing touches were a thin black wash to mute the powder’s whiteness, and a clear coat. The result looks great and a short video is embedded below. Oh, and if anyone has an idea why glow powder would turn pink when mixed into varnish, let us know in the comments!

Continue reading “Lamp’s Ghostly Glow Benefits From Happy Mistake”

Polycarbonate Fish Uses Three Servos To Swim

polycarbonate-fish

[Amnon] is learning the hard way that water and electronics don’t always like to play nicely together. He’s been working on creating a swimming fish that uses three servos to flex a sheet of fish-shaped polycarbonate. This photo doesn’t really do the project justice but you can get a better idea of what he’s accomplished by watching the videos after the break.

The three servos along with some distance sensors for obstacle avoidance are all controlled by a PIC 16F877A microcontroller. [Amnon] tried out three different waterproofing methods; coating the device in varnish, dipping it in hot glue, and dipping it in epoxy. The first two resulted in water damage to the electronics, but the third managed to work. It kept the water out, but also prevents reprogramming of the controller.

Although not successful, we would have loved to see the process of dipping the fish in a churning vat of molten glue. Once perfected, this may be the perfect platform for carrying our weapons of doom.

Continue reading “Polycarbonate Fish Uses Three Servos To Swim”