Laser Cut Arc Reactor Replica

laser-cut-arc-reactor

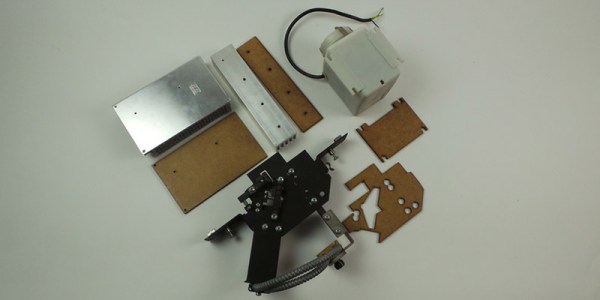
We’re starting to become a repository for Arc Reactor replica projects. The one shown above uses mostly laser cut components. We missed it back in May when [Valentin Ameres] tipped us off the first time. But he sent it in again after seeing the 3D printed version earlier this month.

Our biggest gripe is that we don’t have our own laser cutter to try this out on. Everything has been cut from 2mm thick acrylic. The black, silver, and copper colored components were painted to achieve this look. Many of the clear parts also had a dot matrix etched into them to help with light diffusion.

Basic assembly just required the parts be glued together. The finishing touches include wire-wrapping the slots of the outer ring and adding LEDs and current limiting resistors.

The plans are not freely available, but the 3D printed version linked above doubles as a 123D tutorial. That should help get you up to speed designing your own if you are lucky enough to have time on laser cutter.

Continue reading “Laser Cut Arc Reactor Replica”

Centerpieces For A Geeky Wedding

[Bill Porter] is a married man now, and evidently his new wife, [Mara], is awesome. They put together one of the geekiest weddings that included custom side-lit LED centerpieces.

Instead of laser engraving the dozens of plastic panels for each centerpiece, [Bill] tricked [Mara]’s Silhouette Cameo home vinyl cutter – the same one they made their invitations with – into engraving acrylic panels. They’re made out of very thin plastic, but the fact that the couple were able to snap apart the engraved plasic after putting sheets though the machine is very impressive for something that’s generally used for scrapbooking.

As for the base of each centerpiece, [Bill] whipped up a few enclosures on his 3D printer and built a few battery packs out of 18650 lithium ion cells. The nine LEDs in each base were leftovers from a previous project involving LED strips, perfectly suited to run for a few hours in a reception hall.

It’s a great build for a wonderful occasion, and we’re really impressed with the plastic cutting ability of the Sihouette Cameo. Very nice work there.

Mug Plotter Based On The Egg-Bot

mug-plotter

Here’s a fun way to break up the monotony in the old cubicle farm. The Mug Plotter will let you expertly inscribe your coffee vessel with a different witty saying or design for each day of the week. If it looks familiar that’s because it’s loosely based on the non-flat drawing robot, the Egg-Bot.

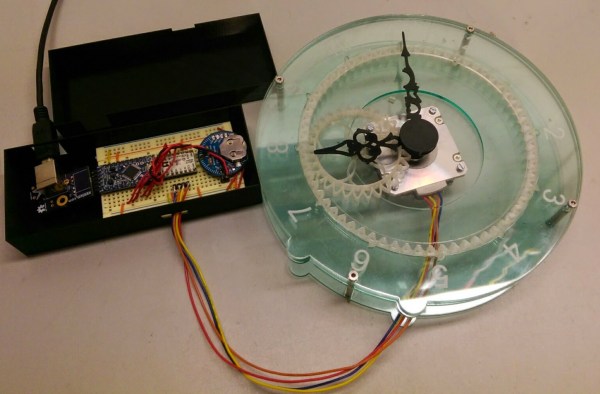
[Teed] built the machine using laser cut plywood parts. He starts off the build description with the griping technique. There are two parts to this, one is concave and fits in the mouth of the mug. The convex side grips the bottom edges of it. These parts go on the frame along with the slide and thread rods which hold the stylus. A servo motor is along for the ride, providing the ability to lift the marker when necessary.

You can see in the clip after the break that there’s a bit of oscillation in the rig when one of the steppers starts turning really fast. But it doesn’t seem to affect the look of the design very much at all.

Continue reading “Mug Plotter Based On The Egg-Bot”

Airsoft Turret Has Turn, Tilt, And Auto-feed To Keep Those BBs Flying

airsoft-turret-with-laser-cut-parts

Yet another project that proves you need to acquire a laser cutter. This Airsoft turret rotates, tilts, and includes a hopper for ammo.

All of the pieces were cut from acrylic. The base includes a bracket which keeps the large rotating gear level by sandwiching it between the layers. That and the tilt mechanism are pretty straight forward. The module responsible for loading the BBs is pretty neat though. It uses a gear with round teeth the same diameter as the ammo. Once a BB is picked up it is forced upward into the tubing that feeds the gun. Get the full picture from the demo video after the break.

The one thing [The Liquider] is wondering about is how to provide feedback for the tilt and rotate functions. We can’t think of an easier way than to use simple rotary encoders. The Arduino Mega he wishes to use as a driver will have no problem interfacing with reflectance sensors and the acrylic makes it simple to mount this type of black and white encoder wheel.

Continue reading “Airsoft Turret Has Turn, Tilt, And Auto-feed To Keep Those BBs Flying”

Beautifully Crafted Geiger Counter A Must If You Live In A Hot Zone

Have a little class when you’re screening for radioactive particles. You can follow the example which [Moustachenator] has set with this gorgeous Geiger counter case.

The business end includes the same Geiger tube we see in all of these projects, but he took the time to solder together a tidy circuit board and housed it in an acrylic tube. it connects to the base unit using a springy telephone handset cord. The laser cut walnut enclosure offers plenty of room for the ATX power supply hidden inside. This feeds the Arduino which runs the system, and provides a powerful source for the Nixie tubes which serve as the display. The attention to detail when it came time to assemble the case is what lends an antique look to the project, even though everything was built from the ground up. Check out the video after the break to see a brief demonstration.

Continue reading “Beautifully Crafted Geiger Counter A Must If You Live In A Hot Zone”

Bending Laser Cut Wood Without Steam Or Forms

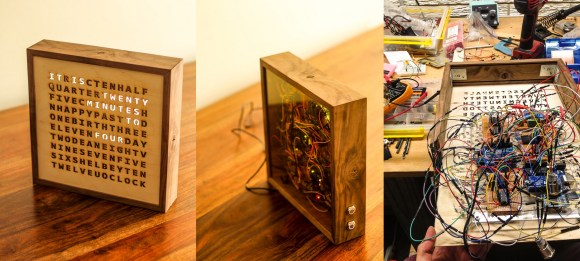
If you want to pretty up your project boxes, we can’t imagine anything better than [Shaun]’s walnut plywood, laser-cut, kerf bent Arduino case. Instead of the slot-and-tab construction of traditional laser-cut enclosures, [Shaun] used a technique to bend plywood without steaming, heating, and eventually scorching his somewhat expensive plywood.

This isn’t the first time we’ve seen this accordian style laser-cut kerf bend. By alternating laser cuts along the desired radius, the plywood can be bent by hand. The technique is called kerf bending and is perfect for putting an organic touch on the usual 90° angle project boxes we see.

[Shaun] has an Instructable for the smaller boxes that are part of his Arduino powered wireless sensor network. This Instructable goes over the pattern of laser cuts required to get a nice, smooth kerf bend, and also shows off how beautiful a laser-cut project box can be when cut out of aromatic cedar.

Laser Cutting In 3D

Everyone in the world suffers from some degree of functional fixedness, a proclivity to use tools only how they were meant to be use. A laser cutter, for example, is usually used to make flat, two-dimensional parts. [Seeker] broke out of this cognitive lock when he decided to create an illuminated 3D object with a laser cutter and a dozen acrylic sheets.

[Seeker]’s project is inspired by acrylic edge-lit LED signs. In these signs, a pattern is engraved on an acrylic sheet and a LED illuminates the panel from the side. When the light from the LED hits the engraving, it’s refracted and produces a wonderful colorful pattern.

To make a 3D version of an edge lit display, [Seeker] subtracted a 3D model of a virus from a cube in Sketchup. This resulted in a hollow cavity that would refract light. After slicing up the model of the 3D cube, [Seeker] sent the files over to the laser cutter to produce a few dozen custom panels. [Seeker] glued them together, put the entire assemblage in front of a LED light, and admired the beauty of his new laser cut 3D virus.