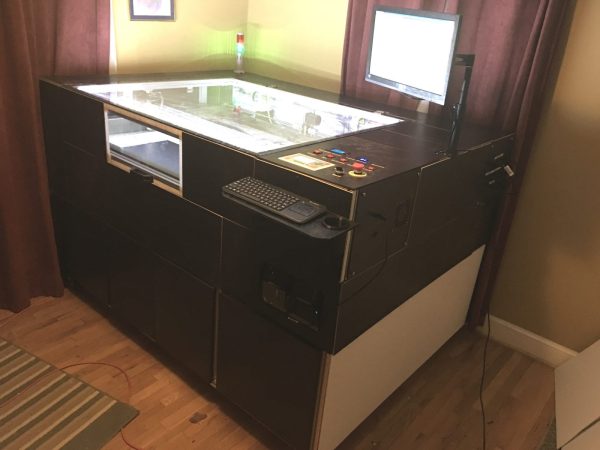
A laser cutter is a great tool to have in the shop, but like other CNC machines it can make a lousy neighbor. Vaporizing your stock means you end up breathing stuff you might rather not. If you’re going to be around these fumes all day, you’ll want good fume extraction, and you might just consider a DIY fume and particulate filter to polish the exhausted air.
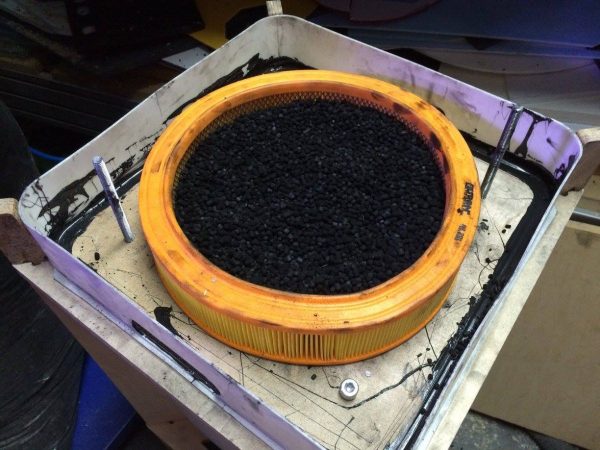
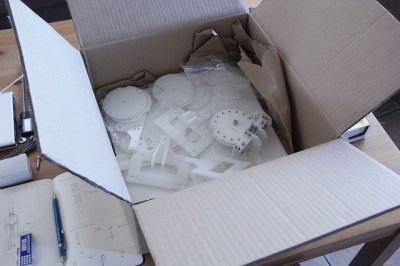
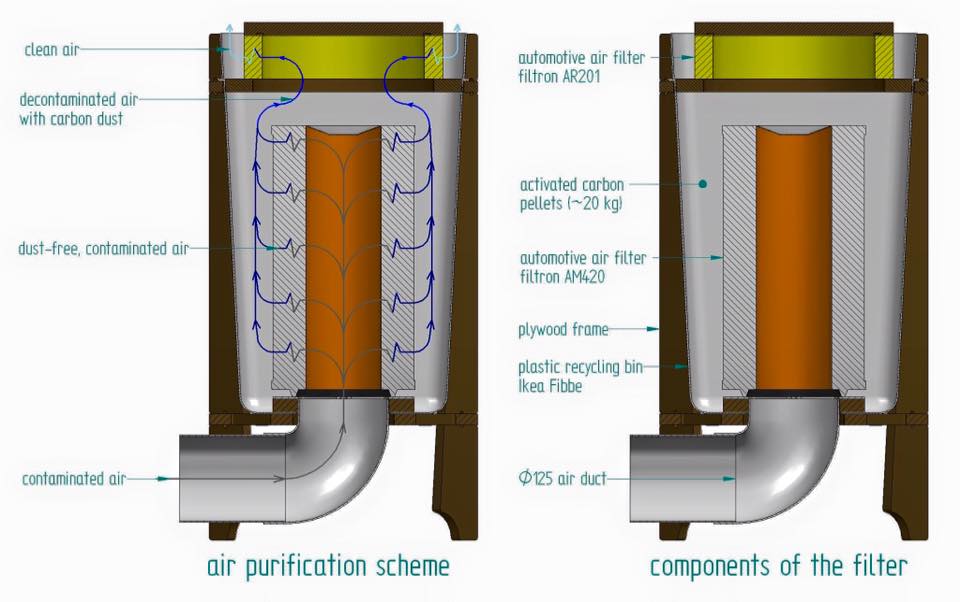 While there’s no build log per se, [ZbLab]’s Facebook page has a gallery of photos that show the design and build in enough detail to get the gist. The main element of the filter is 25 kg of activated charcoal to trap the volatile organic compounds in the laser exhaust. The charcoal is packed into an IKEA garbage can around a prefilter made from a canister-style automotive air cleaner – [ZbLab] uses a Filtron filter that crosses to the more commonly available Fram CA3281. Another air cleaner element (Fram CA3333) makes sure no loose charcoal dust is expelled from the filter. The frame is built of birch ply and the plumbing is simple PVC. With a 125mm inlet it looks like this filter can really breathe, and it would easily scale up or down in size according to your needs.
No laser cutter in your shop to justify this filter, you say? Why not build one? Or, if you do any soldering, this downdraft fume extractor is a good way to clear the air.


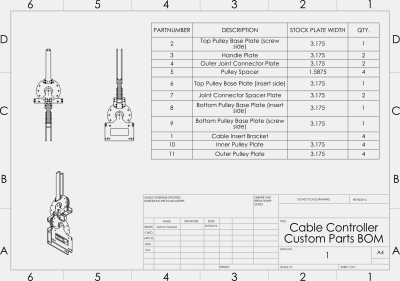 In a good-ol’ engineers-for-engineers fashion, I’m doing something a little different for this post: I’m finishing off this series with a set of assembly videos, a BOM, and the original CAD files to make that beast on the front page come to life. As for why, I figured: why not? Even though these mechanisms have lived in the robotics community and film industry for years, they’re still lacking the treatment of a solid, open design. This is my first shot at closing that gap. Get yourself a cup of coffee. I’m about to give you every bleeding detail on the-how-and-why behind these beasts.