Laser Cut Your Own Vinyl Records

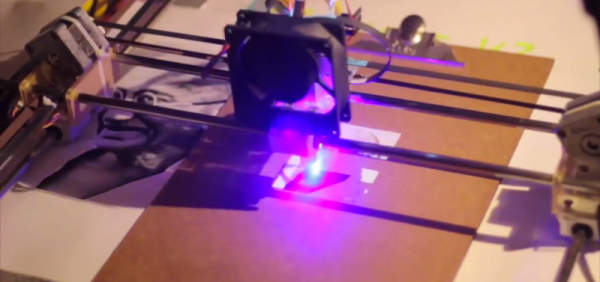
[Amanda Ghassaei] has created an awesome hack for making your own vinyl records using a laser cutter from an MP3 file. Her excellent hack uses a Processing sketch that converts a digital audio file into a vector graphics file, which is then burned onto vinyl using a laser cutter. We saw a demo of this at the FabLab11 conference, and it’s an impressive hack.

One of the best parts of her write up are the details of how she arrived at the appropriate processing settings to get the record sounding as good as possible, but still be cuttable. It’s an object lesson in how you iterate on a project, trying different approaches and settings until you find the one that works. She also decided to take it a few steps further, cutting records on paper and wood for the ultimate eco-friendly record collection.

Audiophiles should avoid this technique though. Due to limitations in the resolution of the laser cutter, [Amanda] ended up having to reduce the bandwidth of the audio signal to 4.5Khz and use a 5-bit sampling depth. That translates to a rather tinny-sounding record. Vinyl record snobs can breathe easy: this isn’t going to replace their beloved white-hot stampers. For the rest of us, there are always records etched into tortillas.

Continue reading “Laser Cut Your Own Vinyl Records”

Ninja Chess

Make Your Own Ninja Chess Board

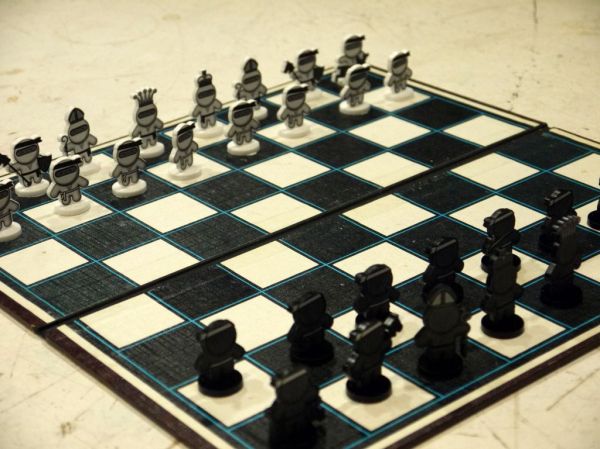
You’re going to want to take a look at this fun project [Alistair MacDonald] just finished up. He calls it Ninja Chess.

He’s had the idea to 3D print a complete set of ninjas vs pirates for a chess board, but, let’s be real;  printing thirty-two chess pieces would take a long time. He opted to use a laser cutter instead, and so far, only has the Ninja characters drawn. But it still makes for a pretty awesome chess board.

Ninja Character

He drew the characters in Inkscape and they’re pretty darn cute. He has all the files available over on his Instructable including the .DXF for the laser cut outlines, and the image files for you to print off the decals. But unless you’re good with scissors, we recommend using your hackerspace’s automated paper cutter to help speed things up.

Is it a hack? Not really, but it’d be an excellent addition to anyone’s workshop. And while we sail under the Jolly Wrencher, we too can appreciate the novelty of a Ninja chess board.

For a more detailed build, did you see the 3D laser cut chess pieces we shared a few weeks ago? No that’s not a typo — you can use a laser cutter to do more than just two-dimensional cutting…

Vintage Vinyl Laser-Etched On A Tortilla

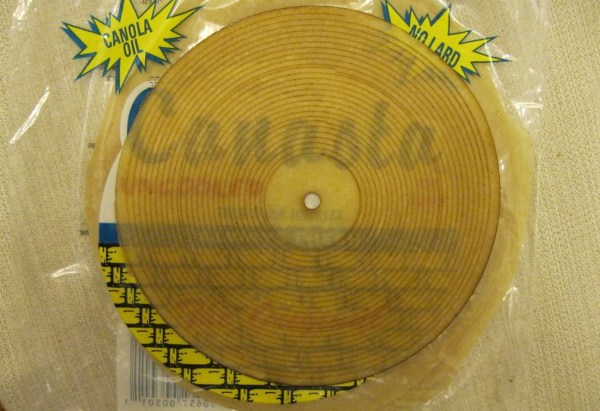
[UpgradeTech] had a proof-of-concept itch they needed to scratch: making a playable record out of a tortilla using a laser cutter. The idea was spawned from the goofy “tortilla vinyl” YouTube video.

Uncooked flour tortillas were used. Corn tortillas were too lumpy while cooked tortillas shredded on the record player. To get the recording onto the tortilla, Audacity was used to modify a stereo WAV file. Using the RIAA equalization standard is a great choice here as it was originally adopted to prevent excess wear and tear on record grooves as the needle passed through. A Python script generated the files for the laser cutter, creating a text file with the sound data which was then processed into a vector PDF of the grooves. For each record it takes 30 minutes for the laser cutter to turn a simple flour tortilla into the musical variety.

Each tortilla can play 30-40 seconds of music at 45 or 78 RPM, but they start to warp once they dry out. Time to build a humidor around the record player! There is background noise that can make certain songs harder to hear, but there is unarguably audible music. There is plenty of room for optimizing the sound file, grooves, and cutting. We hope this project inspires others to make their own musical tortilla. Playing with your food has taken on a whole new meaning!

Continue reading “Vintage Vinyl Laser-Etched On A Tortilla”

Move Over Gucci; Laser Cut Handbags Are A Thing

What happens when you want to make a custom handbag with some handy tech features, and have access to a nice laser cutter? You end up doing what [Christian] did: design a assemble a Woman’s Handbag made of Laser-Cut Leather with iPhone charger and LED Light.

The design of the bag was made in Adobe Illustrator and sent off to a Epilog Legend 36EXT laser cutter located in the hackerspace located near [Christian] in Vienna. Once the parts were precision cut, traditional leather sewing methods were used to assemble the handbag (with a little help from a shoe cobbler).

The interior of the bag was lined with old blue jeans and a white LED, which is wired and held into place with conductive thread. Powered by a coin cell and controlled by your choice of a button, or a slide switch, the light helps locating items in the deep bag.

Slide a standard USB battery pack in one of the pockets of the old jeans and you are ready for a night out on the town. Join us after the break for a video showing the design, construction and features of this practical project.

Continue reading “Move Over Gucci; Laser Cut Handbags Are A Thing”

3D Miniature Chess Pieces Made With A Laser Cutter

When you think of laser cutters, you generally don’t think of 3d parts. Well, at least not without using something like glue, nuts and bolts, or tabs and slots to hold multiple parts together. [Steve Kranz] shows you how to make these very tiny 3D chess pieces by making 2 passes at right angles to thick acrylic. The first pass cuts one side’s profile, then the part is rotated 90 degrees and a second pass is cut, giving the part more of a “real” 3D look, rather than something cut out of a flat sheet. If you’re having a hard time imagining how it works, his pictures do a great job of explaining the process. He even added some engraving to give the chess pieces for a selective frosted look. We think it’s a cool idea, and well executed too!

But that got us to thinking (always dangerous) that we’ve seen rotary attachments for laser cutters, but they are mainly for etching cylindrical objects like champagne flutes and beer bottle. What if you added a rotating “3rd” axis to a laser cutter that could hold a block of material and rotate it while being cut? (Much like a traditional 4th Axis on a CNC machine). Would the material also need to be raised and lowered to keep the laser focused? Surely software that is aimed at 3D CNC would be needed, something like Mach3 perhaps. A quick Google search show that there are some industrial machines that more-or-less do 3D laser cutting, but if you, or someone you know of, has attached a 3rd axis to a desktop laser, let us know in the comments, we would love to see it.

(via Adafruit)

Lasersaur That Cuts 1/2″ Plywood And 10mm Acrylic (Pew-Pew)

Remember when building your own 3D printer was a big deal? We’re starting to think that building your own laser cutter might be the next hot topic.

Boasting a 16,000 square-foot facility, the Dallas Makerspace is an impressive collaboration of local artists, engineers, makers, and thinkers. Recently they embarked on building a serious laser cutting machine. They chose to go with the an open-hardware design rather than buying an off-the-shelf unit. What they built is based on the Lasersaur plans. (Another popular open-source build is the buildlog.net unit.)

They ended up with a huge 24″ by 48″ cutting bed and with a laser tube rated for 100 watts continuous output. It can cut 1/2″ plywood and 10mm acrylic with ease. The entire machine is built from 20mm Misumi aluminum t-slot extrusions, making more like a giant erector set then a commercial built machine. We hadn’t seen too many of the Lasersaur builds out in the wild, so we thought you might like to see one too.

Now, before you start ordering parts to build your own, you should know that a top of the line build like this will run you about $7-10k. But by comparison if you were to go with something with the same cutting area and power, you’d be looking at something like the “Epilog Fusion 40” at a whopping $40k. With that said, we expect to see more budget laser cutter builds. Cost can be cut dramatically when you go for a smaller machine, with less cutting area, and less power. With that, you can use less expensive steppers, drivers, and frame. We suspect a little as $700 for a smart shopper could yield a very respectable laser cutter.

If you’re interested in learning more about the Dallas Makerspace, we took a video tour back in early 2014.

Laser Cutter Exhaust Interlock Is Silly, Educational, Useful

If there’s one maker space that has an excess of mad scientist type hackers, it has to be LVL1 in Louisville, KY. They sure do a lot of crazy stuff, like this simple device to defeat the laser cutter smoke monster. Nobody got the memo about the “simple” part. Instead they created a functional, educational and aesthetically pleasing element for the hackerspace.

LVL1 has a large format laser cutter. Laser cutters emit nasty smoke. Said smoke needs to be vented outside. To do so, it needs to pass through a scrubber/filter so the neighbouring Pigs don’t complain. So they installed a larger, better filter. The Pigs are happy, until the filter gets clogged and the smoke monster decides to escape. Next they install a pressure switch which disables the laser when the filter gets clogged. Laser cutters have a myriad of safety interlocks, so quite often, it isn’t apparent which one caused it to trip. Hence, the Laser Cutter Enable Module – LCEM.

The simple part was to install an indicator that lights up when the pressure switch is enabled, and off when not. But when it’s off, it isn’t clear if the pressure switch is off, or the indicator has failed. Simple, just install a bi-color LED – Red for off, Green for On. But then what about color blind folks who cannot tell the two colors apart? So, finally, two LED’s with clearly labelled text marking them as Enabled and Disabled.

A simple (this time for real) circuit was finally agreed upon. The SPDT contacts of the pressure switch drive the LED in an optoisolator. Its output drives a DPDT relay via a transistor. One set of contacts light up the two indicator LED’s and the other set of contacts goes to the laser cutter enable contacts. Of course, the optoisolator is totally redundant and over kill too – it’s input LED shares the same power supply as the output transistor! Remember the missing memo?

It was time to assemble the circuit. This is where the mad scientist dudes got really creative. On one half of a piece of acrylic, the schematic diagram was etched using the laser. This ensures n00bs get some education. And the remaining half had the circuit laid out in old-skool wire wrap fashion. Holes were drilled and connections were drawn (using the laser, of course) for the various components. Parts were inserted, and wires were soldered to make the connections. The result is what they call the PCB/Mounting Plate/Educational Schematic/Acrylic thing. Of course, exposed connections and wires are no good. So they made a sandwich consisting of a flat acrylic base, and a cut out frame in the middle to accommodate the wire connections and joints. All of this to light up an indicator. Because.

Thanks [JAC_101] from LVL1 for sending in this tip.

If you want to read more about LVL1 shenanigans, check out this post about their Rocketry group, or this post when Hackaday visited LVL1.