Lazing With A Ruby

ruby

[Ben Krasnow], builder of amazingly complex and technical devices, is finally starting work on his ruby laser. He’s been collecting parts for this project for the past few years, but only recently has he started recreating the first visible light laser.

While the design and manufacture of the first ruby laser was astonishingly complex, the basic idea behind it is pretty simple. [Ben]’s laser uses a synthetic ruby rhod with the ends ground optically flat. This rod is placed inside a flash tube. When the flash tube lights up, the rod absorbs the light and re-emits it as a coherent beam for several milliseconds. This beam bounces between two mirrors – one fully reflective and another partially reflective – and emits a constant stream of coherent photons. It’s tremendously more complex than simply connecting a laser diode to a power source, but replicating a build that graced the covers of Time and Newsweek only fifty years ago is pretty impressive

Right now, [Ben] has most of the mechanical and optical parts of his ruby laser on his workbench. The next step is constructing a huge capacitor bank to charge the flash tube every millisecond or so. What [Ben] will end up using his laser for remains up in the air, but if we come across some erbium or neodymium rods we’ll be sure to send them his way.

Continue reading “Lazing With A Ruby”

Touching Conversations: Email Snippets Scroll By On Electro-Embroidery Piece

electroembroidery

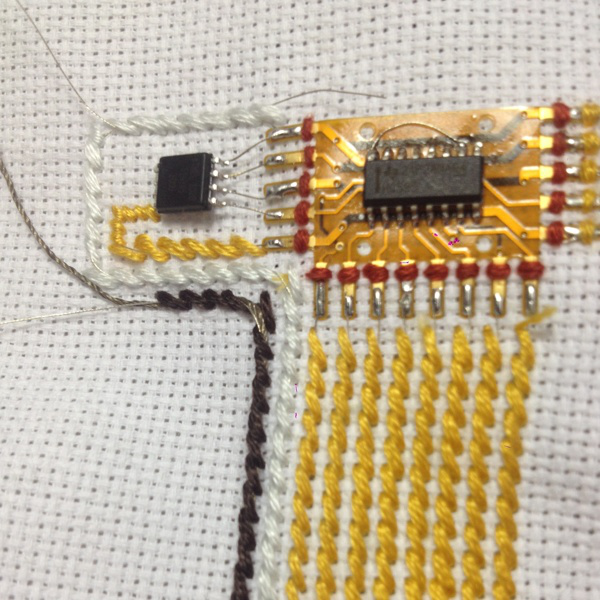
[Wei Chieh Shih] really moves the needle when it comes to wearable technology. His textile design project entitled I Am Very Happy I Hope You Are Too is a striking marriage of masterful hand embroidery, delicate circuitry, and careful programming.

[Wei] is using an Arduino micro to drive a matrix of surface-mount LEDs in the Hello, World video, which is a ramp-up to the scrolling text version that’s in progress now finished. That full version is part of his residency project at Arquetopia in Oaxaca, Mexico and displays snippets of emails from his past relationships. It’s huge, with multiple matrices as large as 8×25 pixels!

No build notes could be found for this or any of [Wei]’s similar projects, like this awesomely dangerous 200 laser diode jacket or this eerily beautiful light installation on Taiwan’s north beach. Based on the pictures, our speculation is that he is using ordinary 6-strand embroidery floss to make stem or half cross-stitches on all the paths. He then runs very thin, flexible conductor underneath the channel of stitches and solders the wires to the component pads.

If [Wei] wants another way to wear his heart on his sleeve, he could investigate these dynamic LED clothing hacks.

Update: [Wei] has completed this project, and has more information available at his Behance site.

Continue reading “Touching Conversations: Email Snippets Scroll By On Electro-Embroidery Piece”

Attacknid Becomes Laser Death Drone

Laser Drone

[styroPyro] liked his Attacknid, but decided it needed just a bit more blue death ray laser. We’ve seen [styroPyro’s] high-powered laser hacks before, but this time he’s taken to hacking one of [Jaimie Mantzel’s] Attacknid robots. According to one of the top comments on [styroPyro’s] video—a comment by Attacknid inventor [Jaimie] himself—the robots were meant to be hacked, and [Jamie] is ecstatic.

[styropyro] removed the disk shooter from his Attacknid and used the fire control circuit to activate a 2 watt blue laser. A low powered, red laser pointer serves as a laser sight, allowing you to aim at your target before unleashing the beefy blue laser. As the video shows, 2 watts is a heck of a lot of power. The Attacknid easily pops balloons and sets fire to flash paper. As usual, we urge you to use caution when handling 2 watt lasers, which fall under Class 4: aka the most dangerous class of lasers. Goggles, skin protection, and safety interlocks are the order of the day. [styroPyro] has been working with high power lasers for a few years, and seems to know what he’s doing. That said, we’ll leave the burning lasers to the professionals.

Continue reading “Attacknid Becomes Laser Death Drone”

Raspi Mini Laser Engraver

If you’ve got a lot of spare parts lying around, you may be able to cobble together your own laser engraver without too much trouble. We’ve already seen small engraver builds that use an Arduino, but [Jeremy] tipped us off to [Xiang Zhai’s] version, which provides an in-depth guide to building one with a Raspberry Pi.

[Xiang] began by opening up two spare DVD writeable drives, salvaging not only their laser diodes but the stepper motors and their accompanying hardware, as well as a handful of small magnets near each diode. To assemble the laser, he sourced an inexpensive laser diode module from eBay and used a vise to push the diode into the head of the housing. With the laser snugly in place and the appropriate connecting wires soldered on, [Xiang] whipped up a laser driver circuit, which the Raspi will later control. [Xiang] worked out the stepper motors’ configuration by following [Groover’s] engraver build-(we featured it a few years back)-attaching the plate that holds the material to be engraved onto one axis and the laser assembly to the other.

Check out [Xiang’s] project blog for details explaining the h-bridge circuits as well as the Python code for the Raspi. As always, if you’re attempting any build involving a laser, please use all necessary precautions! And if you need more information on using DVD burners for their diodes, check out this hack from earlier in the summer

Hacking A Streetlight With Lasers

$20, some spare parts and a bit of mischief was a small price for [Chris] to pay for a reprieve from light pollution with this remote control laser hack. The streetlight in front of his house has a sensor that faces westward, and flips the lamp on once the sun has disappeared over the horizon. As it turns out, [Chris’s] third floor window is due west of this particular lamp, meaning he takes the brunt of its illumination but also conveniently places him in a prime location for tricking the sensor.

According to [Chris], the lamp’s sensor requires two minutes of input before it will switch off and stay off for around 30 seconds before cycling on again. The lamp does not zap straight to full brightness, though; it takes at least a minute to ramp up. [Chris] recalled a hack from a few years ago that essentially used LED throwies tacked onto the sensors with putty to shut off lamps for a guerrilla drive-in movie, but the sensors on those lamps were at the base and easily accessed. [Chris] needed to reach a sensor across the block and nearly three stories tall, so he dug around his hackerspace, found a 5V 20mA laser diode, and got to work building a solution.

[Chris] 3D printed a holder for the laser and affixed it via a mounting bracket to the wall near his third floor window, pointing it directly at the street lamp’s sensor. He plugged the laser’s power supply into an inexpensive remote control outlet, which allowed him to darken the street lamp at a touch of a button. This is certainly a clever and impressive hack, but—as always—use at your own risk. Check out a quick demo video after the break.

Continue reading “Hacking A Streetlight With Lasers”

Fail Of The Week: Laser Cutter That Makes Jagged Edges

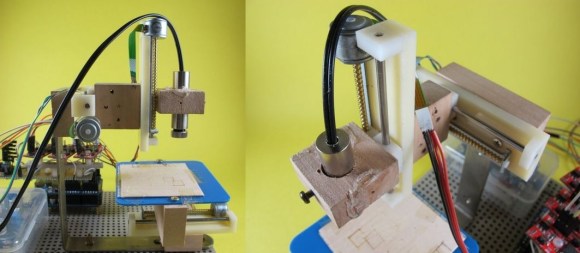
This Fail of the Week is really only a failure because of the standards to which [eLabz] holds himself. The rig pictured above is a laser cutter built out of DVD drive parts. It goes above and beyond most of the optical drive CNC projects we see around here — it actually makes cuts! But [eLabz] looks on it as a failure because the steps of the driver motors are visible as jagged edges in those cuts. We see this more as a pausing point in the development process before the next refinement is made.

Continue reading “Fail Of The Week: Laser Cutter That Makes Jagged Edges”