Optimizing Your Electronics Projects With A Camera

What do you do when you have a microcontroller you’re trying to optimize? One method is using a debugger, but for AVRs and such that’s not a very common technique. For lower-level electronics projects, it’s nearly impossible, even. [Cnlohr] built a small Minecraft server that listens to in-game redstone circuits, but the performance of his real-world to block-world bridge wasn’t what he hoped. He came up with a pretty clever way of figuring out what was slowing his server down without any special gear at all.

[cnlohr]’s Minecraft server is just a simple AVR microcontroller, Ethernet adapter, and SD card affixed to a beautiful glass PCB. The performance of his server wasn’t what he expected; downloading a largish file from the server resulted in a download rate of about 55kbps, much slower than he expected. He wasn’t quite sure what the hangup was, so he took a camera and with a long exposure time took a very blurry picture.

The Minecraft server has a blue LED to show when the SD card was being accessed. In the picture above, [cnlohr] saw that SD card access was taking far too long, and if he wanted to optimize the code this would be the place to start.

Not bad for a dead-simple method of seeing where the code on your microcontroller project is slowing down.

Continue reading “Optimizing Your Electronics Projects With A Camera”
One Dimensional PONG, Take Two

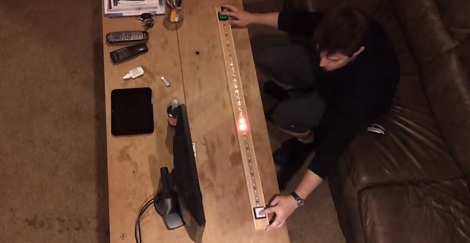
Needing a Christmas present for his 4- and 5-year-old nieces, [John] built a one-dimensional PONG game, sure to be the delight of rosy-cheeked children on a Christmas morn.

The new and improved 1D PONG game is built around a digital RGB LED strip with an LPD8806 LED controller. The speed of the ‘ball’ is controlled by a pot on one side of the game. With each player pressing their button at the right time, the ball bounces back to the other player. Missing the ball awards a point to the other team and most likely an increase in the player’s frustration, greatly increasing the risk of this game being thrown across the room.

While it’s not an obscenely long 1D PONG game like [Jason]’s previous 5 meter version, it’s more than enough to keep a pair of kids occupied for more than a few minutes, a remarkable achievement for just a microcontroller, buttons, and a piece of LED strip.

You can get [John]’s AVR code in this pastebin or just check out the video after the break.

Continue reading “One Dimensional PONG, Take Two”

Roomba And Virtual Walls Make Up This Theme Family Halloween Costume

It figures. You spend a ton of time making a cool set of costumes and then you can’t get your kid to pose for a picture. It’s okay though, we still get the point. This themed set of costumes dresses the little one as a Roomba vacuuming robot while mom and dad are suited up as virtual walls (modules that are used to keep the bot from falling down stairs, etc.). It’s fun and unique, but had it not been for some additional electronics this would have been relegated to a links post. For safety sake each costume was outfitted with a ring of LEDs. As a challenge, the lights were given the ability to sync up patterns with each other.

Each costume has a circular frame at the top with a set of RGB LED strings attached. To get them to display synchronized patterns an IR transmitter/receiver board was designed and ordered from OSHPark. Each costume has four of these modules so no matter where the wearers are facing it should not break communications. A demo of the synchronized light rings can be seen after the break

Continue reading “Roomba And Virtual Walls Make Up This Theme Family Halloween Costume”

Wireless Water Heater Monitor Uses Whatever Was Lying Around

[Chris] set out to build a monitoring system for his water heater. It doesn’t Tweet or send SMS messages. It simply lights up an LED when the water heater is active. The one thing that complicates the setup is that he didn’t want to pull any wire from the garage into the house. What you see above is the wireless setup he used to accomplish this goal.

This is an electric water heater, so [Chris] patched into the 230V heating element feed. When the water heater is idle this connection is cut off. He used a transformer to step the voltage down to 17V and rectified it before feeding a 7805 power regulator. The rest of the transmitter circuit consists of a 555 timer driving the coil seen on the left. It is made out of telephone wire, with each of the four conductors inside connected together to multiply the number of windings. The box of breakfast sausages hosts the receiver coil. His hardware takes the induced current from that coil and amplifies it, feeding the signal to the base of a transistor responsible for switching the status LED. This works through the 6″ thick garage wall, although he did have to use a battery on the receiving end as his wall wart was injecting way too much noise into the system to work.

Birthday Badges Teach Kids How To Solder

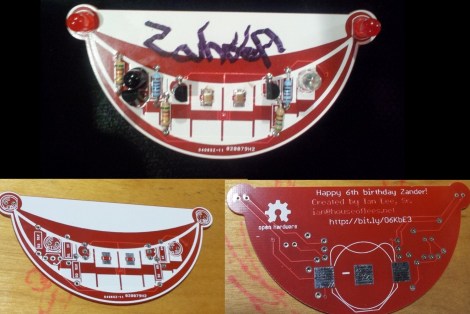
[Ian Lee, Sr] wanted to have an educational activity at his younger son’s birthday party. These were uncharted waters for him as he doesn’t remember education taking place at his own early birthday parties. But he came up with a great idea, with was to teach soldering using interactive badges which each guest could assemble themselves. He needed about twenty, so he tried to keep the BOM as small as possible. But that didn’t mean skimping on features.

You can see the black LED-type package on the left of the assembled badge above. This is an IR receiver whose counterpart transmitter is on the right side of the board. When two of these get within 6-8″ of each other the start talking back and forth. There is no microcontroller involved, instead the system relies on a multivibrator design. One of the red LEDs at the corner of the ‘smile’ is always blinking. When it is off, the IR transmitter is powered. This is picked up by another badge’s receiver, which lights the second ‘smile’ LED. You can see this happen in the short clip after the break.

Although there are relatively few components that went into this, it would take the kids a long time to put them together as they’re just learning. [Ian] and his eldest son soldered on all of the components except for the resistors beforehand.

Continue reading “Birthday Badges Teach Kids How To Solder”

The Band’s Name In Lights, RGB LEDs To Be Exact.

A few of [michu]’s friends formed a band named Kalikut Now and needed an awesome stage show. The band made a few 80cm-high letters of their band name, cut a few pieces of acrylic, and wired them up with a few LED modules. The work of connecting these letters to a computer and programming them fell on [michu], and we’ve got to say he did a pretty good job.

You may remember [michu] from his StripInvaders and PixelInvaders projects, basically a few RGB LED modules that can communicate with an Arduino over an SPI interface. With these huge letters, [michu] ran into a problem: he had 11 meters of cabling between the clock and data lines, far beyond the maximum recommended length for any datasheet.

[michu] looked around the Internet for common problems with SPI interfaces and found a lot of good advice from a lot of very smart people. The issue with the SPI bus was eventually solved by correctly wiring the grounds of his LED modules, building a few dead-simple SPI buffers, and reducing the clock speed of the SPI bus.

After countless hours, the band’s name is in lights, and RGB LEDs to boot. Everything can be controlled with Abelton Live, and looks absolutely fantastic as seen in the video after the break.

Continue reading “The Band’s Name In Lights, RGB LEDs To Be Exact.”

LED Fun And Light Painting With The PyMCU

pymcu-led-pov-writing

Recently [Richard] at [pyMCU] was nice enough to send me one of their units to try out. As featured here before, this little board allows you to control physical things using your computer and the Python programming language. After evaluating it and making a LED blink, there were a couple other LED projects I wanted to try.

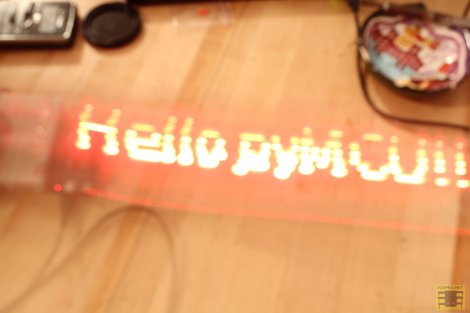
The first idea was to make a LED chaser. This was quite simple, using a little code and plugging in a few LEDs. From this, since you can make the LEDs chase each other, then in the right sequence it should be able to be used to display images using long-exposure photography. Be sure to check out the video after the break of this 10 LED chaser/light bar being assembled.

The results of this LED light bar experiment were really cool, writing some simple text and image with 10 LEDs. Considering the low component count, this is one of the simplest light bar builds that we’ve seen. Programming was simple as well, since the computer using Python does all the processing of the drawing as well as physically turning the LEDs on and off. Of course this setup isn’t without its limitations, having to be connected to a computer being the most obvious. Continue reading “LED Fun And Light Painting With The PyMCU”