kraftwerk_inspired_led_tie

Kraftwerk Inspired LED Tie

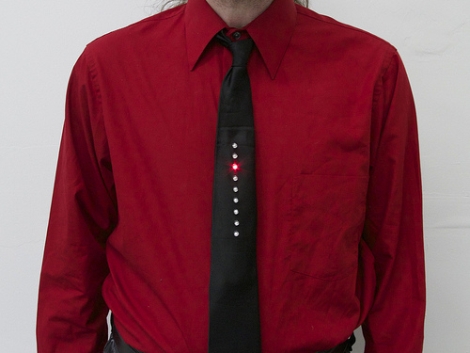
If you didn’t land the job after your last interview, it might have been because you were not wearing this sweet Kraftwerk-inspired necktie. Although our own [Caleb Kraft] insists that this recent creation by the folks over at Evil Mad Scientist Laboratories is a tribute to him, [Ralf Hütter and Florian Schneider] beg to differ.

The inspiration for the tie actually comes from Kraftwerk’s 1977 video for “The Robots”, in which the band wore black ties with embedded scrolling LEDs. The effect is very similar to that of a Larson Scanner, though Kraftwerk’s ties light the LEDs in a single direction and do not fade in and out.

EVMSL has released a firmware update to the Larson Scanner they sell in their shop that replicates the Kraftwerk effect, and they also put together a quick tutorial showing how you can construct your own coin cell-powered LED tie. We’re not suggesting that anyone rush out and buy their kit, as it can be replicated fairly easily – we just thought it was pretty cool.

So, if you’re looking for a retro-inspired Halloween costume, search no further – Evil Mad Scientist Labs has you covered.

Continue reading for a video demo of their tie, as well as the original video that inspired it.
Continue reading “Kraftwerk Inspired LED Tie”

Awesome Fiber Optic LED Viking Helmet

octobrite_led_mohawk_helmet

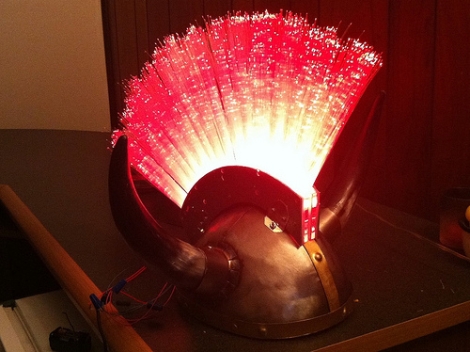
[Garrett] over at MaceTech was approached by a friend who needed a light-up mohawk installed on a Viking helmet, and he needed it ASAP.

Now, [Garrett] does tons of work with LEDs but it’s not every day you are asked to construct a sound-responsive LED mohawk. He had all sorts of LEDs and other bits on hand, but finding the fiber optics that would make up the mohawk itself took a bit of time.

After a bit of searching, he located some cheap bulk fiber optic toy wands, and got busy cutting them apart to remove the fiber bundles. The fibers were glued into a laser cut plastic assembly, where they were paired with a handful of OctoBrite CYANEA modules [Garrett] had on hand. He bought a handful of components from SparkFun, including an Arduino Pro Mini to control the device, as well as an electret mic and graphic equalizer chip to handle the audio input/filtering.

He wrapped up the code portion of the mohawk and handed it off to his friend, who says that the “helmet is +99 to epic awesomeness”, which sounds like a ringing endorsement to us.

[via BuildLounge]

Check out the video below to see the fiber optic mohawk helmet in action.

Continue reading “Awesome Fiber Optic LED Viking Helmet”

Revolights Keep You Safe While Riding At Night

revolights_bike_headlight_taillight

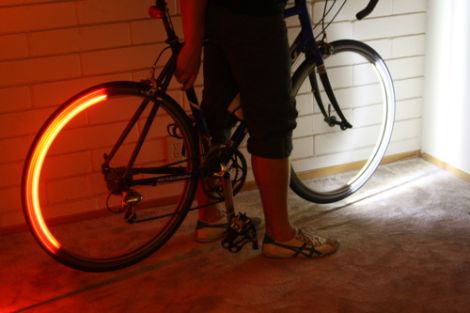
Bicycling at night can be a potentially hazardous endeavor for several reasons, but primarily because well, it’s dark. Inattentive drivers, weather, and other factors aside, the most important thing you can do to keep yourself safe is to ensure that you can see and that you are seen by others.

Revolights, an invention put together by [Kent Frankovich, Adam Pettler, and Jim Houk], is an ingenious way of accomplishing both of those things. The ring-shaped system attaches to nearly any bike tire, and includes LEDs that shine like a car’s head and taillights. A magnet attached to the bike’s fork triggers the onboard microcontroller to light only 4 LEDs at a time, letting persistence of vision take care of the rest.

We think it’s a great idea, and clearly others do as well. With nearly a month left on their Kickstarter page, they have nearly doubled their initial funding goal.

Check out the video presentation on their Kickstarter page to get a better look at the Revolights project.

[Thanks, medix]

Wireless Fiber Optic Mood Lighting

ceiling_mounted_starfield

There’s something calming about looking up into the night sky and seeing an array of shining stars off in the distance. [Marou] is a big fan of stargazing, but sometimes conditions are not optimal, so he decided to bring the stars inside.

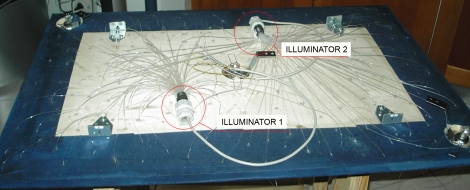
His idea was to build a ceiling lamp that didn’t bask the room with light, but rather one that reproduced the peaceful twinkle of the night sky. He covered a wooden table with dark fabric and drilled a ton of tiny holes into the surface. He fitted the holes in the table with two big bundles of optical fibers since one bundle couldn’t quite cover the entire thing.

To light the cables, he built a pair of 4-LED illuminators, which contain red, blue, green, and white LEDs. Each light source is controlled via an Arduino which takes its direction from [Marou’s] infrared remote.

While the idea isn’t new, the implementation is pretty cool. At first we were expecting a small lamp, but anchoring an entire table to the ceiling as a light panel is definitely something we hadn’t seen before.

If you want to build something similar in your own living room, [Marou’s] Arduino code is free for the taking.

Controlling Dioder Light Strips Wirelessly

dioder_universal_io

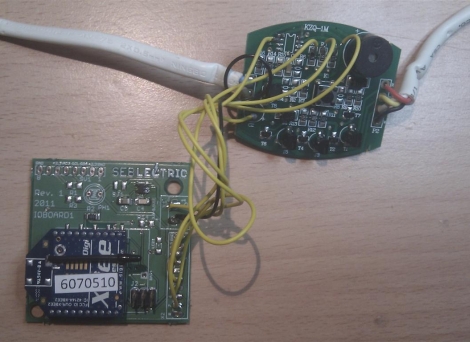
[SeBsZ] does a lot of work in home automation, using Xbee modules, LEDs, and other home lighting systems. Naturally, people look to him for help with different electronics projects, but one thing he has been asked time and time again is if he can make a simple mood lighting solution that can be easily installed.

He has always been interested in playing around with RGB LEDs, but he wasn’t looking to reinvent the wheel with this project. Instead he based his work off the Ikea Dioder product, an off-the-shelf set of adjustable LED strips. As we’ve seen before, the control module for these LEDs leaves a bit to be desired, so he removed the Dioder’s onboard PIC and wired up a controller of his own. His “Universal IO Board” uses an Atmega88 for control and has all the pins required to attach an Xbee wireless module. With everything wired up, he now has full wireless control of the Dioder light strips, without a ton of fuss.

Although he’s selling a few different hardware kits, the schematics for his IO board are freely available on his site, should you want to make your own. The only thing that we didn’t see was the code for the Atmega, but we’re guessing he has that posted somewhere as well.

Glowing Eyes Project Keeps It Simple This Halloween

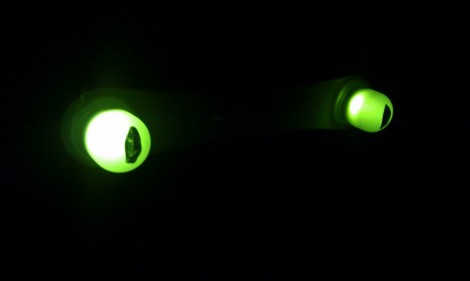
Halloween’s on its way and we want to remind you to get started early so you can show us what you’ve got in store for the little ones this year. [Pete] already finished a simple project to spice up the bushes in front of his house. His trio of glowing and blinking eyes will make a nice addition to the bushes in front of his house. Each is made from a pair of over-sized LEDs mounted on popsicle sticks. After passing the leads through holes in the wood, they are soldered to some resistors and cat-5 cable. The conductors are covered in hot glue to help protect from moisture, and then they’re ready to be driven by the ATtiny2313 which uses random numbers to help ensure the blinking doesn’t look timed. Check out the video after the break to see how he did.

This is a great example that you don’t have to take on the most complicated project in the world to be appreciated. But if you’re looking to be remembered for years to come you might want to aim high by building something like the trash-can jack-in-the-box, or a puking pirate.

Continue reading “Glowing Eyes Project Keeps It Simple This Halloween”

DIY PCB Exposure Box Looks Professionally Made

diy_double_sided_exposure_box

[Stynus] was frustrated with the fact that he would have to flip his PCBs over mid way through the exposure process, so he decided the best course of action would be to build his own double-sided PCB exposure box.

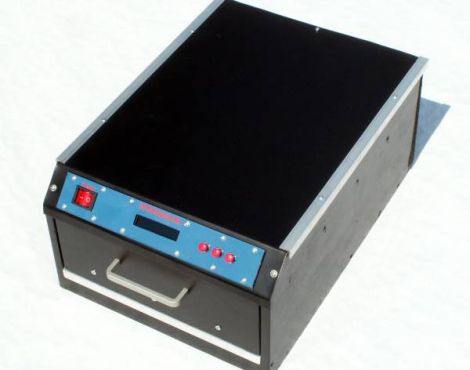
He scored some UV LEDs on eBay, and after waiting a few weeks for PCBs to arrive, he was ready to start construction. The box contains a sliding glass shelf, which is positioned between two sets of LED panels. The setup lets him simultaneously etch both sides of any PCB, up to 20cm x 30cm in size. The exposure box is run by a PIC 16F628P and features an LCD status panel as well as a small handful of controls. [Stynus] programmed the box to retain the length of the last exposure, making it easy to replicate his results time after time.

Towards the end of the build log he shows off some pictures of the completed exposure box, which looks very professionally done. It’s a great job all around, and we would gladly take one for our workshop in a heartbeat.