Light Painting With The Raspi

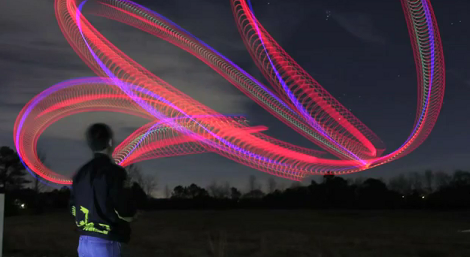
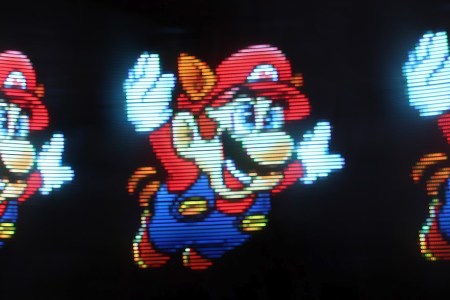
The art of taking long exposure photographs with blinking RGB LEDs has improved greatly over the years, mostly due to the extremely easy to use Arduino and hundreds of tutorials on the web. If there’s one problem with light painting with a ‘duino, it’s that large, full color images take up a ton of storage space, much more than the flash memory on an Arduino can provide. Wanting fancier and more colorful light painted images, [Phil] over at Adafruit used a Raspberry Pi to make some very awesome light painted images.

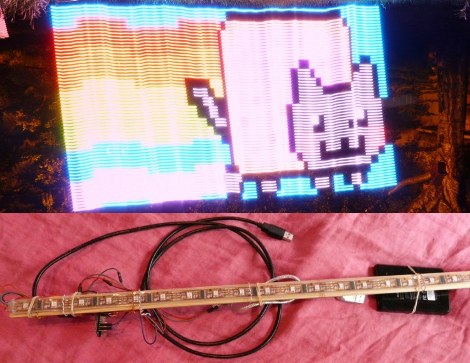
Like any Adafruit tutorial that uses LEDs, the build begins with a digital RGB LED strip wired to the GPIO pins on the Raspi. After loading up the Adafruit educational Raspi Linux distro for hardware SPI support, the only thing left to do was writing a Python script to display images in the air.

[Phil] says vertical, hand-held LED bars are old hat, so he took a hula hoop and a few bits of PVC pipe, attached the LED strip, and put it on his bike. The results are really impressive – we’re loving the flames in the title pic – and considering the Raspi is a full-fledged computer, light paintings larger than what [Phil] made are very possible.

Simple Light Painting Bar Build

[SkyWodd] took the easy route when it came time to build this light painting bar. But he was still met with great success. Thanks to his well-documented work you should be able to throw this together for yourself in about an hour.

The idea here is to build a full-color display that will draw a picture in a long-exposure photograph. We’ve seen the concept used with 64 discrete RGB LEDs, but there’s almost no soldering to be done with this project. Instead, [SkyWodd] used an addressable RGB LED strip. It has 64 pixels, all taking commands via the SPI protocol. This helps keep the number of microcontroller connections to a minimum. He lashed the entire system onto a long hunk of wooden dowel and grabbed a camera.

You’ll need a DSLR as each image needs to have an exposure time approaching 10 seconds. One thing to note is that it may be best to leave the LED bar stationary and move the camera. If you use a tripod it should help keep the vibrations to a minimum.

Laser Light Painting Includes Camera Control

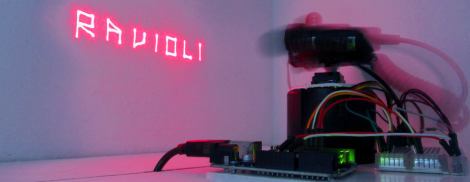
This laser light painting setup can even control the camera. But it probably will not work with your average point-and-shoot. The exposure time used is somewhere around 2 seconds long, a feature which is hard to find on anything but DSLR cameras.

The setup relies on a red laser diode to do the painting. When viewed in real time you only see a dot tracing out a cryptic pattern and occasionally switching on and off. But with a long exposure the intense light persists to achieve an image like the one seen above. Note the ghosting around the rig as it has moved while the shutter was open.

The Arduino controlled device consists of a base which pivots the diode horizontally, with a servo for aiming on the vertical axis. Since the sketch is divided up by letter, we wonder how hard it would be to adapt this for use with a point-and-shoot? Perhaps you could capture one letter at a time and layer the frames in post production?

It seems this is a lot easier to build than some of the LED plotters we’ve looked at. If you do make your own don’t forget to send a link our way.

Continue reading “Laser Light Painting Includes Camera Control”

Salvaged Robot Arm Used For Light Painting And Pen Plotting

The members of Shackspace got their hands on an antiquated robot arm. It’s a Mitsubishi Movemaster RM-101 and was probably manufactured in the mid 1980’s. There’s almost nothing out there that tells you how to use the thing, and so they set out to figure out how to control the hardware.

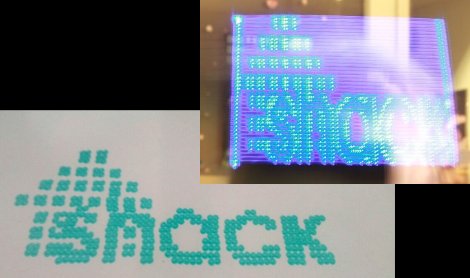
This is a great example of how an EPROM dump can be really useful. After further inspection the team discovered that the arm is driven by a Z80 processor whose program is stored on an EPROM. The first thing the guys did was dump the memory since the aging storage will be useless if just a few bits become degraded. This dump will be really useful for others whose chip has already given up the ghost. The data from that dump was disassembled and painstakingly pawed through to figure out what commands were being sent to the arm. This technique worked, as the team was able to re-implement the control protocol and has already used the arm for some light painting and pen plotting (seen above). After the break you can see a control demonstration.

Continue reading “Salvaged Robot Arm Used For Light Painting And Pen Plotting”

Making A Light Orb Thingy

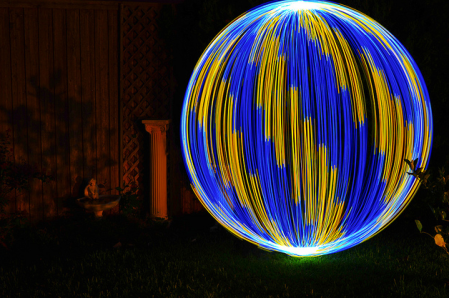
The “light orb” has become a staple of light painting projects. If you’ve ever looked through someone’s gallery of light painting, you’ve probably seen a few. There are multiple ways to make them, this project focuses on swinging a light, or multiple lights at the end of a rope while you slowly turn in a circle.

The addition of addressable RGB LEDs and a micro controller make this rig capable of generating patterns and possibly even simple images in the sphere itself. His results are quite impressive. His spheres actually look even more precisely shaped than the automated sphere rig we shared with you before!

Helicopter Light Painting Continues To Snuff Out Physics Lesson On Your Brain

Cool picture, huh? Wait until you see the video footage of this LED-adorned RC helicopter flying on a dark night. But this isn’t an art project. Analyzing the long-exposure photography turns out to be a great way of clearing up some of the physics of flight which otherwise are not at all intuitive. The helicopter used here has different colored lights on the nose and tail, as well as lights on the rotors.

Depending on how the aircraft is moving, different 3D spirography is captured by the camera. When you zoom in on part of the flight path it becomes clear that there are wider arcs on one side of the fuselage than there are on the other. This has to do with the forward progress of the aircraft and the rotation of the blades. The phenomenon is well known by helicopter enthusiasts, and accounted for in the design. But what we didn’t realize is that it actually translates to a theoretical speed limit for the aircraft. Our childhood love of Airwolf — the TV helicopter that could outrun jets — has been deflated.

You should remember the helicopter physics videos featured here last month. This is the latest offering and we’re still wanting more!

Continue reading “Helicopter Light Painting Continues To Snuff Out Physics Lesson On Your Brain”

Extremely Detailed Light Painting Bar

[Matt Pandina] has been documenting his build of a very nice light painting bar on his G+ page. His light painting bar has 64 RGB LEDs being driven by an ATmega328P and four TLC5940 chips. He wrote his own libraries to talk to the TLC5940 as well as his own libraries to pull images off of a MicroSD card. He also wrote a cross-platform program that automatically converts a directory  of pngs to something the TLC5940s expect. He says the secret to getting his24-bit color correction looking right is gamma correction. It seems that when the LEDs were run too bright, he couldn’t get the colors quite right.  In case you’re curious, those images are 15 inches tall!

You can follow along through his posts as he starts with just a few LEDs and slowly updates and grows it to the impressive state it is at currently.