An odd looking apparatus for cleaning floppy disks. A neon green disk tray is suspended on metal linear rails in a vertical orientation. It can move back and forth through a set of cleaning heads and a set of drying fans. There are some control buttons on the font as well as a string of addressable LEDs and two speakers.

Rube Goldberg Floppy Disk Cleaner

Floppies were once the standard method of information exchange, but decades of storage can render them unreadable, especially if mold sets in. [Rob Smith] wanted to clean some floppies in style and made a Disco Rube Goldberg-Style device for the job.

Starting with a disk caddy on linear rails, [Smith] has a track for the floppy to follow. First it goes through a set of pads with cleaning solution on them, and is then dried off with heating elements. To make it more fun, the device has LEDs and a set of speakers at the bottom to treat the disk to a more complete car wash-esque experience.

Cotton swabs and a cleaning solution are all you really need to do the job by hand, but if you have a lot of floppies, that can get tedious quickly. [Smith] compares his machine’s performance to doing it by hand with both IPA and a dish soap solution showing that his machine does indeed clean the disks and usually makes them more readable than they were before. He cautions that it might be best to make multiple copies of the disk during the cleaning process as it isn’t always constructive though.

Thinking about archiving that stack of floppies under your workbench? While Linux doesn’t support the drives anymore, we’ve covered a couple different methods in the past and the importance of reading the flux.

Continue reading “Rube Goldberg Floppy Disk Cleaner”

Mostly Printed CNC Gets A Few Upgrades

The Mostly Printed CNC is famous for two things. First, being made mostly from 3D printed parts and commonly available steel tubing. Second, because of the materials used, its rigidity isn’t fantastic. But any CNC router is better than no CNC router, and [Alan Reiner]’s “Mostly Mostly Printed CNC” upgrades the base MPCNC into a much more capable unit.

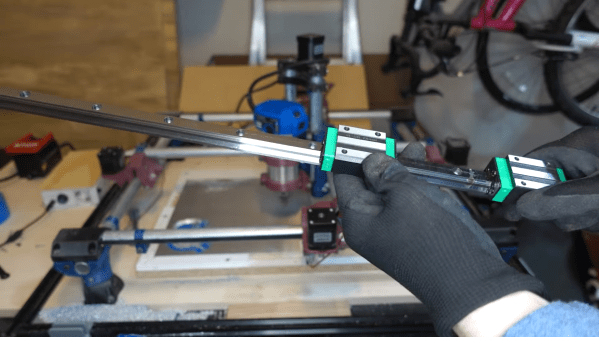
MPCNC purists may want to look away, as the video below shows [Alan] committing the heresy of adding linear rails to his machine. The rails were sourced from VEVOR and at less than $100 for 10 meters, it must have been hard to resist. The rigidity wasn’t amazing — witness the horrific chatter at around the 5:15 mark — but [Alan] sorted that out with some aluminum extrusion and printed adapters.

Those upgrades alone were enough to let [Alan] dive into some aluminum cutting, but he also wanted to address another gripe with his base build: the Z-axis backlash. The fix there was to add another lead screw nut on an adjustable carrier. By tweaking the relative angles of the two opposed nuts, almost all of the backlash was taken up. [Alan] also replaced the motor coupling on the Z axis with a Lovejoy-style coupler, to remove as much axial compliance as possible.

Along with the motion control mods, [Alan] improved work holding and added an enclosure to tame the chip beast, along with some upgrades to the control electronics. The results are pretty good and appear well worth the modest added expense. Maybe a wireless controller can be next on the upgrade list?

Continue reading “Mostly Printed CNC Gets A Few Upgrades”

Video De-shaker Software Measures Linear Rail Quality

Here’s an interesting experiment that attempts to measure the quality of a linear rail by using a form of visual odometry, accomplished by mounting a camera on the rail and analyzing the video with open-source software usually used to stabilize shaky video footage. No linear rail is perfect, and it should be possible to measure the degree of imperfection by recording video footage while the camera moves down the length of the rail, and analyzing the result. Imperfections in the rail should cause the video to sway a proportional amount, which would allow one to characterize the rail’s quality.

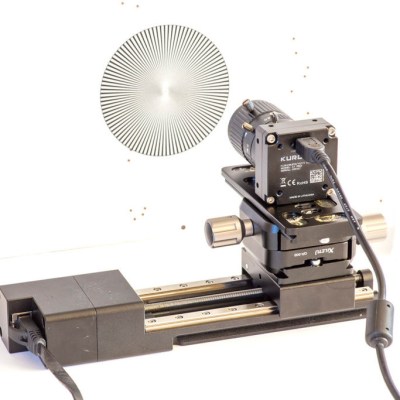
To test this idea, [Saulius] attached a high-definition camera to a linear rail, pointed the camera towards a high-contrast textured pattern (making the resulting video easier to analyze), and recorded video while moving the camera across the rail at a fixed speed. The resulting video gets fed into the Deshaker plugin for VirtualDub, of which the important part is the deshaker.log file, which contains X, Y, rotate, and zoom correction values required to stabilize the video. [Saulius] used these values to create a graph characterizing the linear rail’s quality.

It’s a clever proof of concept, especially in how it uses no special tools and leverages a video stabilizing algorithm in an unusual way. However, the results aren’t exactly easy to turn into concrete, real-world measurements. Turning image results into micrometers is a matter of counting pixels, and for this task video stabilizing is an imperfect tool, since the algorithm prioritizes visual results instead of absolute measurements. Still, it’s an interesting experiment, and perfectly capable of measuring rail quality in a relative sense. Can’t help but be a bit curious about how it would profile something like these cardboard CNC modules.

A CNC Hacked Together In Pajamas

Sometimes you just gotta sit down and hack something together. Forget the CAD and the cool software toys; just hammer away until you have something working. That’s how [bobricus] ended up with this cute little laser engraver anyway.

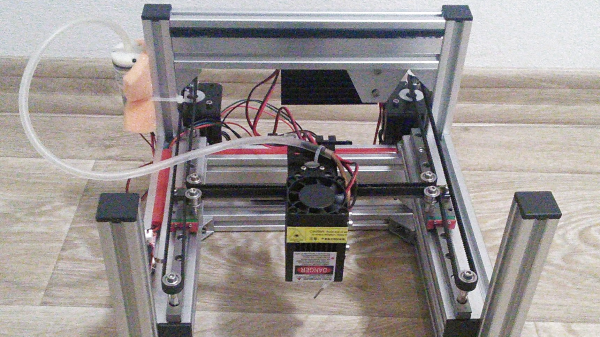
For under $300 US of parts and a few nights working in his pajamas, the aptly named, pajama micro laser engraver is a pretty nice little machine for its class. Not having the space for a full size machine and not necessarily needing its capabilities he aimed to produce something compact.

The frame is aluminium extrusion, the movement is core-XY an H-bot on linear rails, and it appears to just be a grbl board with a Chinese laser module on it. He took a bit of care to make the frame a cube which allows him to easily vent the fumes from the little unit. There’s even a small air pump to blow the off-gas from the cutting away from the laser.

All in all a nice little hack useful for all sorts of things from solder masks to cutting wood veneers. You can see it zipping around in the video after the break.


Continue reading “A CNC Hacked Together In Pajamas”

Cheap And Easy Linear Supported Rail

Some of the very largest – and coolest – CNC machines use supported linear rail for their movement axes. For any home tinkerer trying to reproduce these supported rails, the problem of cost comes up very quick; these rails can run over $100 for just a few feet. [Michael] came up with a great way to build his own supported rail so he can build his very large CNC router.

There aren’t many tools needed to build [Michael]’s rail. He put a 90° notch in a 2×4 to support his 25mm rail, and clamped it down with a piece of plywood. After drilling a 5/16″ hole every 12 cm, he tapped these holes out to receive 3/8″ threaded rod. Yes, we also hate the mix of metric and imperial units in that description, but the results speak for themselves.

The now-supported rail was mounted to a piece of MDF with a few bolts and washers. MDF isn’t the most dimensionally stable material, so [Michael] will be covering the whole thing in a coat of epoxy very soon. Now, he’s one step closer to his gigantic CNC gantry router.

You can check out [Michael]’s demo video after the break.

Continue reading “Cheap And Easy Linear Supported Rail”