Num Pad Reborn As Stream Deck

Stream decks are cool and all, but they are essentially expensive, albeit sorta cool-looking macro pads. So why not try to make your own? You don’t necessarily have to start from scratch.

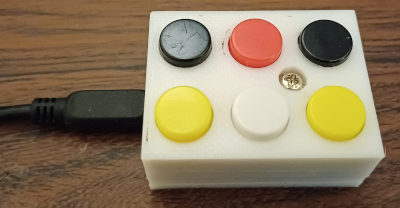
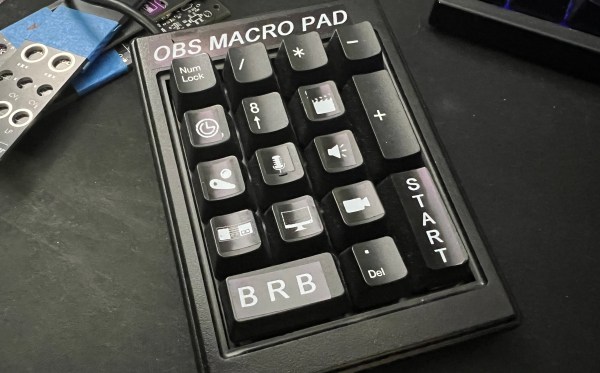
It all started when [dj_doughy] found an extremely clicky num pad in a recycle pile. It was so clicky, in fact, that even though [dj_doughy] didn’t need an external num pad, they wanted to keep it around as a fidget toy. From the video after the break, they look to be white ALPS switches. The only problem? It had a PS/2 connector.

Well, okay, there was another problem. The chip inside seemingly has no datasheet available. [dj_doughy] took to Discord for help, and was advised to just have the thing use extended keys, like F13-F24, and assign those as hotkeys in OBS.

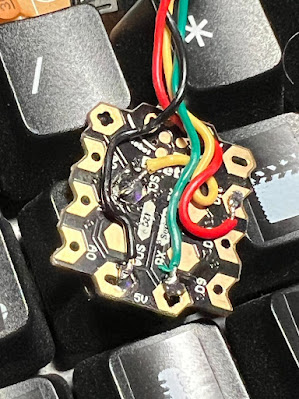
In order to make it USB, [dj_doughy] need a microcontroller capable of acting as a Human Interface Device (HID). While [dj_doughy] tested using an Arduino Leonardo, they ended up using an Arduino Beetle due to its diminutive size. [dj_doughy] had a bit of trouble with the code sending two key presses, but found out they were just missing some variables. Now it works like a charm.

Would you like a macro pad that lets you physically reassign macros? Then check out this tile-based macro pad.

Tile-Based Macro Pad Keeps Getting Better

If there’s one thing we love to see around here, it is the various iterations of a project. If you keep up with Keebin’, you know that [Michael Gardi] created a tile-based macropad after developing a tile system for yet another project. This macro pad would have 3D-printed tiles next to the keys that would not only make them easy to relabel, but give [Michael] a novel way to change the function when changing the tile using magnets and Hall effect sensors.

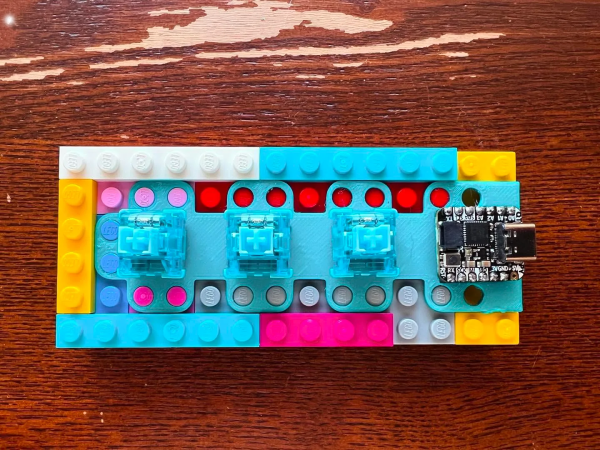
Well, fast forward to [Michael] actually using the thing, and he’s found that, more often than not, he’s pressing the tiles instead of the keys next to them. So it was time for another iteration: a macro pad with tile buttons. Much like the previous iteration, this one uses a Pro Micro for a brain and a handful of very cool Futaba MD switches that bear Cherry MX stems.

Those Futaba switches are activated by tile holder buttons, which were quite the feat to create. These tile holder buttons each contain two Hall effect sensors and have a Cherry MX-style recession on the other side to connect to the Futaba. Unfortunately, some usage has already damaged the connections, so the next iteration will include small PCBs for surface-mount Hall effect sensors and a main PCB, as well.

[Michael] can make these pretty cheaply, but are they cheap enough to be given away?

Illustrated Kristina with an IBM Model M keyboard floating between her hands.

Keebin’ With Kristina: The One With The Tile-Based Macropad

Prolific Hackaday.io member [Michael Gardi] has hit upon the biggest problem with making reprogrammable macro pads — the legend situation. What do you do when the whole point is that the keys can so easily be changed?

There are a couple of options: blank keycaps and memorization, re-legendable keycaps, and little screens instead of keycaps. Surely there has to be another way, and [Michael] has discovered one: a tile-based system of descriptors.

As you can see, the labels are removable 3D-printed tiles that swap out with ease thanks to tiny magnets. But these aren’t just tidy labels. Inserting a new label automatically changes the macro! Each tile holds a “simple numeric value” which maps it to a macro when inserted and detected by a Hall effect sensor. I can’t wait to hear these tiles click in action during a demo video, which I can only hope is forthcoming.

Continue reading “Keebin’ With Kristina: The One With The Tile-Based Macropad”

Single-Button Keyboard Has Multiple Uses

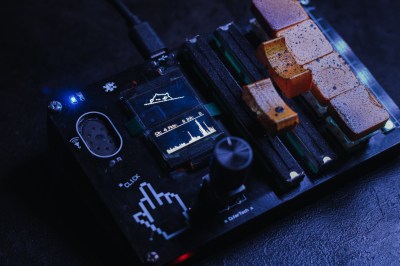
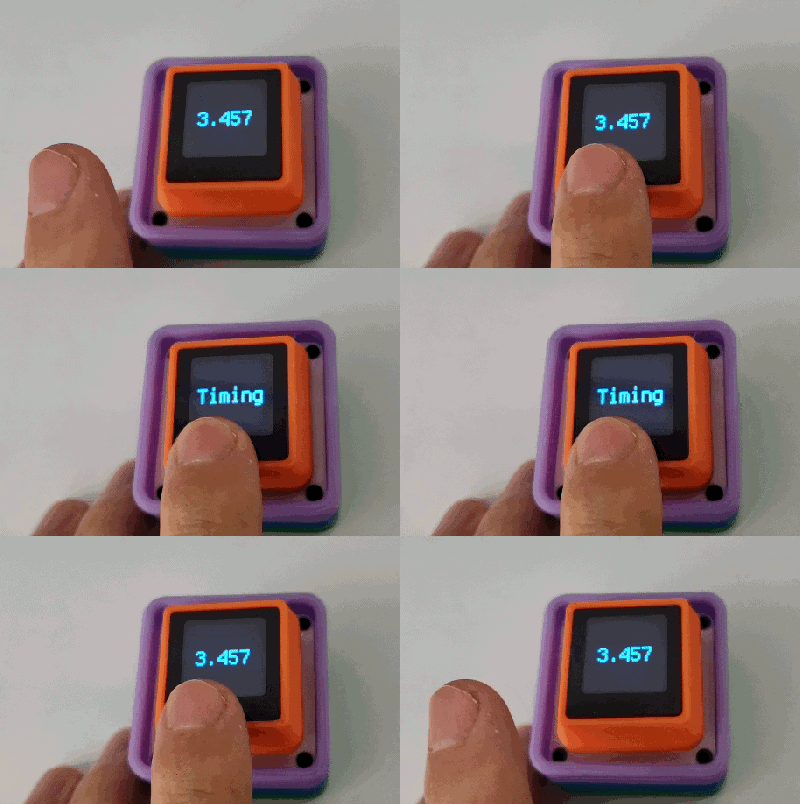
Well now why would I want a single-button keyboard, you might be asking yourself. We say it all depends on how you build the thing, and how you program it. Would you believe that the MagiClick by [Modular] is capable of showing live weather information or the date and time, acting as animated dice, or being a stopwatch and Pomodoro timer? Now you’re beginning to understand.

Before we get much further, yes, this bad boy has two additional buttons on the sides. But the spirit of the thing is in the single large switch in the middle. It’s hiding beneath the 0.85″ 128×128 display, which is protected from pressure and fingerprints by that Pop-o-Matic bubble over the top. While the big button is the main operator used to access the function options, the side buttons are used as auxiliaries to exit and return to the home screen.

MagiClick is based on the ESP32-S3 and is designed to run on CircuitPython. In addition to everything else packed into this thing, there are blinkenlights and a small speaker inside, plus a GPIO expansion header around back. Everything is available on GitHub if you want to build your own.

Not enough keys for you? Well, here’s one with two.

Illustrated Kristina with an IBM Model M keyboard floating between her hands.

Keebin’ With Kristina: The One With The Busy Box Macro Pad

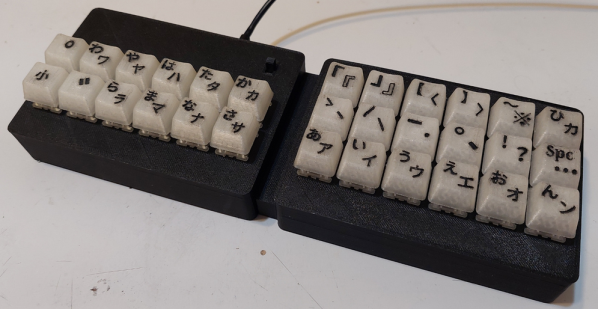
Well, I must admit that Google Translate completely failed me here, and thus I have no real idea what the trick is to this beautiful, stunning transparent split keyboard by [illness072]. Allegedly, the older tweets (exes?) hold the key to this magic, but again, Google Translate.

Based on top picture, I assume that the answer lies in something like thin white PCB fingers bent to accommodate the row stagger and hiding cleverly behind the keys.

Anyone who can read what I assume is Japanese, please advise what is going on in the comments below.

Continue reading “Keebin’ With Kristina: The One With The Busy Box Macro Pad”

Illustrated Kristina with an IBM Model M keyboard floating between her hands.

Keebin’ With Kristina: The One With The Death Metal Macro Pad

At “the size of three 60% keyboards (put together)” or approximately one Cannibal Corpse record on vinyl, this beautifully-executed death metal font-inspired macro pad by [zyumbik] may be better off hanging on the wall than hanging out on the desktop.

But let’s say you did have room for the 9-key Deathpad on your desktop. Wouldn’t you just play with the tentacles (?) all the time like I would? Yeah, that’s what I thought. They’re pretty inviting.

So why does this look so fantastic? It’s an SLA print, for one thing. For another, [zyumbik] spent over 1,000 hours designing the thing. Unfortunately it’s not open-source, but you can buy the only other one in existence for a cool $1,000.

Rubik’s Cube Keyboard

Although it doesn’t rotate (yet), creator [_Rudeism] is calling this the Rubik’s Cube Keyboard. Fine with me, though any type of actual rotation would be insanely difficult to pull off. The plan is to do it with RGB LEDs.

The layout is QWERTY-adjacent — the white side is the num pad, yellow has the modifiers, and the other four sides house all the letters. As you might imagine, this uses a custom frame and PCBs. The switches are Glorious Gateron Clears, which definitely supports the blinkenlights planned for V2.

This thing reminds me a bit of of the SafeType™ vertical keyboard, or even [Aaron Rasmussen]’s spherical keyboard. Be sure to check it out in Monkeytype action, where [_Rudeism] manages to pull off about 20WPM. Continue reading “Keebin’ With Kristina: The One With The Death Metal Macro Pad”

Open Deck Is Your Window To Shortcuts

Once in a while, we see projects that could easily pass for commercial products. This is one of those projects: a (surprisingly) low-cost DIY macro pad from [Josh R] that was designed to be a cheaper alternative to the various stream decks out there. Between the carbon fiber top plate and the crystal-clear acrylic keycaps, this is quite the elegant solution.

This lovely little macro pad is built around the ESP8266, specifically the WEMOS D1 Mini V4. However, the most vital part to get right is the screen, which must be a 128 x 160 TFT display in order to line up with the 3D printed frame that divides it into fourths. Custom parts like the acrylic keycaps and the carbon fiber top plate are available on Tindie if you don’t have access to a CNC.

Operationally, Open Deck has a nice-looking GUI. Once programmed, each shortcut is capable of having three beneath it, with the fourth button reserved for Home. Be sure to check out the extremely satisfying build video after the break.

Want a stream deck, but don’t want to build it? Just dig up an old phone or tablet.

Continue reading “Open Deck Is Your Window To Shortcuts”