Chiptune Instrument From NES

[Jarek Lupinski] wanted an instrument that would let him play chiptunes live, without a need for pre-programming a cartridge for playback during a concert. His preferred hardware is an original Nintendo Entertainment System because of its familiar nostalgic sound. After picking up a lot of 5 broken NES units he set out to build a midi-compliant device.

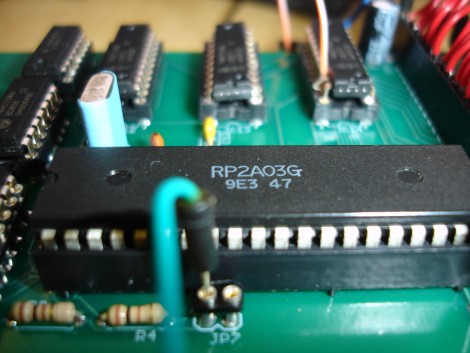
The five NES units he bought had nothing wrong with them other than the 70-pin cartridge connector. He fixed them all, then de-populated the board on one and tried to build out a circuit on a breadboard. After much trial and error, forum searching, and conversations with others who were familiar with the hardware he got the circuit working. He’s posted a schematic and had a board fabricated which takes the transplanted chips and transforms them into an instrument. Check out the test notes being played by an Arduino Mega after the break.

Continue reading “Chiptune Instrument From NES”

Next Generation Arduino Manufacturing Problems?

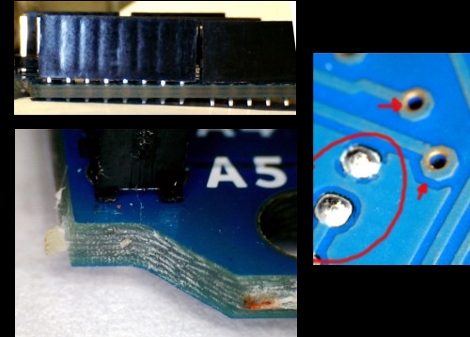
[The Moogle] just got his new Arduino Uno; wow, that was fast. What should have been a happy unboxing turned sour when he took a close look at the board. It seems that it exhibits several examples of sloppy fabrication. The the lower-left image shows unclean board routing, a discolored edge, and a sharp tooth sticking out from the corner. The shield header shown in the upper left is not flush with the board, resulting in a weaker physical union and a crooked connection. There are vias that look like they’re not be centered in the solder mask, and areas where raw copper is exposed.

It saddens us to see this because the original Arduino boards were so well manufactured. Keep in mind that this may be an isolated case, and as of yet the company hasn’t been given the chance to swap out the board for one that has passed a more rigorous quality control inspection. But if you’ve already ordered one of your own, take a close look and make sure you’re satisfied with it upon arrival.

Not sure what we mean by next generation Arduino? Take a look at the new hardware that was recently unveiled.

Update: Here’s a direct response from the Arduino blog.

Update #2: [Massimo Banzi], one of the founders of Arduino, took the time to comment on this post. It details the organization’s willingness to remedy situations like [The Moogle] encountered and also links to the recent Arduino blog post.

LEGO Host For All Of Your Prototyping Projects

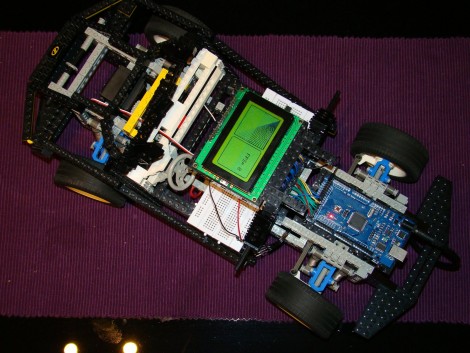
[Deadbird] decided to use a LEGO 8880 Super Car as a host for all of his electronic tinkering. Throughout his blog (translated) you’ll find the vehicle with an Arduino MEGA interfacing various prototyping bits. It starts with the motors for locomotion, closely followed by a servo for steering. From there we see the addition of a breadboard and graphic LCD screen. So far he’s worked out the use of a PS2 keyboard as a controller and, most recently he’s interfaced a Wii Nunchuck.

We’re more used to seeing NXT kits adapted for wider use, but if you’ve got a nice kit like this one it makes a great base onto which you can add your own robotic elements.

Arduino Based EATC Replacement

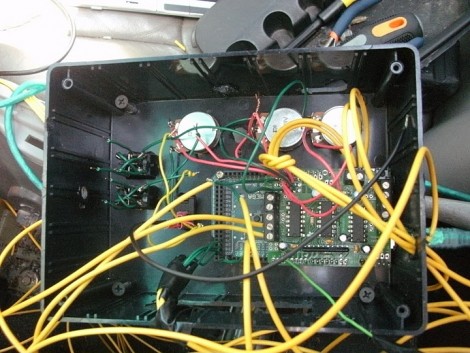
The Electronic Automatic Temperature Control Module on [Dan Mattox’s] 2000 Ford Taurus bit the dust. The junkyards in the area didn’t have a matching replacement and a new one is pretty hard to come by so he built an EATC  replacement from an Arduino Mega. It includes a solenoid controller board for the vent selector, blower control, and new switches to control the power windows. He’s got the system up and running which is important because after removing the broken EATC the car was stuck blowing 90-degree air at full blast. He’s put together a demo and an installation video which we’ve embedded after the break but there’s also a photo album you can page through. The sketch that we developed to control the system is up at pastebin so get it while it’s hot.

Continue reading “Arduino Based EATC Replacement”

Arduino-human Synthesizer

[youtube=http://www.youtube.com/watch?v=IObPkUFq0hg]

(Thanks to [Aaron] for the tip) As a promo for [Calvin Harris], some of the creative minds at Sony Music have put together an Arduino-based sythesizer composed of 15 bikini clad babes. By analyzing which circuits are closed, the Arduino Mega is able to tell a sequencer which sample to play. The only innovation happens to be that the circuits are painted onto the aforementioned girls with a conductive body paint known as Bare.

Developed by students at the Royal College of Art, the paint is not available for purchase, but they are willing to mix a batch up for art installations or performances. Technical stats (such as resistance) have not been released, but for a washable paint it seems to be performing quite well.

How was the whole project set up? The video below reveals all:

[youtube=http://www.youtube.com/watch?v=up1wraRnriI]

Arduino MEGA

arduino_mega

Evil Mad Scientist Laboratories spotted one of the first images of the Arduino MEGA. The board is based on the ATmega1280 microcontroller, which has 128KB of flash,4KB of RAM, and 4KB of EEPROM. We haven’t seen any official specs yet, but the silkscreen shows 12 PWM connections, 36 Digital I/O, and 16 analog inputs. The post mentions 4 hardware UARTs and an I2C bus as well. No release date yet, but we can assume it’s soon since the hardware was already demoed at ETech.

Related: We added an Arduino category.