Bucky Glow: Have A Ball While You Practice Coding

About a year ago, [Jonathan Bumstead] built a giant, touch-sensitive, interactive RGB LED geodesic dome that somehow escaped our attention entirely. For this year’s Hackaday Prize, he’s designed a smaller version that’s just as awesome, but a lot faster and easier to build.

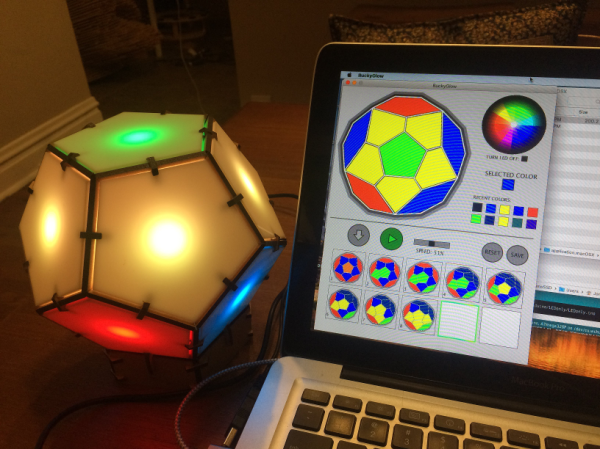
The Bucky Glow is great way for hackers of all ages to expand their coding and problem solving skills. This interactive dodecahedron consists of 11 RGB LEDs and a Nano inside 12-sided laser-cut MDF sculpture. The breakout header means you’re free to add interactive bits like a DIY capacitive touch keyboard, IR sensor/emitter pairs, motors, or whatever you want.

When it’s time to relax, Bucky Glow puts on a light show. It comes ready to party without any programming necessary, but if you wanna put on some Pink Floyd and get your hands dirty, [Jonathan]’s custom Processing app makes it easy to program complex light shows.

[Jonathan] is currently working on some different Bucky Glow dissemination methods, such as a kit version. For now, you can buy a fully assembled Bucky Glow through the One Bit Kit store. Interact with the break to try it before you buy it.

Continue reading “Bucky Glow: Have A Ball While You Practice Coding”

OpenDeck Makes Spinning Your Own MIDI Controller Easy

These days, MIDI controllers are just plain cool. There are a million of them out there, and they’re all dressed to the nines in flashing LEDs and sporting swag like USB MIDI interfaces and sliders that just feel right. With our italics budget running out, I should get to the point – you can make your own, and the OpenDeck platform makes it easy.

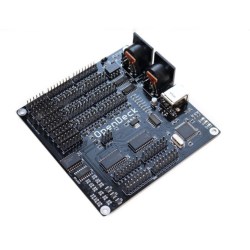
The OpenDeck board. Readily apparent is the fact that it has tons of IO.

In its most refined form, the OpenDeck is a board covered in pin headers. To these, you may connect an absolute truckload of buttons, encoders, sliders, and LEDs. The OpenDeck handles all of the inputs and outputs, while you get to have fun attaching your various gizmos to the control surface/keytar/birthday cake you happen to be building. It saves you reinventing the wheel as far as reading switches and potentiometers goes, allowing you to focus on the creative side of your project. All configuration is handled through a simple web interface.

Boards are available on Tindie,  but it’s also possible to take the code and run it on various Arduinos and the like, as it’s wonderfully opensource. This gives you the power to take things to a higher level once you’re good and ready.

We’ve seen a rather cool OpenDeck build already, and if you’ve got more, you know where to reach us.


Pocket Woodwind MIDI Controller Helps You Carry A Tune

It’s easy to become obsessed with music, especially once you start playing. You want to make music everywhere you go, which is completely impractical. Don’t believe me? See how long you can get away with whistling on the subway or drumming your hands on any number of bus surfaces before your fellow passengers revolt. There’s a better way, and that way is portable USB MIDI controllers.

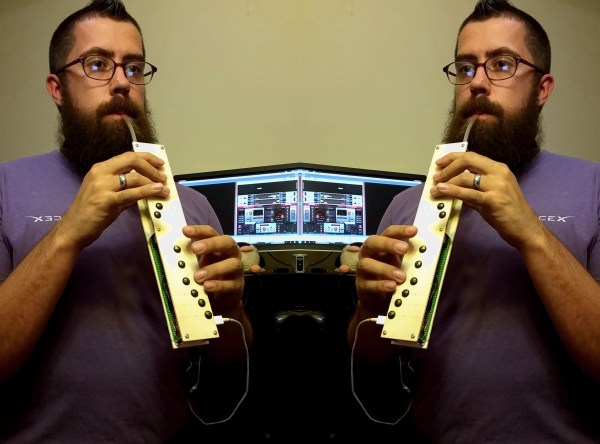
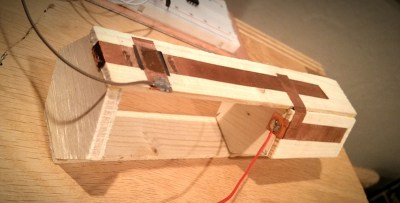
[Johan] wanted a pocket-sized woodwind MIDI controller, but all the existing ones he found were too big and bulky to carry around. With little more than a Teensy and a pressure sensor, he created TeensieWI.  It uses the built-in cap sense library to read input from the copper tape keys, generate MIDI messages, and send them over USB or DIN. Another pair of conductive pads on the back allow for octave changes. [Johan] later added a PSP joystick to do pitch bends, modulation, and glide. This is a simple build that creates a versatile instrument.

You don’t actually blow air into the mouthpiece—just let it escape from the sides of your mouth instead. That might take some getting used to if you’ve developed an embouchure. The values are determined by a pressure sensor that uses piezoresistivity to figure out how hard you’re blowing. There’s a default breath response value that can be configured in the settings.

TeensiWI should be easy to replicate or remix into any suitable chassis, though the UV-reactive acrylic looks pretty awesome. [Johan]’s documentation on IO is top-notch and includes a user guide with a fingering chart. For all you take-my-money types out there, [Johan] sells ’em ready to rock on Tindie. Check out the short demo clips after the break.

We saw a woodwind MIDI controller a few years ago that was eventually outfitted with an on-board synthesizer. Want to build a MIDI controller ? , like this beautiful build that uses hard drive platters as jog wheels.

Continue reading “Pocket Woodwind MIDI Controller Helps You Carry A Tune”

Teensy Laser Harp Has Big Sound

[Johan] has slipped down the rabbit hole of making musical instruments. His poison? Laser harp MIDI controllers. Having never made one before, he thought he would start small and then iterate using what he learned. Fortunately for us, [Johan] documented the process over on .io, essentially creating a step-by-step guide for building a simple but powerful 16-note laser harp.

Laser Harp I is built around a Teensy 3.2 and, of course, lasers pointed at LDRs. [Johan] used fairly low-power laser modules, which are slightly less blinding if you accidentally look at them for a second, but should still be taken seriously. He added four potentiometers to control the sensitivity, scale, octave, and the transposition. The sensitivity pot essentially accounts for the ambient light in the room. Although it only has 16 notes, Laser Harp I is ready to rock with over 30 different scales to choose from. Check out the brief demo that [Johan] put up on his Instagram.

If you try to build your own laser harp and get lost trying to follow [Johan]’s instructions, don’t worry. His well-commented code and lovely schematic will undoubtedly save you. Then you can move on to open-beam designs.

Marvelous MIDI Button Box

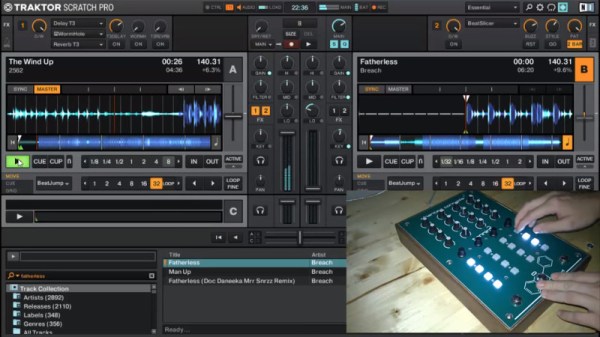
Most DJ tools are just ripe for DIY rework. Everything at least speaks MIDI, and the firmware side of the equation that makes a physical interface for your laptop can be downloaded and flashed with minimal effort. And this means that there’s no time better than the present to wire up a ton of buttons to a Teensy and call it a controller.

[UmamiFish]’s build goes the extra mile, though, with a nice laser-cut box and holes for display LEDs as well as the 22 arcade buttons that are packed tightly into the enclosure. A 74HC595 shift-register IC handles the LEDs, but there’s no getting around a bunch of wiring in a build like this. It pays to be neat, and using ribbon cable helps keep some of the chaos under control.

Browsing around Instructables will turn up myriad similar controllers, should the exact configuration of this one not suit your needs. And if you want something with a little more of the real-disk feel, have a look at this controller that uses hard disk platters, or this log of a timecode-vinyl-to-MIDI build.

Forgotten Rock Band Drum Controller As A MIDI Instrument

Happen to have an old Rock Band drum controller collecting dust in your living room? If you also have a spare Arduino and don’t mind parting with that plastic college memento then you’ve got the bulk of what could potentially be your new percussive MIDI instrument. In his project video [Evan Kale] outlines the steps necessary to turn that unloved plastic into a capable instrument for recording.

The whole process as outlined by [Evan] in under seven minutes. This looks like a great weekend endeavor for those of us just starting out with MIDI. After cracking the back of the Guitar Hero drum kit controller open, the main board within is easily replaced with a standard sized Ardunio (which matches the present mounting holes exactly). About 4:50 into the video [Evan] explains how to add a basic perf-board shield over the Arduino which connects the piezo sensors in each of the drum pads to the analog pins of the micro-controller. The MIDI jack that comes built into the back of the kit can also be reused as MIDI out when wired to the Arduino’s serial out pin. By adjusting [Evan’s] example code you can dial in the instrument’s feedback to match the intensity of each hit.

The video with all of the details is after the jump. Or you can check out a MIDI hack that goes the other way and uses a drum kit as a Guitar Hero or Rock Band controller instead

Continue reading “Forgotten Rock Band Drum Controller As A MIDI Instrument”

Pendulum MIDI Controller Really Swings

Once in a while, we see a project that makes us want to stop whatever we’re doing and build our own version of it. This time, it’s Modulum, a pendulum-based MIDI controller. It’s exactly what it sounds like. The swinging pendulum acts as a low-frequency oscillator. In the demo video configuration, you can hear it add a watery, dreamlike quality, sort of like a lap steel guitar on LSD.

The pendulum’s motion is detected by four pieces of stretchy, conductive cord. These are wired to an Arduino Nano in a voltage divider fashion. [Evan and Kirk] used the Maxuino library to determine x and y mapping of possible pendular positions as well as perform the necessary MIDI processing. Get your groove on after the break, and check out some of the many other fantastic MIDI controllers we’ve had the pleasure of covering.

Continue reading “Pendulum MIDI Controller Really Swings”