Hackaday Links: December 11, 2011

Drilling square holes

We’re still a bit baffled by the physics of this, but apparently it’s possible to drill a square hole with a round bit. This video shows square holes being milled using a cutter which is offset from the center of the bit. [Thanks Jordan]

LED Motorcycle headlight driven by mains

[William] found a way to use a big capacitor and bridge rectifier to run this H4 LED headlight bulb in a mains sconce lamp.

Electronic slide whistle

Here’s an electronic instrument that [Dorian] made. It uses a linear potentiometer and a button and works much like a slide whistle would.

Robot rocks out to Daft Punk

[Adrian] didn’t just make a robot arm out of CD cases and a mints tin. He built the arm, then made a music video featuring it.

More light-pipe sensor experiments

[Uwe] has been working on an input sensor using a flexible light tube. It is a similar idea to these optical flex sensors, but [Uwe] tried several variations like filling the tube with alcohol.

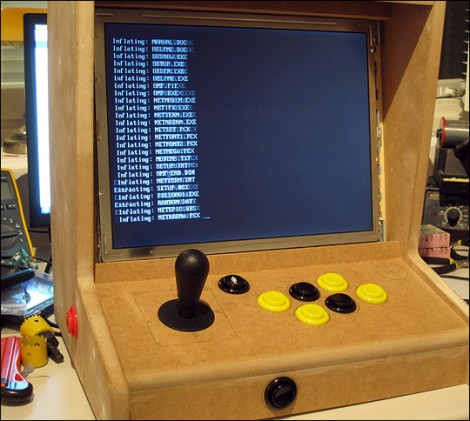
MAME Cabinet 3D Modeled And CNC Milled

[Entropia] is just putting the final touches on his bar-top MAME cabinet (translated). The project started out as a 3D model to get the case dimensions just right. An old laptop is being, so the enclosure was designed to fit the bare LCD assembly and hide the rest of the computer. [Entropia] had access to a CNC mill through an education program and used it to cut most of the parts for the case out of MDF.

From there the build proceeds as normal. Mounting holes for the controls were cut with a drill and hole saws. We think it’s a bit easier to lay this design out once you have the control panel itself milled, rather than try to get it right in the 3D model. The image above is part way through the build. Since it was taken the case has been painted and a sound system was added but it looks like it’s still waiting for a bezel over the LCD and a marquee for the masthead.

You can see a demo of the game selection UI after the break.

Continue reading “MAME Cabinet 3D Modeled And CNC Milled”

LEGO Mill Produces Sculpted Models With Fantastic Resolution

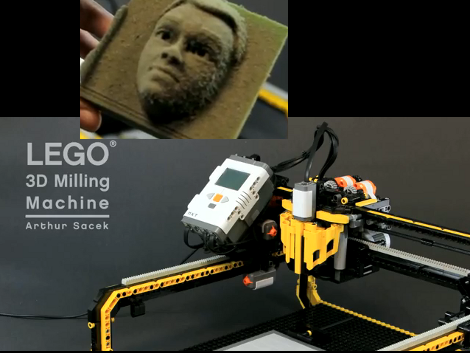
[Arthur Sacek] has really got something with the 3D Mill he built entirely from LEGO pieces. As you can see, it uses NXT parts to control the cutter head along three axes. The drill bit that acts as the mill’s cutting head is not a LEGO part, but that’s [Arthur’s] only transgression.

The demo sculpture seen above was cut into a block of floral foam. The model was processed by Autodesk Softimage before being fed into the mill, where it took about two and half hours to complete the job. The foam comes out still in block form looking like a piece of outdoor carpeting. That’s because there’s no debris removal during the milling process. But hit it with the shopvac and you’ll reveal a physical model with surprising detail. We don’t think it comes close to the light-cured resin printing we’ve seen, but it would be a great asset if you’re doing some mold making.

Don’t miss [Arthur’s] video of the milling process after the break.

Continue reading “LEGO Mill Produces Sculpted Models With Fantastic Resolution”

Wireless Controller Operates Your CNC Mill

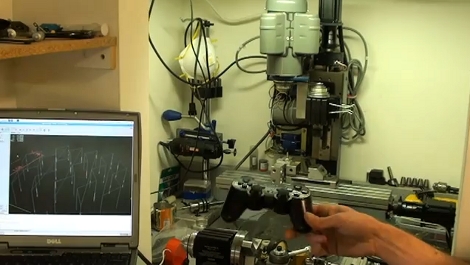
[Darrell Taylor] wanted to add a CNC control pendant to his mill but didn’t want to foot the bill which can often run several hundred dollars. These pendants are basically a physical remote control that operates the CNC software that controls the machine. Since he was already using a Linux box running EMC2, it wasn’t too hard to figure out how to operate the mill with a PlayStation controller.

To get the controller talking to his Linux machine he uses a package called QtsixA. The package identifies and loads the control through Bluetooth pairing. From there it can be used to map the buttons and joysticks as keys on the keyboard or as a mouse. In the video after the break [Darrell] demonstrates how he has his shortcuts set up. He’s able to move the machine head, and even start or step through the programmed routine. As he mentions, this is pretty nice if you’ve got dirty hands; just throw the controller in a zipper bag and you’re set to go.

Continue reading “Wireless Controller Operates Your CNC Mill”

PCB Milling With A Makerbot

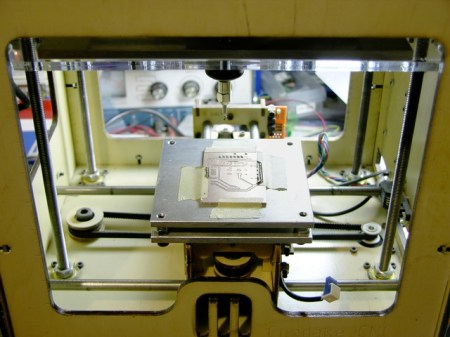
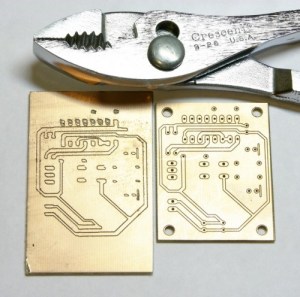
[Keith] wanted to use his makerbot for some PCB milling, but he ran into a pretty big problem. The platform that his PCB would sit on was mounted with a layer of double sided foam tape and was not perfectly aligned to the head. Not only that, but it would tilt when pressure was applied. This made the result of the milling completely unacceptable. To remedy this, he made a new platform that is not only rigid, but he has made it so that there is the ability to adjust it for perfect alignment via adjustment screws in the 4 corners. At the beginning of each session, he can be absolutely sure that everything is aligned perfectly and his PCBs show a huge improvement. You can see a comparison of the two in the following picture.

[via HackedGadgets]

Adding A Tachometer To The SX2 Mini Mill

sx2_mill_tach

[Jeff] recently bought an SX2 mini milling machine with plans to eventually automate it for use as a CNC mill. After paying nearly $700 for the mill, he decided there was no way he was willing to pay for the $125 tachometer add on as well. Instead, he reverse-engineered the mill and constructed a tachometer of his own.

He opened the control box and started looking around. After identifying most of the components, he got sidetracked by a 3-pin header that didn’t seem to have any particular function. That is, until he realized that a lathe by the same manufacturer uses the same components, and figured that the header might be used for reversing the motor. Sure enough he was right, and after adding a reverse switch, he got back to business.

He probed the 7-pin socket with his logic analyzer and quickly picked out the mill’s data line. He hooked the line up to an Arduino and in no time had the RPM displayed on an LCD screen.

[Jeff] says that this little experiment is the first of many, since the mill is so hacker friendly. We definitely look forward to seeing a CNC conversion tutorial in the near future.

A Weighted Companion Cube Worth Saving From The Incinerator

companion_cube

It’s honestly sad that Valve has not released any official Portal-related items to the masses, as a market for them clearly exists. As the saying goes, “necessity is the mother of invention”, and [Jamie] needed a Weighted Companion Cube in the worst way.

Actually he constructed his Companion Cube in order to test out some modifications and upgrades he performed on his homebrew CNC Mill. Judging by how the cube turned out, and the fact that he was able to keep tolerances within .005”, we would say that his mill is working just fine.

The cube was designed in Solidworks, and passed through the BobCAD plugin to generate the GCode for the mill. The base of the cube was machined out of a 3” solid block of aluminum, hollowed out on one side to give him access to the cube’s innards. He milled out heart shaped openings on each side, covering them with frosted Lexan.

He added a BlinkM to the mix, mounting it on the cover plate he milled for the open side of the cube. Once lit it cycles through several colors, including the pinkish tone anyone who has played Portal is quite familiar with.

We would say that it’s a great job, but it doesn’t do his work justice – it’s absolutely stunning. We’re not just saying that because we want one, though we do want one…badly.