2D Printed Tachometer For A Lathe

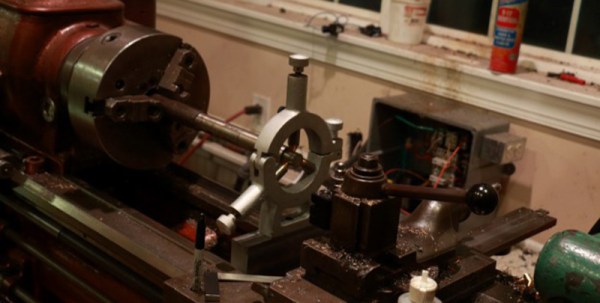
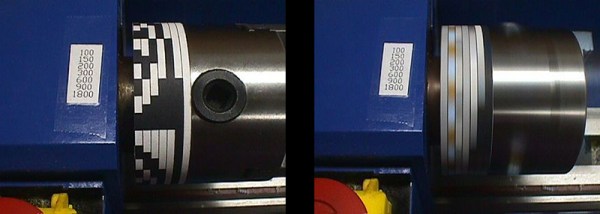
If you ever wanted a reason to have DC lighting pointed at the spinny part of your mill and lathe, [Bill] tells a great story. One day, he noticed the teeth on his lathe chuck would change color – red, then blue, then red. His conclusion was the fluorescent lights above his workbench was flashing, as fluorescent lights normally do.

Imagine if the teeth on [Bill]’s chuck weren’t painted. They would appear stationary. That’s usually a bad thing when one of the risks of using a lathe is ‘descalping.’ Buy an LED or incandescent work light for your shop.

This unique effect of blinking lights got [Bill] thinking, though. Could these fluorescent lights be used as a strobe light? Could it measure the RPM of the lathe?

And so began [Bill]’s quest for a 2D printed lathe tachometer. The first attempt was to wrap a piece of paper printed with evenly space numbers around the chuck. This did not work. The flash from his fluorescent bulb was too long, and the numbers were just a blur. He moved on to a maximum-contrast pattern those of us who had a ‘DJ phase’ might recognize immediately.

By printing out a piece of paper with alternating black and white bands, [Bill] was able to read off the RPM of his chuck with ease. That’s after he realized fluorescent lights blink twice per cycle, or 120 times a second. If you have a 3″ mini-lathe, [Bill] put the relevant files up, ready to be taped to a chuck.

Hands-On Othermill Review Grinds Out Sparkling Results

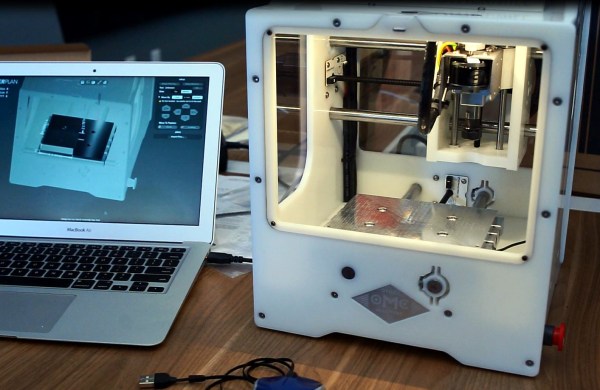
We’ve been on the lookout for alternatives to chemically etching circuit boards for years. The problem has been that we don’t particularly want to devote months of or lives learning how to build precision CNC mills. Off in the distance there may be an answer for that quandary if you don’t mind parting with twenty-two Benjamins. Sure, it’s a heck of a lot more expensive than toner transfer and cupric chloride, but the Othermill can be purchased right now (in your hands a few months later) and after reading this in-depth review we are a bit less hesitant about opening our wallets for it.

othermill-review-thumbIt’s a tome of a review, but that means there’s something for everybody. We especially enjoyed seeing the 10 mil board shown here which took about 1-hour to mill. Considering it has also been through-hole drilled we’d put that on part with the time it takes to etch a board. There are obvious places where the traces are not perfectly smooth (not sure if that’s burring or over-milling) but they are not broken and the board’s ready to be populated.

Alignment is something of an issue, but the Othermill isn’t limited to PCBs so we’d recommend designing and milling your own alignment bracket system as an early project.

Who isn’t envious of custom-builds that can get down to 10-mils, like this beauty from 2013. Our hopes had been sparked when Carbide 3D came onto the scene. We’re still optimistic that they will make a big splash when they start shipping preorders in a few months.

As this review proves, Othermill is already out in the wild with a 6-8 week wait before shipping. We saw it in action milling multiple materials at the Hackaday Omnibus Lauch Party and were duly impressed. Price or waiting-period aside we’re going to hold off until the software options expand beyond Mac-only (UPDATE: Othermill software support for Windows was added in early 2016); either Othermill will add support or someone will come up with a hack to use traditional CNC software. But if you count yourself as a subscriber to the cult of Apple the software, called Otherplan, does get a favorable prognosis along with the hardware.

Already have an Othermill sitting on your bench? Let us know your what you think about it in the comments below.

Bonus content: [Mike Estee], CTO of Othermill just gave a talk last night about how he got into making mills and the challenges of building something with super-high-precision. Sound isn’t good but the talk is solid. Hackaday’s [Joshua Vasquez] also gives a talk on the video about building an SPI core for FPGA. These talks are one of the Hardware Developer’s Didactic Galactic series which you really should check out if you’re ever in the San Francisco area.

Continue reading “Hands-On Othermill Review Grinds Out Sparkling Results”

Machining A Yo-Yo With Speed Holes

A while ago, [Gord] received a notice from his daughter’s school looking for silent auction donations for a fundraiser. It’s pretty much a bake sale, only [Gord] gets to build something. He has a pretty nice machine shop, and eventually settled on building a pair of beautiful vacillating vertical pendulums. They’re yo-yos, in case you were wondering what that meant.

Each half is cut out of a 2.5″, with both sides of each half faced off and tapped. From there, eighteen speed holes shave off 22 grams of weight. The sides of the yo-yo are shaved down to a thickness of half an inch, a 14° bevel is put on each face, the edges are chamfered at 30°, and everything is polished up.

Sending a bare metal yo-yo to a raffle is apparently a little uncouth, so [Gord] anodized each half of the yo-yos in a bath of sulfuric acid, then applied dye to the surface. With everything assembled, a fancy glass and metal case was constructed and a certificate of authenticity printed out. It’s a brilliant final touch to a great project, we just wish we knew how the yo-yo performed.

Thanks [Chris] for sending this in.

Peculiar Radial Mill From Car Parts

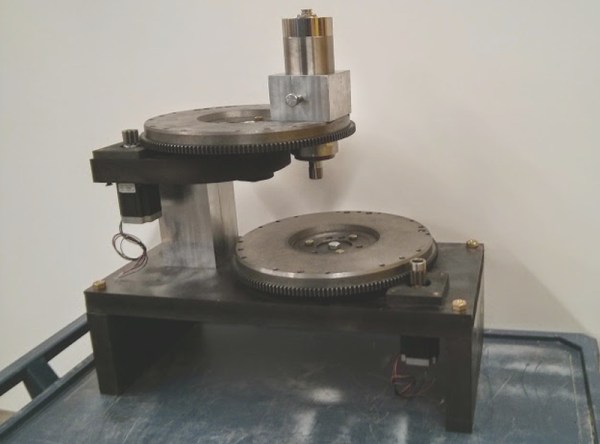
Whether 3D printer, lasercutter, or mill, most CNC machines use human-friendly, square-angle Cartesian geometry. This intriguing concept mill instead uses radial axes where motion is derived from scrap Chevy flywheels. It may look and feel weird at first, but it works – sort of.

Cartesian axes are intuitive. If you want to go to the right, increase X. If you want to go to away from you, increase Y. If you want to lift, increase Z. On a manual mill this is easy for making rectangles and blocks, or, with creative clamping, straight lines of any sort. But if you want to carve a circle? As we all learned on an Etch-A-Sketch, you increase your swearing and then throw it in the corner.

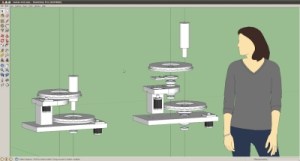
HAD - Radial Mill2[Jason] knew that with a CNC machine all geometry problems are reduced to math done by software. With two offset discs, any position is possible by rotating both the correct way. It may look odd that both plates drunkenly meander about just to draw a straight line but the computer is ambivalent. Software can be complicated without penalty and is free once written – more on that later. If a machine is physically simple then it can be built and repaired easily and cheaply. This design does away with almost all the familiar – and [Jason] argues complicated – components of normal hobby CNC machines. No slides, rails, carriages or belts here. His design uses only about a dozen parts.

Because automotive flywheels are made from cast iron the machine is rigid and naturally dampening. Sticking with the junkyard theme he pulled bearings from an F-450 truck, good for a few thousand pounds. Some steppers and a Raspberry Pi and he was done – well, sort of.

[Jason] let us know that his project has sat for long enough that he has become passionate about other things and decided to move on. He documented his progress and submitted the tip in hope to inspire someone else to continue the design further. Any type of CNC is possible, not just a mill. 3D printer perhaps?

Two big caveats: it needs a Z-axis (linear, probably standard) and there appears to be deeper-seated-than-expected G-code demands to chit-chat about rectangles and only rectangles. Nothing insurmountable, just nothing he has solved yet himself.

[Jason] said not to expect any further updates from him but he would love to see what the next person could do with it.

See the video after the break of the mill drawing our skull and wrenches logo, (soft of, without a Z-axis to lift).

Continue reading “Peculiar Radial Mill From Car Parts”

Adding A Steady Rest To A Lathe

A steady rest is a tool for a lathe, enabling a machinist to make deep cuts in long, slender stock, bore out thin pieces of metal, and generally keeps thin stuff straight. Unlike a tool that follows the cutter, a steady rest is firmly attached to the bed of a lathe. [Josh]’s lathe didn’t come with a steady rest, and he can’t just get parts for it. No problem, then: he already has a lathe, mill, and some metal, so why not make the base for one from scratch?

[Josh] was able to find the actual steady rest from an online dealer, but it wasn’t made for his lathe. This presented a problem when attaching it to his machine: because each steady rest must fit into the bed of the lathe, he would need a custom bracket. With the help of a rather large mill, [Josh] faced off all the sides of a piece of steel and cut a 45 degree groove. To make this base level, [Josh] put one side of the base on the lathe, put a dial micrometer on the tool post, and got an accurate reading of how much metal to take off the uncut side.

With the steady rest bolted onto the lathe, [Josh] turned a rod and found he was off by about 0.002″. To machinists, that’s not great, but for a quick project it’s fantastic. Either way, [Josh] really needed a steady rest, and if it works, you really can’t complain.

Continue reading “Adding A Steady Rest To A Lathe”

Hand-Machined Companion Cube Can Be Destroyed And Rebuilt

[Michael Gainer] is a big fan of Portal, and it shows in the Weighted Companion Cube he made. [Michael] hand-machined the many pieces that comprise the Cube’s body and medallions out of 6061 aluminum. Dykem was used to transfer the marks for accurate machining, and the color is powder-coated to a heat tolerance of 400F. A CNC was used to make the distinctive hearts. [Michael] notes the irony was “very Portal” in having them cut by a heartless machine when everything else was done manually. The attention to detail is striking, the level of design more so when [Michael] proceeds to incinerate the poor Companion Cube with a brush burner. In the video shown at the link above, the Cube falls apart as the glue holding it together melts. When all is said and done, just grab more glue to bring that Cube back to its six-sided glory. Repeat to your heart’s content. Huge success! We have to be honest, after seeing all those pieces, we aren’t sure we’d want to do this very often. Companion Cubes have been featured in various iterations on Hackaday before, but they were never built with the idea of repeatedly destroying and rebuilding them. This novel take would make GlaDOS proud.

[Michael] has plans to put an Android device inside it with some light and temperature sensors. He wants to give it a voice resembling Portal’s turrets so it can whine when it needs to be charged or scream when it’s too hot or cold. He dubs this next project the “Overly Attached Weighted Companion Cube.” It wouldn’t be a good idea to incinerate this upcoming version, though we’d probably be inclined to if it demanded so much of our attention!


Tumblemill

The Tumblemill: Homemade CNC Milling

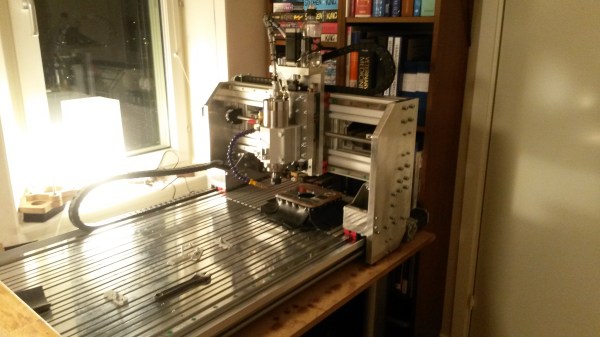
[Jens] aka [Tumblebeer] has compiled an impressive overview of the Tumblemill, his homemade CNC mill. It warms our hearts to learn that [Tumblebeer] was inspired to pursue electronics by projects featured here on Hackaday, even if it means he dropped out of med school to pursue electrical engineering. We’re glad he’s following his passion, though, and reading through his blog reveals just how far he’s come: from fiery disaster in his first projects to a gradual obsession with making a CNC device, [Tumblebeer] has made plenty of mistakes along the way, but that’s how it should be.

His first iteration was a CNC router that used rubber wheels as linear bearings. It worked…barely. His latest build grew out of meticulous Solidworks modelling, with a moving gantry design constructed largely from aluminum, and upgraded linear motion: this time a bit overkill, using HIWIN HGH20CA blocks. Rather than sourcing a traditional spindle mount, [Tumblebeer] opted for the housing from a LM50UU bearing, which provided both the perfect fit and a sturdier housing for his 2.2kw spindle.

Visit his project blog for the details behind the mill’s construction, including a lengthy installment of upgrades, and hang around for a demo video below, along with the obligatory (and always appreciated) inclusion of the Jolly Wrencher via defacing an Arduino.

Continue reading “The Tumblemill: Homemade CNC Milling”