Classic 8-Bit Computing The Atari Way

In the classic gaming world, even before the NES arrived on the scene, there was no name more ubiquitous than Atari. Their famous 2600 console sold almost as many units as the Nintendo 64, but was released nearly 20 years prior. In many ways, despite making mistakes that led to the video game crash of the early 80s, Atari was the first to make a path in the video game industry. If you want to explore what the era of 8-bit computing was like in the Atari age, a new resource is compiling all kinds of Atari-based projects.

This site has everything, from assembling Atari 8-bit computers based on the 6502 chip, to programming them in BASIC and assembly, to running official and homebrew games on the hardware itself. This was put together by [Jason H. Moore] who grew up around Atari systems and later, their home computers. He even puts his biomedical experience to use here by designing a game for the 2600 called Gene Medic which can be found at the site as well.

If you grew up in the 70s and 80s and are looking for a bit of Atari nostalgia this site is the place to go. It’s even worth a visit from younger folks as well since the 8-bit world is a lot easier to get immersed in and learn the fundamentals of computer science. Of course, if you want to take it the other direction, it’s possible to modify the old Atari to add a few modern conveniences.
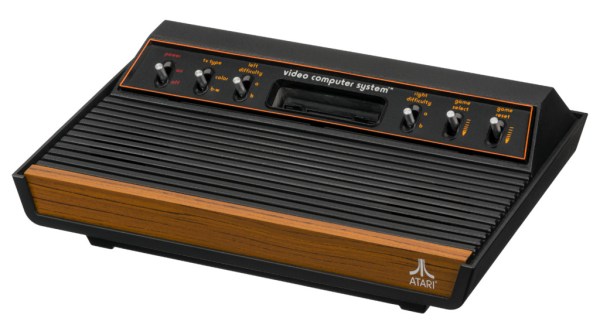
Photo via Evan-Amos

Make It Easier For Your Software Project To Accept Contributions

[Flameeyes] has heard complaints (and at times, he admits, has complained himself) about big companies not contributing improvements to projects they seem to find useful, or rolling their own implementation rather than use and contribute to an existing code base. Having recently left Google after seven years, he has some insights into some of the reasons big corporations (at least Google, anyway) may sometimes seem to eschew making code contributions, and some of the reasons might come as a surprise.

There are things a corporation can do differently, but there are also some things that can be done on the project’s end to make accepting contributions easier. [Flameeyes] took some time to write out a few pointers on how to make it easier for others (particularly large corporations) to contribute code to a software project.

The biggest issue is the software license. Without one, there is no legal structure to use, distribute, or contribute to the code, and no corporate entity will want to touch it. Google specifically forbids creating patches for projects with either no license, or incompatible licenses. An example of an incompatible license is one that forbids commercial use, because everything a corporation like Google does — even research –is considered a commercial endeavor. In addition, on the corporate side making contributions might trigger a code review process of some kind for some licenses, but not for others. [Flameeyes] suggests the MIT license as one that is acceptable to pretty much everyone with a minimum of fuss. Another caution: if a project’s code resides in an online repository, make sure the repository is licensed as well.

A few other small suggestions (such as maintaining an AUTHORS file to track contributors in a tidy way) rounds out the advice. It sounds simple, but software licensing is so critical to the whole affair that it’s important to get it right — he suggests the REUSE tool for anyone wanting to make sure a project’s licensing is tidy.

[Flameeyes] makes a point that none of this guidance is based on secret or institutional knowledge. Google has a public document detailing exactly how they use and deal with open source, and it’s a solid guide for how to make your project more accepting of contributions from a corporate entity like Google. (Or, if you prefer, a guide on how to set up as many barriers as possible for your project.)

In case you missed it, we just want to remind you that our favorite recent open source project from Google is definitely Pigweed.

Giant Scale RC A350 Airliner Using Carbon Fibre And 3D Printing

Large scale RC aircraft are pleasure to see on the ground and in the air, but putting in the months of effort required to build them requires special dedication. Especially since there is a real possibility it could end up in pieces on the ground at some point. [Ramy RC] is one of those dedicated craftsman, and he has a thing for RC airliners. His latest project is a large Airbus A350, and the painstaking build process is something to behold.

The outer skin of the aircraft is mostly carbon fibre, with wood internal framing to keep everything rigid. The fuselage and winglets are moulded using 3D printed moulds. These were printed in pieces on a large format 3D printer, and painstakingly glued together and prepared to give a perfect surface finish. The wing surfaces are moulded in flat section and then glued onto the frames. [Ramy RC]’s attention to detail is excellent, making all the control surfaces close as possible to the real thing, and retractable landing gear with servo actuated hatches. Thrust comes from a pair of powerful EDF motors, housed in carbon fibre nacelles.

This project has been in the works for almost 5 months so far and it looks spectacular. We’re looking forward to the first flight, and will be holding thumbs that is remains in one piece for a long time. See the video after the break for final assembly of this beast.

For the next step up from RC aircraft, you can always build your own full size aircraft in your basement. If you have very very deep pockets, get yourself a private hangar/workshop and build a turbine powered bush plane.

Thanks for the tip [tayken]! Continue reading “Giant Scale RC A350 Airliner Using Carbon Fibre And 3D Printing”

A DIY 10-bit Relay Adder

When it comes to understanding computers, sometimes it’s best to get a good understanding of the basics. How is data stored? How does the machine process this information? In order to answer these questions a bit more and start learning programming, [Nakazoto] built a 10-bit binary adder with relays.

The build is designed from the ground up, including the PCBs, which are milled using a CNC machine. There are six boards: the input board, sequencer board, 2 sum register boards, a carry register board and a 1-bit ALU board. The input board has 32 LEDs on it along with the switches to turn on each bit on or off. In total, 96 relays are used and you can hear them clacking on and off in the videos on the page. Finally, there is a separate switch that sets the adder into subtraction mode.

Usually, [Nakazoto]’s website is mostly about cars, but this is a nice diversion. The article has a lot of detail about both the design and build as well as the theory behind the adder. Other articles on binary adders on the site include this one which uses bigger relays, and this 2-bit adder which uses 555 timers.

Continue reading “A DIY 10-bit Relay Adder”

A Custom Saw Designed For Close Quarters Making

It probably goes without saying that we’d all love to have a huge, well-appointed, workshop. But in reality, most of us have to make do with considerably less. When trying to fit tools and equipment into a small space you need to get creative, and if you can figure out a way to squeeze multiple functions out of something, all the better.

Wanting to get as much use out of his space as possible, [Chris Chimienti] decided that his best bet would be to design and build his own folding combination table. Using interchangeable inserts it can switch between being a table saw and a router, and with its extendable arms, also serves as a stand for his miter saw. Of course when not cutting, it makes a handy general purpose work surface.

In the videos after the break, [Chris] takes viewers through the design and construction of what he calls the “Sinister Saw”, which is made somewhat more complicated by the fact that he obviously doesn’t have a table saw to begin with. Cutting out the pieces for the table itself and the panels that would eventually become home to the router and circular saw took some careful work with clamps and saw horses to make sure they were all perfectly square.

But the wooden components of the Sinister Saw are only half of the story. The table is able to extend by way of an aluminum extrusion frame, and there are numerous 3D printed parts involved for which [Chris] has provided the STL files. We particularly like the box that holds the emergency stop button and relocates the tool’s battery to the front panel, which looks to be an evolution of his previous work in 3D printing cordless tool adapters. We could certainly see this part being useful on other projects that utilize these style of batteries.

In the other extreme, where you want to build your own tools and have plenty of space, you could try making everything out of giant slabs of stone.

Continue reading “A Custom Saw Designed For Close Quarters Making”

Test Equipment, Shim Washers, And A 30 Year Old Space Telescope

This year marks the 30th anniversary of the Hubble Space Telescope. When you see all the great pictures today, it is hard to remember that when it first launched, it was nearly a failure, taking fuzzy pictures. The story of how that problem was fixed while the telescope was whizzing through space is a good one. But there’s another story: how did a $1.5 billion satellite get launched with defective optics? After all, we know space hardware gets tested and retested and, typically, little expense is spared to make sure once a satellite is in orbit, it will work well for a long time.

The problem was with a mirror. You might think mirrors are pretty simple, but it turns out there’s a lot to know about mirrors. For astronomy, you need a first surface mirror which is different from your bathroom mirror which almost certainly reflects off the back of the glass. In addition, the mirrors need a very precise curve to focus light.

Continue reading “Test Equipment, Shim Washers, And A 30 Year Old Space Telescope”

The Nintendo Game Boy Color Is An Aircon Remote

Those of you who are familiar with 1990s handheld consoles may recall that Nintendo’s Game Boy Color had an infra-red receiver and transmitter. The thought of a handheld computer with infra-red capabilities interested [jg], who immediately set about converting it into a remote control for an air conditioner.

The Game Boy doesn’t have dedicated infra-red remote control hardware, instead the IR diodes appear to be connected to I/O lines. Thus the bitstream bas to be bit-banged, and takes the processor’s entire attention when transmitting. The software is neatly placed on a reprogrammed bootleg cartridge.

It’s an interesting read in terms of the approach to reverse engineering, for example finding the parameters of 37 kHz infra-red remote control by trial and error rather than by a quick read up on the subject, or searching for information on National air conditioners and finding nothing, but not searching the National brand itself to find that a search on Panasonic air conditioners would likely give all the information needed. But the end result operates the appliance, so it’s good to record a success.

This isn’t the first time we’ve seen a Game Boy control something, though we can’t recall seeing another using the IR. Need a brilliant overview of the Game Boy?  We’ve got you covered.

Thanks [Roel] for the tip.

Header image: Evan-Amos / Public domain.