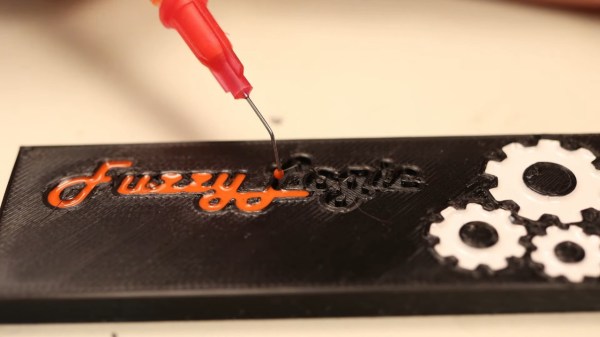
Syringe with diluted nail polish used to fill into cursive "FuzzyLogic" letters extruded into a surface of a 3D-printed block of plastic, as a demonstration.

Brighten Up Your Prints With This Nail Polish Approach

It’s not enough to 3D-print a part – there’s a myriad of things you can do from there! [FuzzyLogic] shows us his approach of adding inlay labels, icons and text to a 3D print, by extruding them into the print and filling the resulting cavity with nail polish! This makes for colorful and useful prints, as opposed to dull single-color parts we typically end up with.

The devil’s in the details, and [FuzzyLogic] has got the details down to a technique. Nail polish has to be diluted with acetone so that it flows well, and a particular combination of syringe and needle will be your friend here. Of course, don’t forget to factor surface tension in – even with well-diluted nail polish, you cannot make the grooves too thin. A bit more acetone on a q-tip helps in case of any happy little accidents, and a coat of clear acrylic spray paint seals the lettering firmly in place. The five-minute video tells you all about these things and a quite few more, like the basics of extruding text and icons in a typical CAD package, and has a bit of bonus footage to those watching until the end.

Adding markings to our prints is a lovely finishing touch! If you’re looking for more of that, here’s a custom tool-changing printer with a pen attachment making beautiful custom enclosures for the Pocket Operator.

Continue reading “Brighten Up Your Prints With This Nail Polish Approach”

Exploring Options For DIY Waterproofing

TL;DR — Don’t use silicone to pot electronics.

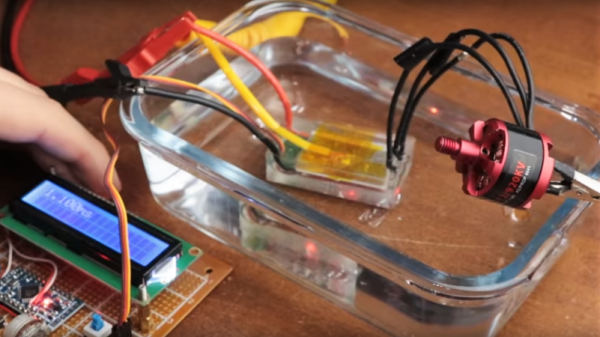
That’s the conclusion [GreatScott!] comes to after trying out several methods for waterproofing electronics. His efforts stem from a recent video in which he discovered that water and electricity sometimes actually do mix, as long as the water is distilled and the electronics in the drink are relatively simple. He found that the main problem was, unsurprisingly, electrolytic corrosion, so he set out to experiment with various waterproofing coatings. In a series of careful experiments he goes through the pros and cons of both conformal coatings and potting compounds. The conformal tests used simple clear nail polish on an ESC board; that worked pretty well, but it was a little hard to reach all the nooks and crannies. He also tried potting with a thick black silicone compound, but that ended up never really curing in the middle. A final attempt with legitimate two-part epoxy potting compound sealed up the ESC tight, although we doubt the resulting brick would perform well on a quadcopter.

If you want to explore potting a bit further, check out this introduction to the basics.

Continue reading “Exploring Options For DIY Waterproofing”

More Acetone-vapor Polishing Experiments

acetone-vapor-polishing-experiments

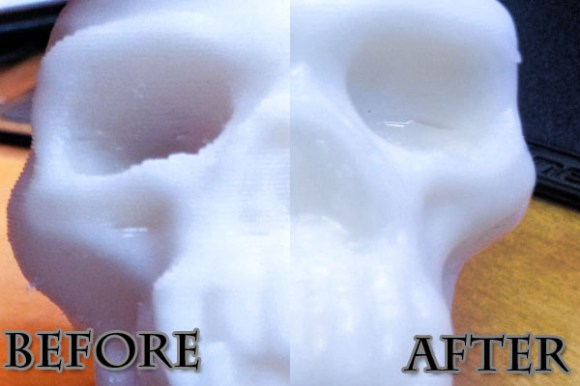
If you’re thinking of trying the acetone-vapor polishing process to smooth your 3D printed objects you simply must check out [Christopher’s] experiments with the process. He found out about the process from our feature a few days ago and decided to perform a series of experiments on different printed models.

The results were mixed. He performed the process in much the same way as the original offering. The skull seen above does a nice job of demonstrating what can be achieved with the process. There is a smooth glossy finish and [Christopher] thinks there is no loss of detail. But one of the three models he tested wasn’t really affected by the vapor. He thinks it became a bit shinier, but not nearly as much as the skull even after sending it through the process twice. We’d love to hear some discussion as to why.

There is about eight minutes of video to go along with the project post. You’ll find it after the jump.

Continue reading “More Acetone-vapor Polishing Experiments”

Keyboard Concept Uses Magic Trackpad

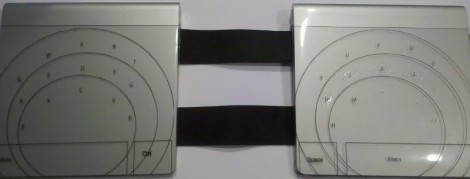
This is a keyboard alternative that [Sebastian] is building from two Apple Magic Trackpads. The multitouch devices are a good platform for this because they’re designed to pick up several events at the same time. To prototype the locations of the keys he’s using printable transparency sheets. He gives you a sense of where the home row is with a dab of clear fingernail polish that you can feel with your digits.

He may laser etch these pads once the key location is just right. This should give a bit of texture in itself and do away with the need for nail polish but we still like the ingenuity of that solution. The device is being developed in Linux, with some kernel hacking to handle the devices. We asked about source code and [Sebastian] is hesitant to post it because he’s been getting a lot of kernel panics. It sounds like once he cleans things up a bit he’ll share his work.

Don’t forget, there’s an easy hack to do away with the batteries in these things.