TV-B-Gone Can Double As A Camera Remote Control

[Christopher] found a way to get a bit more mileage out of his TV-B-Gone kit. The little device is intended to turn off every television in range with the push of a button. But at its core it’s really just a microcontroller connected to some infrared LEDs. Instead of sending codes to shut of televisions, you can rewrite the firmware to send a camera remote shutter release code.

It doesn’t take too much to pull this off. You need a way to flash new firmware to the device, and you need to know the new code timing that you want to send. Since the firmware is open source it’s easy enough to make code changes, and there are several easy methods of flashing AVR devices (like the tiny85 used here), including using an Arduino as an ISP.

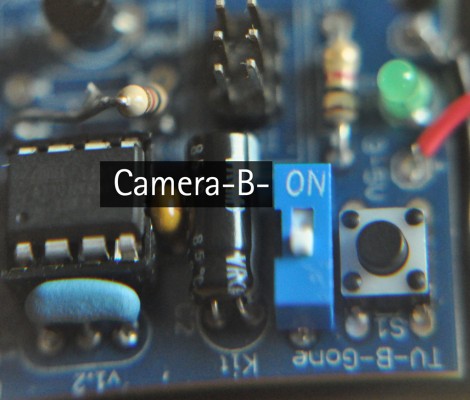
But [Christopher] did more than just add the Nikon code for his camera. He realized that there’s a jumper to select between European or American television codes. Since he wasn’t using the foreign option, he replace that pin header with a switch that selects between normal TV-B-Gone operation and camera shutter release modes. Nice.

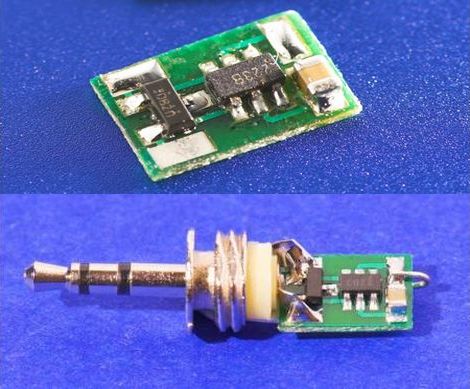
Tiny Hardware-based DSLR Intervalometer

diy_dslr_intervalometer

Most DSLR cameras have the ability to take pictures at set intervals, but sometimes the menu system can be clunky, and the options are often less than ideal. [Achim] is a big fan of time lapse photography and has been hard at work creating a hardware-based intervalometer to suit his needs. He has just finished the second revision of the controller which is just about small enough to fit inside the housing of a 2.5mm stereo plug. The timer is not 100% universal, but so far he has confirmed it works on Nikon, Canon, and Pentax cameras.

Based on a PIC10F222, the circuit’s operation is quite simple. Once the dongle is connected to your camera, you simply need to take two pictures anywhere from 0.4 seconds to 18 minutes apart. The intervalometer “watches” to see how long you waited between pictures, and proceeds to take shots at that interval until the battery dies or your memory card fills up.

As you can see in the video on his site, the timer works a treat. If you want to make one of your own, swing by his site to grab schematics and code – it’s all available for free.

*Whoops, it looks like we’ve actually covered this before. Our apologies.

Macro Lens And Image Stacking

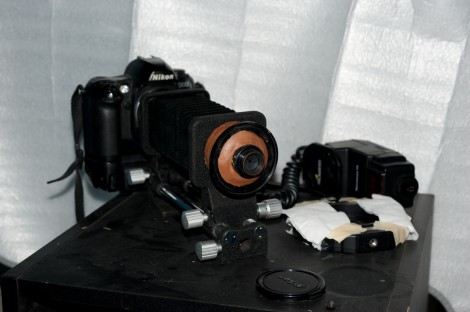
[Samuel Sargent] built his own lens for making stacked macro images.This project, which was completed as part of his senior thesis, utilizes a Zeiss enlarger lens. The aperture ring was broken, making it difficult to tell how much light was being let into the camera. Instead of scrapping the whole thing he turned it around, making it a macro lens when combined with a few other parts. He’s used a Nikon PB-5 belows, a PK-13 extension tube, and a body cap to provide a way to mount the lens to his camera. A hole was added to the body cap using his Dremel, and a liberal dose of epoxy putty seals all of the gaps.

After the break you can see a couple of photos that [Samuel] made of bismuth. He estimates the sharpest focal length by taking a few test shots. Next he captures a series of images, moving the bellows slightly between each shot. Finally, this set is combined using Helicon Focus image stacking software. Maybe for his graduate thesis he can build a mechanized platform to move the subject automatically.

Continue reading “Macro Lens And Image Stacking”

If You’re Photographing And You Know It Clap Your Hands

If you’ve ever tried to take pictures of yourself you’ll know that it can be a pain. It’s especially hard to get that perfect shot of your godly features when you’re out of breath from sprinting across the room. OK, yes, they have remote controls for that. But what if you lost your remote or you just don’t want to have to carry it? [LucidScience] put together a sweet, um, “hands free” alternative.

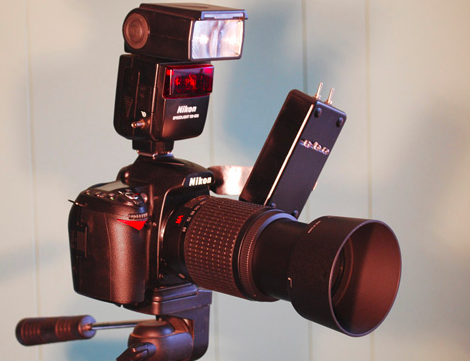
Essentially this hack emulates the IR signals sent by a Nikon remote, either to take a picture right away or to take time lapse photographs at regular intervals. We’ve seen a similar time lapse remote using an arduino before and a really thorough one using an AVR, but they don’t take the same approach as [LucidScience]’s design in terms of monitoring a microphone input for triggering. The project includes several status LEDs and adjustments for ambient noise and triggering, and it can be mounted to the camera body. We wonder how many of the Nikon’s features could be controlled using clap encoding, and how detailed your timing would need to be to have a kind of hand-made (get it?) pulsetrain syntax.  You’d probably need to have world record clap skills.

Check out the demo vid after the break.

Continue reading “If You’re Photographing And You Know It Clap Your Hands”

Smart Flash Synchronization

[Max] designed this circuit to add smart flash synchronization to his photography arsenal. He did this because ‘dumb’ TTL based flashes won’t play nicely with more sophisticated systems like the Nikon Advanced Wireless Lighting. By building a microcontroller into the mechanism, he’s added functionality for several different scenarios, ensuring that he’ll never again have problems with early flash triggering. Now that the kinks have been ironed out in the prototype, the code and hardware can be migrated over to whatever microcontroller suits you.

Time-lapse Courtesy Of Arduino

arduino-time-lapse

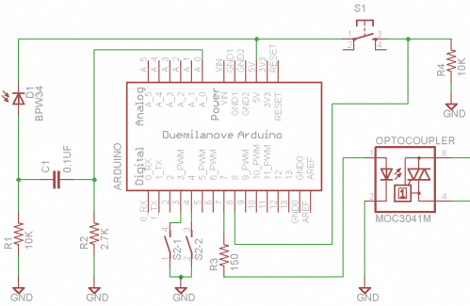
[Ross] put together a small package for use with time-lapse photography. The Nikon camera he’s using can snap a picture when it receives an IR command. [Ross’] solution connects an IR LED to an Arduino to generate this signal. The delay between frames is set with a potentiometer that is read in through the ADC. This is quite a bit less involved than the last solution we saw.

The unit consisting of an Arduino clone, a 9v battery, and the IR LED on a cable is easy to fit into a camera bag. He’s posted the code and we’ve embedded an example of his work after the break. An enclosure as well as time references around the potentiometer would complete this handy tool.

Continue reading “Time-lapse Courtesy Of Arduino”

Nikon Coolpix S1000pj (teardown)

HAD_NCP

Earlier this year, Nikon released the Coolpix S1000pj, a 12 megapixel point and shoot with the usual features, including image stabilization, face recognition, etc. However, the S1000pj features a built in projector into the usual diminutive point and shoot footprint, and also comes with a remote for controlling the projector in display mode, or for remote shooting. iFixit has gotten a hold of the unit, and detailed the difficult teardown process, which included component desoldering to get the extremely compact system completely apart. It is also interesting to compare this setup to other stand alone pico-projectors we have covered.