TNDLPT Brings Tandy Sound To Any DOS Computer

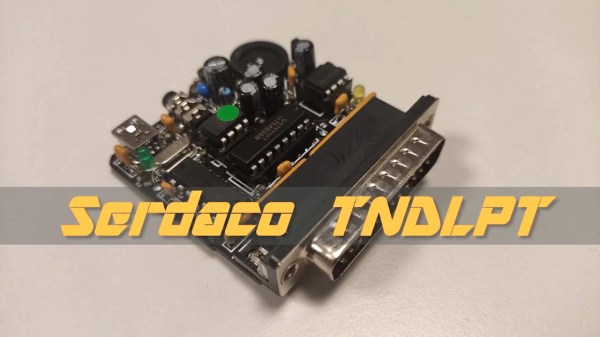
The Tandy 1000, among other contemporary computers and consoles of the 1980s, used the Texas Instruments SN76489 for its sound and musical output. This venerable sound chip can now be used on virtually any DOS machine, as long as it has a parallel port – thanks to the TNDLPT adapter!

The adapter consists of the SN76489, hooked up to the parallel port so that it can be addressed by the host computer via a DOS Terminate and Stay Resident program acting as a driver. With the TSR loaded, classic DOS games can be used with the TNDLPT sound output by simply selecting the Tandy 1000 soundcard at install. It can also be used in a variety of other ways, such as with the TNDY tracker for music creation, or the SBVGM soundtrack player.

For those eager to hear the soaring 3 voices (and one noise channel!) of the SN76489 once again, this is a great way to do it, with kits available on the Serdashop site for those wishing to solder up their own. Alternatively, get a different vibe with the OPL2 instead. Video after the break.

Continue reading “TNDLPT Brings Tandy Sound To Any DOS Computer”

Linux-Fu: Parallel Universe

At some point, you simply run out of processing power. Admittedly, that point keeps getting further and further away, but you can still get there. If you run out of CPU time, the answer might be to add more CPUs. However, sometimes there are other bottlenecks like memory or disk space. However, it is also likely that you have access to multiple computers. Who doesn’t have a few Raspberry Pis sitting around their network? Or maybe a server in the basement? Or even some remote servers “in the cloud.” GNU Parallel is a tool that lets you spread work across multiple tasks either locally to remote machines. In some ways, it is simple, since it looks sort of like xargs but with parallel execution. On the other hand, it has myriad options and configurations that can make it a little daunting to use. Continue reading “Linux-Fu: Parallel Universe”

Writing Dance Bangers Like It’s 1990 Again

Dance and house music exploded in a big way at the end of the 1980s. Typically the product of well-equipped studios with samplers and mixers worth thousands of dollars, it was difficult for the home gamer to get involved. That was, until the advent of the glorious Amiga, as [cTrix] ably demonstrates.

Sampling on your Amiga often meant sneaking off with the family hi-fi.

The video explains the history of both the music and the hardware, and highlights just why the Amiga was so special. Packing stereo audio and a four-channel sound chip, it had the grunt to pump out the tunes. All it was lacking was an audio input – which is where third-party hardware stepped in. Parallel-port analog-to-digital converters hit the market in a big way, letting users sample audio on their home computer without breaking the bank.

[cTrix] then proceeds to demonstrate how one would go about producing a dance track on an Amiga way back in 1990. A home stereo is used to play records, hooked up to a Stereo Master parallel port sampler. With a bunch of drum, piano, and synth samples recorded and saved on disk, a tracker is then used to assemble the track. It’s then compared with other music from the era as a great example of how things used to be done.

Overall, the Amiga will long have a legacy as the machine that brought real multimedia capabilities to the home computer. It’s one of our favourites, though keeping them going can be tough sometimes. Video after the break.

Continue reading “Writing Dance Bangers Like It’s 1990 Again”

Arduino Converts Serial To Parallel: The Paralleloslam

After a youth spent playing with Amigas and getting into all sorts of trouble on the school computer network, I’ve always had a soft spot in my heart for hardware from the 80s and 90s. This extends beyond computers themselves, and goes so far as to include modems, photocopiers, and even the much-maligned dot matrix printer.

My partner in hacking [Cosmos2000] recently found himself with a wonderful Commodore MPS 1230 printer. Its parallel interface was very appropriate in its day, however parallel ports are as scarce as SID chips. Thankfully, these two interfaces are easy to work with and simple in function. Work on a device to marry these two disparate worlds began.

Enter: The Paralleloslam

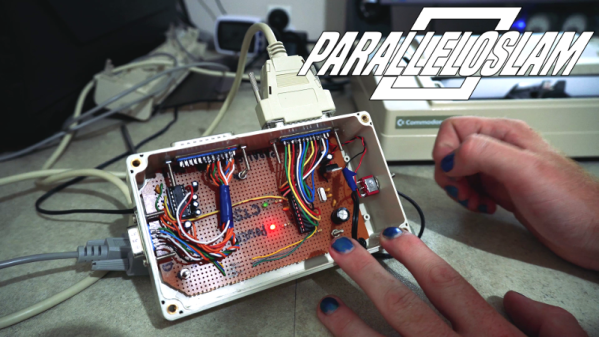
While I was gallivanting around the Eastern coast of Australia, [Cosmos2000] was hard at work. After some research, it was determined that it would be relatively simple to have an Arduino convert incoming serial data into a parallel output to the printer. After some testing was performed on an Arduino Uno, a bespoke device was built – in a gloriously plastic project box, no less.

An ATMEGA328 acts as the brains of the operation, with a MAX232 attached for level conversion from TTL to RS232 voltage levels. Serial data are received on the hardware TX/RX lines. Eight digital outputs act as the parallel interface. When a byte is received over serial, the individual bits are set on the individual digital lines connected to the printer’s parallel port. At this point, the strobe line is pulled low, indicating to the attached device that it may read the port. After two microseconds, it returns high, ready for the next byte to be set on the output lines. This is how parallel interfaces operate without a clock signal, using the strobe to indicate when data may be read.

At this point, [Cosmos2000] reached out – asking if I had a name for the new build.

“Hm. Paralleloslam?”

“Done. Cheers!”

Continue reading “Arduino Converts Serial To Parallel: The Paralleloslam”

Back To Video Basics With An ESP32 VGA Display

In a world where standards come and go with alarming speed, there’s something comforting about VGA. It’s the least common denominator of video standards, and seeing that chunky DB15 connector on the back of a computer means that no matter what, you’ll be able to get something from it, if you can just find a VGA cable in your junk bin.

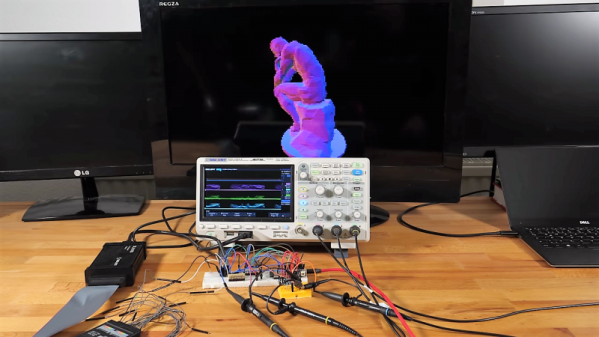
But that’s the PC world; what about microcontrollers? Can you coax VGA video from them? Yes, you can, with an ESP32, a handful of resistors, and a little bit of clever programming. At least that’s what [bitluni] has managed to do in his continuing quest to push the ESP32 to output all the signals. For this project, [bitluni] needed to generate three separate signals – red, green, and blue – but with only two DACs on board, he had to try something else. He built external DACs the old way using R/2R voltage divider networks and addressed them with the I2S bus in LCD mode. He needed to make some compromises to fit the three color signals and the horizontal and vertical sync pulses into the 24 available bits, and there were a few false starts, but the video below shows that he was able to produce a 320×240 signal, and eventually goosed that up to a non-native 460×480.

It’s a pretty impressive hack, and we learned a lot about both the ESP32 and the VGA standard by watching the video. He’s previously used the ESP32 to build an AM radio station and to output composite PAL video, and even turned his oscilloscope into a vector display with it. They’re all great learning projects too.

Continue reading “Back To Video Basics With An ESP32 VGA Display”

Digital Attenuator Goes From Manual To Arduino Control

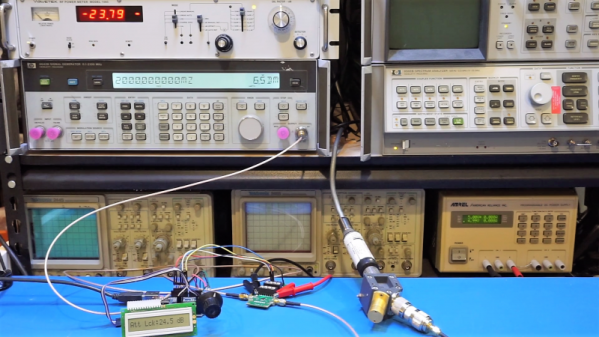
[Kerry Wong] comes across the coolest hardware, and always manages to do something interesting with it. His widget du jour is an old demo board for a digital RF attenuator chip, which can pad a signal in discrete steps according to the settings of some DIP switches. [Kerry]’s goal: forget the finger switch-flipping and bring the attenuator under Arduino control.

As usual with his videos, [Kerry] gives us a great rundown on the theory behind the hardware he’s working with. The chip in question is an interesting beast, an HMC624LP4E from Hittite, a company that was rolled into Analog Devices in 2014. The now-obsolete device is a monolithic microwave integrated circuit (MMIC) built on a gallium arsenide substrate rather than silicon, and attenuates DC to 6-GHz signals in 64 steps down to -31.5 dBm. After a functional check of the board using the DIP switches, he whipped up a quick Arduino project to control the chip with its built-in serial interface. It’s just a prototype for now, but spinning the encoder is a lot handier than flipping switches, and once this is boxed up it’ll make a great addition to [Kerry]’s RF bench.

If this video puts you in an RF state of mind, check out some of [Kerry]’s other videos, like this one about temperature-compensated crystal oscillators, or the mysteries of microwave electronics.

Continue reading “Digital Attenuator Goes From Manual To Arduino Control”

Build Your Own Supercomputer With ESP32s

If the computer you have isn’t particularly fast, there’s a well-documented way to get more out of it. You just need more of the same computer, and you can run your tasks on them all at the same time. Building computer clusters is an effective way of decreasing the time it takes for computers to solve certain problems, even if the computers themselves aren’t top-of-the-line hardware. Of course, with cheap enough hardware, people will build clusters out of just about anything, including the ESP32.

For this project, [Wei Lin] admits that this isn’t really a serious attempt at building speedy hardware, but rather an interesting exercise in creating a cluster as a sort of learning experience. ESP32 boards can be found for around $10 so building an experimental cluster with these is even more feasible than using the Raspberry Pi. [Wei Lin] goes into a great amount of detail on his GitHub page about all of his goals with the project, most of which involve exploring the functionality of the new cluster and its underpinnings.

While this might seem like little more than a thought experiment, it does have the advantage of being a great solution for problems that involve gathering data from points that are physically very far from one another. If you’ve ever been interested in parallel computing or computing clusters, this is a great project to check out. If you have more Raspberry Pis on hand than ESP32s and still want to build a cluster, check out this project that used a mere 750 of them for one.