Hackaday Links: March 26, 2017

PoC||GTFO 14 is now out. It’s a 40 MB PDF that’s also a Nintendo Entertainment System ROM, and a Zip archive. Pastor Laphroaig Screams High Five To The Heavens As The Whole World Goes Under. Download this, but don’t link – host it yourself. Bitrot will be the end of us all.

[Photonicinduction] is back. The guy best known for not starting an electrical fire in his attic has been working through some stuff recently. He got married, went to India, and he’s going to try to blow a five thousand amp fuse. Good on him.

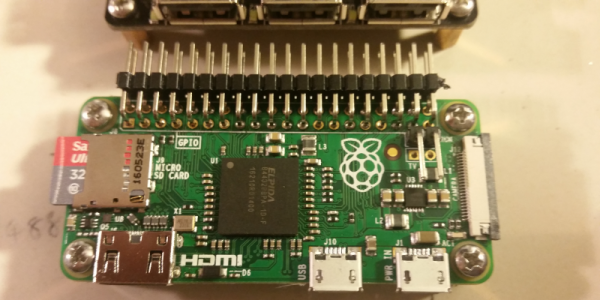
There’s a certain segment of the Internet that believes the Raspberry Pi Zero doesn’t exist. The logic goes something like this: because I can’t buy a Ferrari right now, Ferraris don’t exist. Now there’s a new and improved website that checks if the Pi Zero and Pi Zero W are in stock: thepilocator.com. It checks a dozen or so online stores for the Pi Zero and Pi Zero W. Guess what? They’re mostly in stock.

[bxcounter] built a PC case and holy crap this thing is incredible. This case is made out of Paulownia wood, and is made up out of fifty pieces held together with magnets. This thing is hand-carved and looks fantastic. Inside is a Mini-ITX motherboard, an i3, a Gigabyte ITX-sized 1060, and an SSD. It’s no powerhouse, but then again it’s not overkill, either. This is a fantastic addition to any battlestation.

As most hackerspaces do, the Omaha Maker Group had a storage problem. Previously, members used plastic totes someone picked up as surplus, but these totes were in short supply. Banker’s Boxes are a better idea, but how to store them? A box case. This ‘bookcase for boxes’ holds 21 standard Banker’s Boxes and only uses two full sheets of MDF in its construction.

The Best Pi Emulation Console You Can Build

By far the most popular use for a Raspberry Pi is an emulation console. For an educational device, that’s fine – someone needs to teach kids how to plug a USB cable into a device and follow RetroPi tutorials on the Internet. These emulation consoles usually have one significant drawback: they’re ugly, with wires spilling everywhere. Instead of downloading a 3D printed Pi enclosure shaped like a Super Nintendo, [depthperfection] designed his own. It looks great, and doesn’t have a donglepocalypse hanging out the back.

The biggest factor in building an enclosure for a Pi Zero is how to add a few USB ports. There’s only one USB port on the Pi Zero, although if you’re exceptionally skilled, you can solder a hub onto the test points on the bottom of the board. This stackable USB hub solves the problem with the help of pogo pins for the power and USB pair. It’s only $17 USD, too.

With the USB and power sorted, [depthperfection] set out to design an enclosure. This was modeled in Fusion360, with proper vent holes, screw bosses, and cutouts for all the ports. It’s designed to be 3D printable, and with a little ABS smoothing, this enclosure looks great.

For software, [depthperfection] turned to Recallbox, a retrogaming platform that also doubles as a media player. It’s simpler than a RetroPi installation, but for playing Super Mario 3, you don’t really need many configuration options. This is a great project that just works and looks good doing it. The world — and the Raspberry Pi community — needs more projects like this, and we’re glad [depthperfection] sent this one in.

PolaPi-Zero For Surprisingly Good Instant Photos

The ‘Pola’ in the PolaPi is a giveaway for what this Hackaday.io project is. This polaroid-like camera, created by [Muth], is a sort of black and white, blast from the past mixed with modern 3D printing. It is based on a Raspberry-pi Zero with a camera module, a Sharp memory LCD for viewing the image, and a Nano thermal printer to print the actual photo. Throw in some buttons, a battery and a slick 3D printed case and you have your own PolaPi.

polapi-front
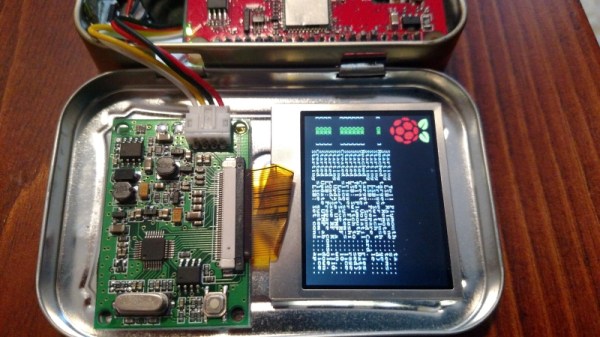
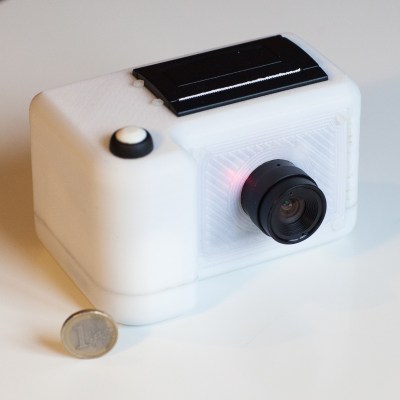
Right now it’s already on the second iteration as [Muth]s gave the first prototype to some lucky person. As he had to rebuild the whole camera from scratch, he took advantage of what he learned in the first prototype and improved on it. The camera has a ‘live’ 20fps rate on the LCD and you can take your photo, review it, and if you like the shot, print it. The printed photo is surprisingly good, check it out in the video after the break.

Currently the software is being actively developed and the latest version has, among other things, a slit-scan mode. For those who don’t know, slit-scan photography is a technique that can create some crazy warped and psychedelic effects (in this case, as psychedelic as a black and white photo can be).

We know you want one for yourself. If you don’t want to spend the time installing and configuring your RPi Zero, [Muth] kindly shared an SD card image with everything ready.

Continue reading “PolaPi-Zero For Surprisingly Good Instant Photos”

PiMiniMint — Altoids RPi Zero Computer

We’ve seen our fair share of Altoids mint tin projects and it seems the tin… can always house another interesting project. This time [MWAGNER] managed to make his long time idea of having a computer inside an Altoids tin. He had the idea in 2012, after the original raspberry pi came out, but the size constraints kept the project from going forward. The RPi Zero is much smaller and its launch made the project possible.

[MWAGNER] made two versions, the first version of the PiMiniMint includes a screen, WiFi, Bluetooth, 32GB of storage, an infrared camera, and a full size USB port. All of this fit inside the Altoids tin. The second version has a battery — 2000mAh reportedly lasting for 6-8hrs. But there is only so much space to perform small miracles so in this version the camera had to go. This makes it a wireless standalone computer as you can control it with Bluetooth keyboard and mouse while connecting to the outside world over WiFi.

Back in 2015, in Hacklet 29, we covered a bunch of Altoids based projects, from AM/FM transmitters to OTP generators and now we have a fully working laptop PC on a tin, screen and all. The project blog has all the instructions you need to try it yourself. If you do, let us know how it went and how long did that battery lasted.

That is, if you can get your hands on a Zero…


[thanks Itay]

Adding IceZero To The Raspberry Pi

[Kevinhub] noticed there were quite a few FPGA hats for the Raspberry Pi. Instead going out and buying one of these boards like a filthy commoner, he decided to spin up his own FPGA Pi accessory. This IceZero FPGA board combines the best features from other FPiGA boards, and does it in a form factor that fits right on top of the minuscule Pi Zero.

If you think slapping a Lattice FPGA onto a Pi has been done before, you’re right. Here’s a hat for the Pi using an iCE5LP4K-SG48, an FPGA with 3520 LUTs. The CAT Board from Xess has a slightly bigger FPGA with 7680 logic cells, and the FleaOhm has a monster FPGA on board that costs about $70 USD.

[Kevin]’s IceZero is at the lower end of these Raspberry Pi FPGA hats, using a Lattice ICE40HX4K. That’s only 3520 logic cells, but it only costs about $7 USD in quantity one. The board design is a standard two layer board that shouldn’t be too terrible for hand soldering. The boards are shared on OSH Park, should you want to test this little guy out.

This Pi Hat is specifically designed to be used with Project IceStorm, the Open toolchain for Lattice’s iCE40 FPGAs. That means there’s already a few projects out in the wild that can be easily ported to this platform, and already [Kevin] has a logic SUMP example going on his board.

Pikelet – A Pi-Zero PC

There are many uses for an old 10 Mbps Ethernet hub besides using it as a speed-bump in your network. (No fun in that!) [thinkerzone] decided to gut an old EN104 Bay Networks ‘Netgear Hub’ to re-purpose the solid steel case as a Raspberry Pi Zero PC housing. The project, which [thinkerzone] called Pikelet, aims to be an ‘IoT server’ with the feel of a PC. Note: a PC, not a Gameboy. In his hackaday.io project, he describes the minimum set of features for the Pikelet.

  • Power button – PCs need a power button
  • Power and Status LEDS – Blue for power, RGB for the programmable status LED
  • USB ports – using a Zero4U hub to expand the Pi Zero usb ports
  • Ethernet – using a ENC28J60 module was the original idea, but it burned while making the project
  • HDMI access – the case should ensure the HDMI port is accessible
  • Minimum storage – a 32 Gb SD card was found to be “enough to be useful”
  • UART – via a FT232 module
  • WiFi – a WiFi dongle with an external antenna, since the metal case would degrade the signal if it was inside, so a WiFi hat was not an option

On the software side, it runs the latest version of Raspbian with some additional configuration for the UART port and status LED pins.

In the project logs we can follow along as [thinkerzone] battles through the implementation of the project and, well, Murphy’s Law.  One of the things that a descriptive log is useful for is that it serves as a reminder that an apparently simple project can have a lot of setbacks. Sometimes an easy-to-describe project is quite a challenge to implement. And it can be annoying when explaining the challenges to other (non hackers/makers) persons and they go: “That’s just connecting some wires…”

Is the feeling familiar? It’s nice to see someone else going through it too.

A Simple Route To A Plug Top Pi

There are a host of tiny plug-top computers available for the experimenter who requires an all-in-one mains-powered computing platform without the annoyance of a full-sized PC or similar. But among the various models there has always been something missing, a plug-top Raspberry Pi. To address that gap in the market, [N-O-D-E] has created a fusion of Pi and plug using the official Raspberry Pi PSU accessory and a Raspberry Pi Zero, with a UUGear Zero4U USB hub sandwiched between the two.

It’s a pretty straightforward and simple build, the back of the PSU is formed into a flat surface with a bit of Sugru, then the power cable is stripped back to its wires which are then connected to the power pins on the USB hub. The hub is then attached to the Sugru — he doesn’t say how, but we suspect double-sided tape — and the Pi is mounted on top of the hub. Pogo pins make the required connections to the pads on the underside of the computer, so it can be removed and replaced at will.

The result is a useful addition to your Pi arsenal, one that could be used for a host of little stand-alone devices. It could use a cover, however we suspect a 3D printer owner could create themselves one with relative ease. The full description is shown in the video below the break.

Continue reading “A Simple Route To A Plug Top Pi”