Color Changing Clock Gets A Pi Zero Heart

Hackaday reader [Don] dropped by the tip line recently to let us know about the latest version of his color-changing LCD clock project. This is his second version of the hardware which makes some pretty big improvements over the original, including moving from the Pi B to the Pi Zero and an internal simplification of the wiring. He mentions the next revision of the project will focus on Google Home integration, which should be interesting to see.

As a father of two pre-school age children, he was looking for a way to help his kids understand the concept of time and scheduled activities. Colors and shapes come fairly easy to children of this age, but time and how it relates to the day is a bit more difficult for them especially as their comprehension of numbers is still developing. [Don] reasoned that even if they couldn’t read the numbers on the clock yet, if he had the display change colors to indicate different periods of the day (sleep, play, cleanup, etc), it would not only keep them on schedule, but reinforce the meaning of the numbers on the screen.
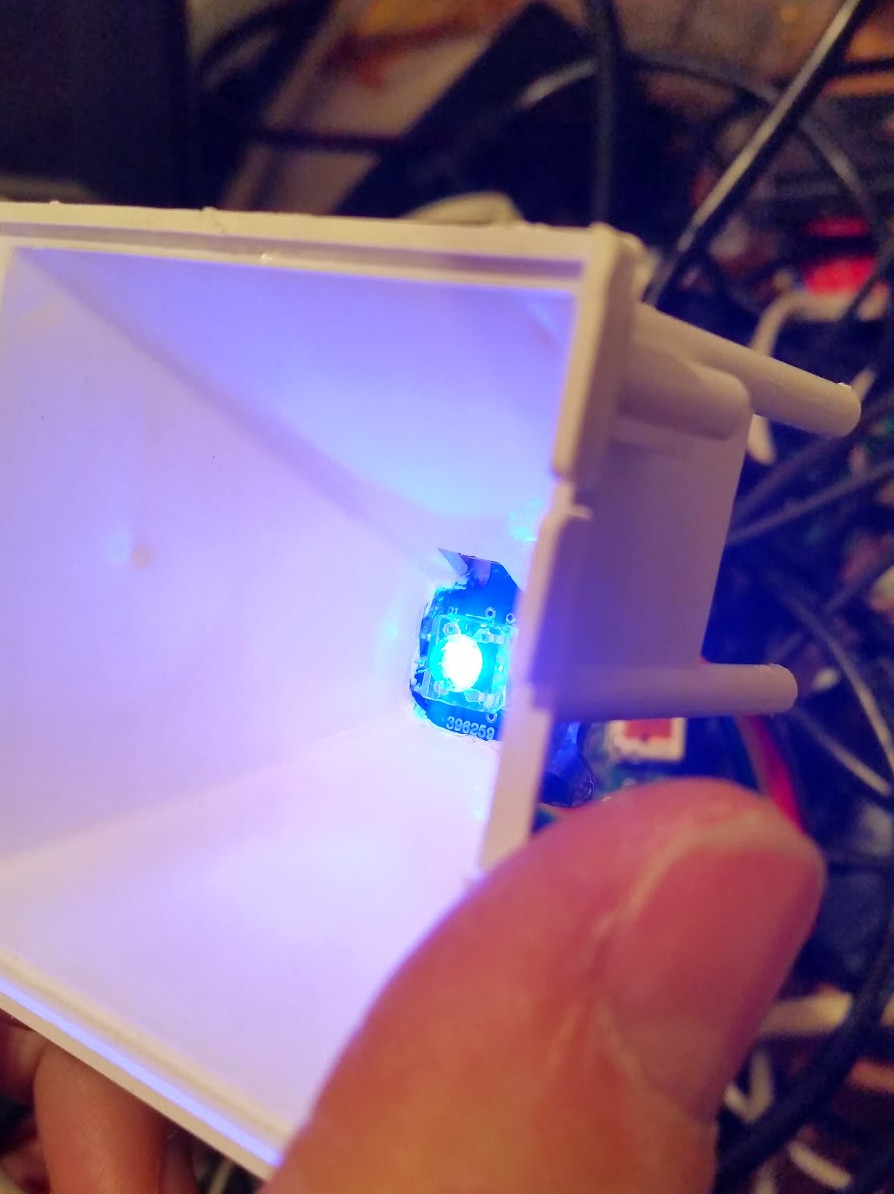
ShiftBrite installed in the projector.

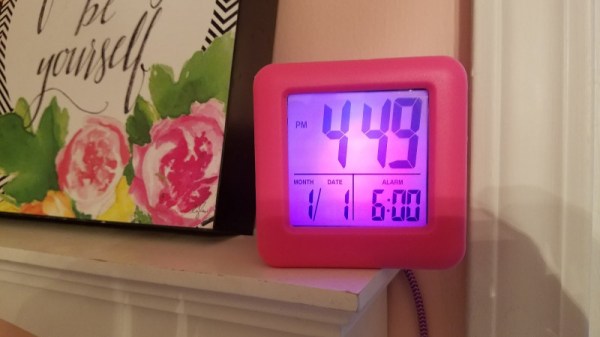
The project was made infinitely easier by a lucky find at a local retailer. For $10 he got a kid-friendly looking clock that utilized a simple projector to backlight the LCD display. This meant [Don] would just need to swap out the stock lighting module for a controllable RGB LED, and the hardware modifications would essentially be complete.

Even the Pi Zero fits perfectly inside the case of the clock, the only modification necessary was cutting a little hole in the back for the Pi’s micro USB port. His earlier version used an external Pi B connected to the clock via CAT5, so getting it all integrated into the one device is a huge improvement, especially when little kids are involved. Moving the Pi and its 5 V pins into the clock itself also allowed [Don] to drop the voltage regulator required previously.

With the basic hardware for a color changing LCD clock together, the rest of the project was just a matter of software. After some research, [Don] came across RPi-ShiftBrite by [Hive13] and made his own fork which added some features necessary for his project, namely the ability to quickly set the ShiftBrite to a specific color on the command line. To schedule the color changes, he used the very slick minicron: a web-based tool to create and monitor Linux cron jobs.

The Pi itself does not actually interface with the clock, and with no onboard RTC it’s necessary to keep it updated with NTP or else the times will become desynchronized. It can be necessary to sync the Pi’s clock to the Internet as often as every hour to make sure the colors shift at the appropriate times. The addition of a RTC module like the DS1307 could alleviate this issue and might be something to consider for a future revision.

All told, a fantastic project and something we’ll be sure to keep our eyes on as it progresses. We’ve seen our share of unique Raspberry Pi powered clocks, and even a few color changing ones, but this approach is easily the most straight-forward we’ve seen.

Continue reading “Color Changing Clock Gets A Pi Zero Heart”

Evil Hotspot Costume Makes Valuable Connections

This year for Hallowe’en, [Scott] went out dressed as a Comcast xfinity hotspot. Funny, yes, but there’s a deeper meaning here. [Scott] really went as a walking PSA that illustrates the dangers of making assumptions about the relative safety of WiFi networks based solely on their broadcast names.

[Scott] could have gone chaotic evil with this setup, but he didn’t. No one could actually get on the Internet through him. Inside the “hotspot” are a Wi-Fi adapter and a Pi Zero running a captive portal. It broadcasts the default ‘XFINITY’ and ‘xfinitywifi’ SSIDs, plus a bunch of other common network names. Whenever anyone tries to connect, or worse, their phone automatically connects, they’ll hear a sad tuba cadence. This comes courtesy of a multi-sound effects box that’s controlled by the Pi through a relay board.

Meanwhile, the mark’s device is redirected to an internally-hosted “xfinity” login page. Anyone who actually goes on to enter their login credentials is treated to a classic horror film scream sample while the evil hotspot quietly stores their name and password and displays them on an e-ink display for all to see — a walking e-ink wall of sheep. Check out the demo after the break.

[Scott]’s evil hotspot is powered by a huge battery that can run it for 24 hours. Here’s a wind- and solar-powered WAP we covered several years ago.

Continue reading “Evil Hotspot Costume Makes Valuable Connections”

Simultaneous AP & Client On The Pi Zero W

The Raspberry Pi Zero W is a great platform for IoT projects, with a smattering of GPIO and onboard WiFi. However, security is an important consideration when it comes to the Internet of Things and it can be beneficial to keep your IoT devices on a separate network for safety’s sake. [Albert] wanted to do this all on board the Pi Zero W, and figured out how to get it acting as an access point and a client all at the same time.

[Albert] starts off with a fresh install of Raspbian Stretch, and sets the Pi up in OTG mode. This allows access to the Pi over a USB serial terminal. This is great for productivity when working on headless networking projects, as it can be frustrating trying to work with an SSH session that keeps dropping out when you change settings.

After creating a second named device (ap0) to go along with the one created automatically by the kernal (wlan0), DNSmasq is installed to act as a DHCP server for the AP. Hostapd is then installed to control the AP settings. Following this, like anything in Linux, a flurry of configuration files are edited to get everything humming along and starting up automatically after a reboot. For some reason, things don’t start up smoothly, so [Albert] has a cron job that fires 30 seconds after bootup and toggles the interfaces off and on again, and that’s done the trick.

It’s a useful hack, as it allows the Pi Zero to act as a hub for IoT devices, while also creating a bridge between them and the internet. Traffic can be managed to stop random internet users flicking your lights on and off and overspeeding your dishwasher.

We’ve seen the Pi Zero used for just about everything under the sun so far. If you’re just starting your own IoT build, perhaps you’d like to use the Pi Zero as a streaming camera?


Hackaday Prize Entry: Visioneer Sensor HUD

Only about two percent of the blind or visually impaired work with guide animals and assistive canes have their own limitations. There are wearable devices out there that take sensor data and turn the world into something a visually impaired person can understand, but these are expensive. The Visioneer is a wearable device that was intended as a sensor package for the benefit of visually impaired persons. The key feature: it’s really inexpensive.

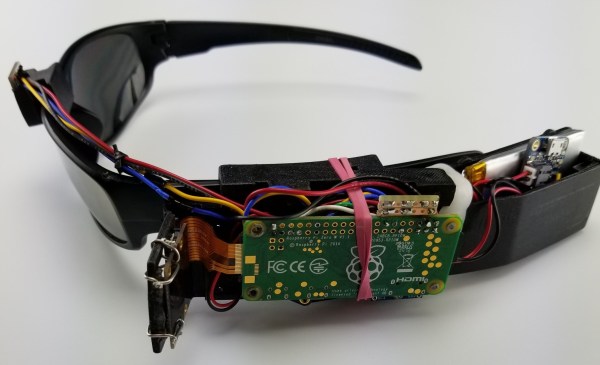
The Visioneer consists of a pair of sunglasses, two cameras, sensors, a Pi Zero, and bone conduction transducers for audio and vibration feedback. The Pi listens to a 3-axis accelerometer and gyroscope, a laser proximity sensor for obstacle detection within 6.5ft, and a pair of NOIR cameras. This data is processed by neural nets and OpenCV, giving the wearer motion detection and object recognition. A 2200mA battery powers it all.

When the accelerometer determines that the person is walking, the software switches into obstacle avoidance mode. However, if the wearer is standing still, the Visioneer assumes you’re looking to interact with nearby objects, leveraging object recognition software and haptic/audio cues to relay the information. It’s a great device, and unlike most commercial versions of ‘glasses-based object detection’ devices, the BOM cost on this project is only about $100. Even if you double or triple that (as you should), that’s still almost an order of magnitude of cost reduction.

Pedal-Pi, Simple Programmable Guitar Pedal

For several years, [Ray] and [Anna], the team behind ElectroSmash, have been smashing audio electronics and churning out some sweet DIY audio gear. This time around, they’ve built Pedal-Pi — a simple programmable guitar pedal based around the Raspberry-Pi Zero. It is aimed at hackers, programmers and musicians who want to experiment with sounds and learn about digital audio. A lot of effort has gone in to documenting the whole project. Circuit analysis, a detailed BoM, programming, assembly and background information on related topics are all covered on their Forum.

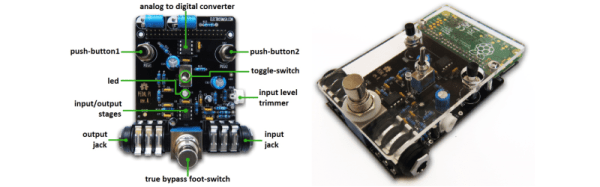
The hardware is split in to three parts. On the input, a MCP6002 rail-to-rail op-amp amplifies and filters the analog waveform and then a MCP3202 ADC digitizes it to a 12-bit signal. The Pi-Zero then does all of the DSP, creating effects such as distortion, fuzz, delay, echo and tremolo among others. The Pi-Zero generates a dual PWM signal, which is combined and filtered before being presented at the output. The design is all through hole and the handy assembly guide can be useful for novices during assembly.  The code examples include a large number of pedal effects, and if you are familiar with C, then there’s enough information available to help you write your own effects.

Even if you don’t plan on building one, technical background such as the Basics of Audio DSP in C for Raspberry Pi Zero, Using MCP3202 ADC with Raspberry Pi Zero and PWM Audio on Raspberry Pi Zero ought to make for interesting reading. Check out the video after the break detailing the build.

If you’d like to check out some of their earlier work, check out 1WAMP, an Open Hardware Guitar Amplifier and pedalSHIELD, an opensource Arduino Guitar Pedal.

Continue reading “Pedal-Pi, Simple Programmable Guitar Pedal”

Stunning Fake Polaroid Camera Performs Magic

It’s high time us Muggles got our hands on the hardware used to take Magical Photographs as seen in The Daily Prophet. The first pioneering step in that direction has been taken by [Abhishek] who built this moving picture taking polaroid-ish camera, which he’s calling the “Instagif NextStep”. It’s a camera that records a short, three second video, converts it to GIF and ejects a little cartridge which displays the animated photo.

This amazing piece of hardware has been painstakingly built, and the finished product looks great. The nice thing about building such projects, in [Abhishek]’s own words, is that “it involves a bunch of different skill sets and disciplines – hardware, software, 3D modeling, 3D printing, circuit design, mechanical/electrical engineering, design, fabrication etc that need to be integrated for it to work seamlessly.”
Continue reading “Stunning Fake Polaroid Camera Performs Magic”

Add A Second SD Card To The Pi Zero

The Raspberry Pi Zero is a beautiful piece of hardware, fitting an entire Linux computer into a package the size of a pack of gum (don’t chew it, though). However, this size comes with limited IO options, which can be a complication for some projects. In this case, [Hugatry] wanted extra storage, and devised a smart method to add a second SD card to the Pi Zero.

The problem with the Pi Zero is that with only a single USB port, it’s difficult to add any other storage to the device without making things bulkier with hubs or other work arounds. Additionally, the main SD card can’t be removed while the Pi is running, so it makes sense to add an easy-to-use removable storage option to the Pi Zero.

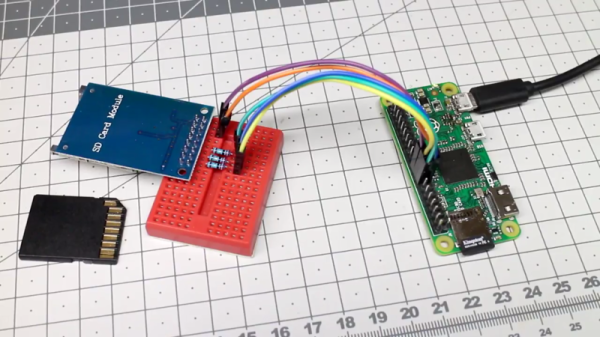
It’s quite a simple hack – all that’s required to pull it off is a few resistors, an SD card connector, and some jumper wires. With everything hooked up, a small configuration change enables the operating system to recognise the new card.

Overall it’s great to see hacks that add further functionality to an already great platform. If you find it’s not powerful enough, you can always try overclocking one. 

Continue reading “Add A Second SD Card To The Pi Zero”