Thumbnail that say The Hacklet

Hacklet #4 — PCB Tools And Wristwatches

4

The Hackaday Prize is heating up! When we set up the prize, we expected to see some incredible entries, and you guys haven’t let us down. Projects like SatNOGS, which aims to create a global network of satellite ground stations, or OpenMV, a low-cost Python powered vision module, are seriously blowing us away.

We’re starting to give away some prizes through community voting and there’s still plenty of time for you to enter. Check out The Hackaday Prize page for the full details.

Low Cost Printed Circuit Board Tools

Pick and Place

We’ve seen mills, lathes, CNC machines and 3D printers, but if there is any device that gets a hardware hacker’s attention, it’s a pick and place machine. In the PCB industry these machines pick up thousands of parts every hour, perfectly placing them on printed circuit boards. The downside is they’re incredibly expensive. The cheapest Chinese machines without vision start in the $4000 USD price range.

[Neil] aims to break down those price barriers with a $300 Pick and Place Machine that doubles as a 3D printer. He’s using delta 3D printer hardware to do it, and he’s throwing in everything! OpenCV based vision, multiple tool heads, reel and tray pick up, [Neil] has covered all the major points. He can’t do it alone though, so he’s looking for help. Check it out, and give him a hand (or a skull)!
pcbMill

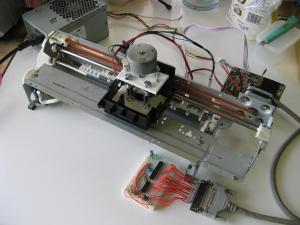
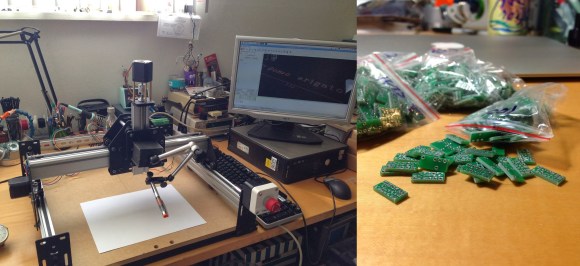
A low-cost pick and place machine will need printed circuit boards to work on. Not to worry, [shlonkin] has you covered with his PCB mill for under $10. Built from recycled printers, an Arduino, and host software written in processing, [shlonkin] has already posted impressive photos of boards his machine has milled. The main problem [shlonkin] has run into is longevity with plastic parts. In his most recent update, he’s looking for ideas. Can you help him?

Digital Watches

Anyone will tell you that digital watches are a pretty neat idea. With the era of smartwatches upon us, more than one hacker has delved into building their own timepiece. We’re happy to report that most of them even tell time.
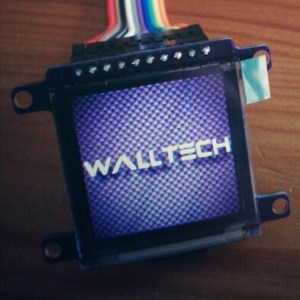
walltech[Walltech] has gone all out to create the ultimate watch. His OLED Smart Watch 6.0 is the culmination of years of work. The watch features a 1.5” OLED display, an SD card slot, and a vibrator motor. It has Bluetooth 4.0 to connect to the world, and an Atmel ATmega32u4 as its brain. A 500mAh battery will power the watch for 18-24 hours per charge.

[Walltech] plans to make it do everything from SMS and email notifications to music streaming. Don’t see a feature you want? Add it! Smart Watch 6.0 Is completely open source, so you can hop into the code and hack away!
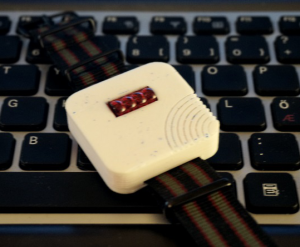
tilttouchtime2On the other side of the spectrum is [askoog89’s] Tilt Touch Time, which utilizes  those awesome bubble LED displays some of us remember from the 70’s. The retro look is only 3D printed skin deep though, as [askoog89] is using an ATtiny2313 processor. Atmel’s Qtouch is providing the capacitive touch sensing, while a tilt sensor helps Tilt Touch Time live up to its name. [Askoog89] has submitted his watch to The Hackaday Prize, so he’s trying to figure out a way to use the touch sensor to sync time with a PC. If that doesn’t work out, we bet those bubble LEDs would make great light sensors for some monitor-blink-sync action.

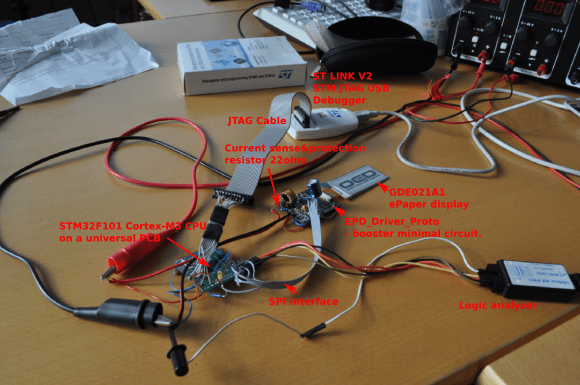
Fallout fans have seen plenty of PIP boys here on Hackaday, but have you seen [jara’s] PIP Watch? This Personal Information Panel is going big on size but low on power with a 3 inch e-ink display. [Jara] is using an STM32F101 ARM Cortex-M3 CPU, so he’s got plenty of processing power at his disposal. He’s connecting to the world through a Bluetooth serial link. All he needs is a Geiger counter, and he’s good to go!
pipWatch

That’s it for this week’s Hacklet, stay tuned for next week when we bring you more of what’s happening at Hackaday.io!

3D Printed Trays For Your Pick And Place Machine

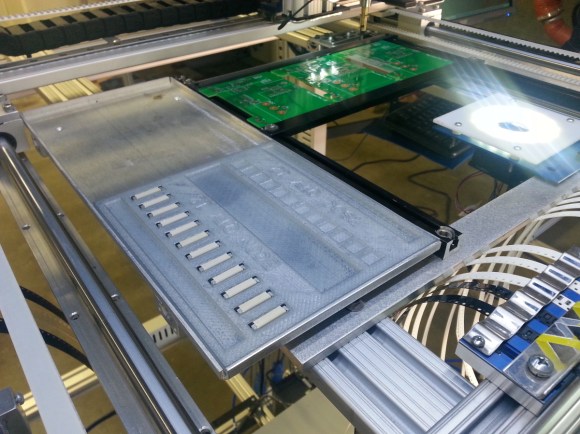
3dprintedPNPTray Pick and Place machines are one of the double-edged swords of electronics.They build your boards fast, but if you don’t have everything setup perfectly, they’ll quickly make a mess. A pick and place can’t grab a resistor from a pile and place it – so far only humans can pull that one off. They need parts organized and oriented in reels or trays.
[Parker Dillmann] had to load some parts, but didn’t have a tray for them, so he 3D printed his own. [Parker] works at a small assembly house in Texas. He’s working on a top secret design which includes FFC connectors. Unfortunately, the connectors shipped in pick and place unfriendly tubes rather than reels. If he couldn’t find a tray, [Parker] would have to hand place those connectors as a second operation, which would increase the time to build each board and leave more chances for mistakes.

Rather than place each part by hand, [Parker] got in touch with his friend [Chris Kraft] who is something of a 3D printing guru. [Chris] confirmed that a 3D printed tray would be possible, though the PLA he prints with was not static safe. That was fine for the connectors, but [Parker] was hoping to save some tray space by putting his PSOC4 chips in the printed tray as well.

[Parker] used SketchUp to design a tray that would fit his Madell DP2006-2 pick and place. He left .15mm clearance around the parts – just enough to cover any inaccuracies during printing, but not enough to throw off parts placement. He sent the STL file over to [Chris] who used Simplify3D to a create a Gcode file. [Chris] printed the tray at .2 mm layer height on his MakerGear M2 printer, and the results looked great. Would they be good enough for the pick and place machine?

[Parker] received the printed trays in the mail and loaded them with parts. The pick and place had no problem finding and placing the connectors, making this job a huge success. [Parker] even left room for the PSOC4 chips.He plans to paint the tray with anti-static paint before giving them at try.

We really like this story – it’s a perfect example of how 3D printers can speed up processes in manufacturing. Now that the basic design is done, creating new trays is a snap. Nice work [Parker] and [Chris]! Continue reading “3D Printed Trays For Your Pick And Place Machine”

THP Entry: A $300 Pick & Place 3D Printer

pnp

With the advent of cheap PCB fabrication, (relatively) easy to use layout tools, and a whole host of prototypes for nearly any device imaginable, the age of custom circuits is upon us. The tools to make these custom circuits, though, are usually hilariously expensive or simply unavailable to all but the most resourceful hackerspace. It would be great if every workshop in the country had a pick and place machine, and the $300 Pick and Place / 3D printer would be a great way to introduce this tech to millions of electronic tinkerers around the world. It also makes for a great entry to The Hackaday Prize.

The basic design of this machine is a delta bot. This is a wonderful choice over a Cartesian bot; deltas are faster and can have higher acceleration, a great thing to have if you want to throw together a few boards quickly. Although the configuration looks a little inverted as compared to other 3D printer delta bots, there’s a reason for this: the design was simulated with evolutionary algorithms and statistical tests to find the best geometry for the machine. The completed machine should be able to place 0201 components; anything smaller would be called dust.

The software hits all the marks, using OpenCV for image processing, ARM boards for motor control and computational tasks, and a good bit of mechanical and pneumatic work to suck up the parts. They’re even working on a 3D printed tape feeders. Now a component often overlooked when looking at the total cost of pick and place equipment is essentially free.

It’s awesome work, and even if they don’t win The Hackaday Prize, it’s still something every hackerspace should have. Now if someone would only crack the through-hole plating problem…


SpaceWrencherThe project featured in this post is an entry in The Hackaday Prize. Build something awesome and win a trip to space or hundreds of other prizes.

Humble Beginnings Of A Pick And Place Machine

beginnings

[Pete’s] invented a product called an AIR Patch Cable designed to interface with an airplane’s intercom, and is looking to manufacture and assemble them himself — unfortunately, the circuit boards are tiny, and SMD components aren’t exactly the easiest to install. So he decided to build a pick and place machine to do it for him!

It’s not finished yet, but [Pete] has reached a major milestone — he’s finished the base CNC machine aspect of it. He opted for a kit build for the major mechanical components, the Shapeoko 2 — its a solid design and if you decided to make something from scratch it’d probably cost much more and take a lot longer.

From there he began selecting his electronics individually. He’s chosen the Big Easy Driver by Sparkfun to control his stepper motors, which supports a maximum size of NEMA 17 steppers, so he bought five of those too. To control it all, he’s using LinuxCNC which is an excellent choice — and if you’re not crazy about Linux, you can actually download Ubuntu 10.04 with LinuxCNC pre-installed for you to make it super easy — you’ll just need an old dedicated PC to use.

Continue reading “Humble Beginnings Of A Pick And Place Machine”

Manual Pick And Place

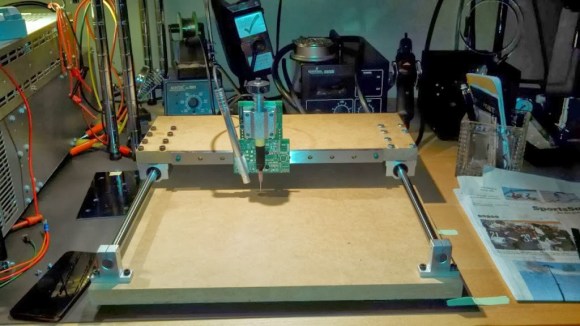
picknplacePopulating a large surface mount PCB can take forever. [craftycoder] from Freeside Atlanta has built a great looking manual pick and place machine, removing the need for tweezers. No more will passives stick to your tweezers while you are trying to place them on your PCB!
We have seen a lot of pick and place machines in the past few years. What makes this one stand out is its simplicity and the no-nonsense build. This pick and place is built on an MDF platform, uses bearings from Amazon, standard 12 mm rails, and has a small camera for a close-up look at your part placement. Sure it is a manual method, but it beats painstakingly placing each part with tweezers. It would be interesting to see how much this entire build cost; we expect that it was not too expensive. See this thing in action in the video after the break.

We hope this project has inspired you to go out and make something cool! If so, let us know what you have made!
Continue reading “Manual Pick And Place”

Update: Semi-automatic Pick And Place Goes Fully-Automatic

automated-pick-and-place

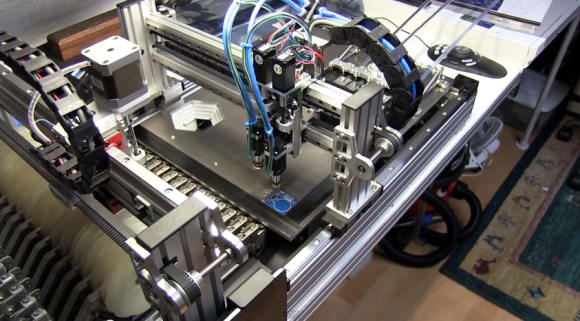
Way back in April we looked at an impressive Pick and Place machine project which wasn’t actually up and running yet. Well it looks like [Brian Dorey] has really put the pedal to the metal with this fall, posting nine project updates since September.

The previous system was working just fine but required quite a bit of user intervention to do the actual placing. So the first modifications toward the new goal centered around motorizing the gantry. There’s a lot of information on this, as well as the vacuum tweezer heads that were designed for the system. But for us it was exciting to read about the vibrating chip feeder. This uses the vibrating motor from an Xbox controller to jiggle the ICs from their tube packaging to a staging jig off the side of the build table. You can see a video of this after the break along with a demo of the entire machine at work.

[Brian] seems to favor the Xbox parts as he also used an Xbox live camera along with OpenCV to detect the parts and ensure they are lined up correctly. For the best results possible the parts need to be illuminated properly which is why he also built a rather interesting light ring using 144 red LEDs.

Continue reading “Update: Semi-automatic Pick And Place Goes Fully-Automatic”

DIY Pick And Place Just Getting Under Way

diy-pick-and-place

It’s not totally fair to say that this project is just getting under way. But the truth is it neither picks nor places so there’s a long road still to travel. But we’re impressed with the demonstrations of what [Daniel Amesberger] has achieved thus far. Using the simplest of CNC mills he’s finished the frame and gantry for the device. You can see some of the parts on the left after going though an anodizing process that leaves them with that slick black finish.

The demo video shows off the device by driving it with a joystick. It’s fast, which gives us hope that this will rival some of the low-end commercial pick and place machines. He’s already been working on the software, which runs on a mini ITX form factor computer. This includes a gerber file interpreter and some computer vision for a visual check on part placement. He hasn’t gotten around to building the parts feeders but we’ll keep you updated as we hear back from him.

Continue reading “DIY Pick And Place Just Getting Under Way”